
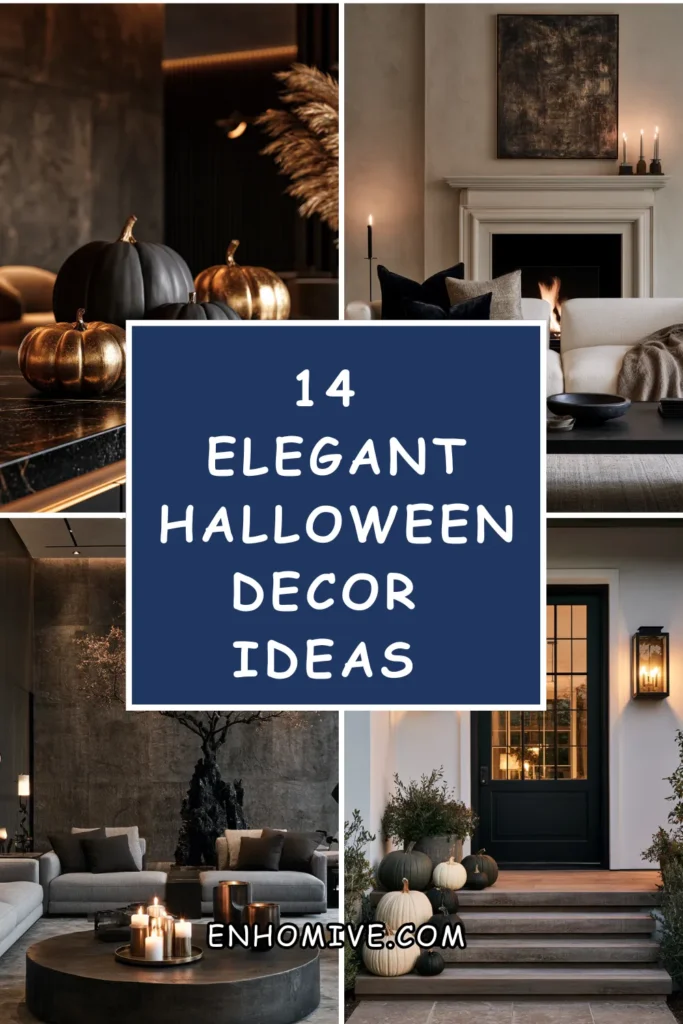
14 Elegant Halloween Decor Ideas for a Grown-Up Aesthetic
My Halloween decor used to come entirely from the seasonal aisle: orange plastic pumpkins, purple string lights, a rubber skeleton that looked exactly like every other rubber skeleton on the block.
I kept assuming Halloween decorating only came in one register, bright, plastic, a little juvenile, and that anything more refined belonged to a completely different holiday’s aesthetic. Then I started noticing the Halloween displays that actually stopped me on a walk weren’t loud at all. They were dark, textured, and genuinely beautiful, more moody dinner party than trick-or-treat candy aisle.
I started small. Swapping the string lights for real taper candles. Leaving a pumpkin its natural white instead of painting a face on it. A single dried floral arrangement in black and cream instead of a plastic skeleton hand reaching out of a planter.
Within one October, that same house went from looking like it raided the dollar store to looking like it belonged in a design magazine’s autumn issue.
Here are 14 ideas that bring a genuinely elegant, grown-up sensibility to Halloween decorating, without losing any of the season’s actual mood.
Why Most Halloween Decor Never Reads as Elegant
The common mistakes:
The primary-color plastic approach:
- Bright orange, purple, and green as the default color palette
- Shiny plastic materials that read as juvenile regardless of the actual imagery used
- A display built entirely from mass-produced seasonal aisle items
- Halloween treated as inherently silly rather than genuinely atmospheric
The prop-overload habit:
- Dozens of small individual items scattered without any cohesive design thread
- Every available surface covered in some small skeleton, spider, or plastic pumpkin
- A display that reads as cluttered rather than curated, no matter how much was spent
- Quantity substituted for genuine visual intention
The single-season, throwaway mindset:
- Cheap, disposable decor purchased fresh every year and discarded afterward
- No investment in pieces genuinely worth keeping and reusing
- A display that never develops the kind of considered, collected quality more elegant decorating relies on
- Halloween treated as separate from, rather than an extension of, a home’s actual year-round design sensibility
What a successful elegant Halloween display does:
Builds mood through material and restraint, not volume:
- A muted, sophisticated color palette used consistently throughout
- Real materials (wood, wax, dried botanicals, brass) over plastic and shiny synthetic finishes
- A few genuinely well-chosen pieces rather than many small scattered ones
- Halloween decor that could believably live in the home the other eleven months of the year, just with a darker mood
My revelation: Halloween decor becomes elegant the moment it stops trying to look like a costume party and starts looking like the rest of a well-designed home, just turned a few shades darker.
1. A Strict Black, White, and Cream Color Palette
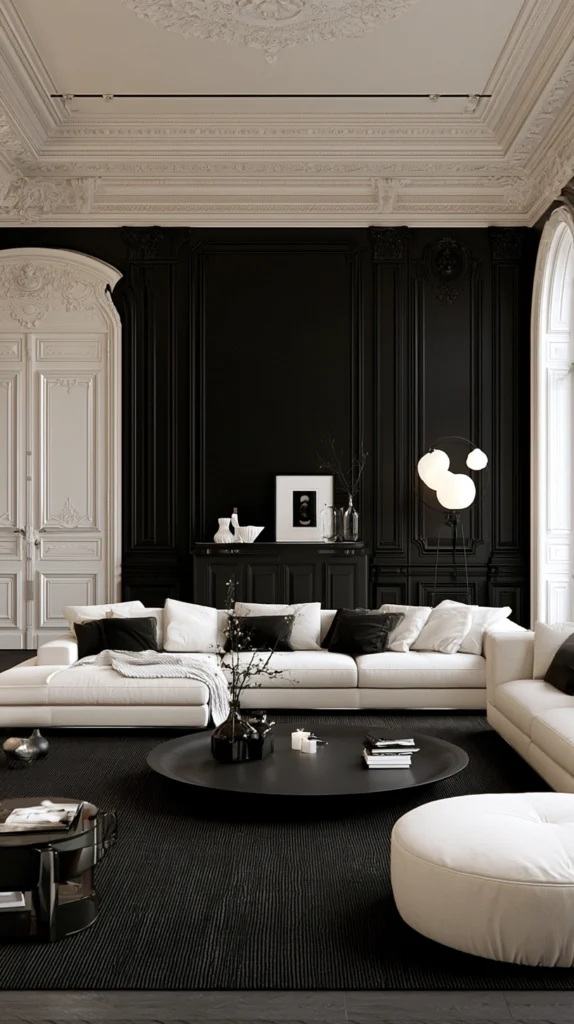
Committing the entire display to black, white, and cream tones, eliminating the bright orange and purple typically associated with mass-market Halloween decor.
My display full of clashing bright colors:
What I had:
- Orange pumpkins, purple string lights, and green plastic monster decor, none of it coordinated in any way
- A visually loud, scattered collection that read as generic rather than intentional
- No unifying thread tying any of the individual pieces together
The monochrome palette discovery:
Why restricting the palette changes everything:
- A limited, muted palette instantly reads as more sophisticated than a full-color seasonal display
- Black, white, and cream work with almost any existing home decor, rather than clashing with it for one month a year
- Removes the visual noise of competing bright colors, letting texture and shape carry the design instead
- The same principle used in high-end seasonal retail displays and editorial styling, applied to a home
Applying the palette:
Practical execution:
- Choose pumpkins in white, cream, or a deep charcoal rather than traditional orange
- Select any fabric, ribbon, or textile accents strictly within this same three-tone range
- Replace colored string lights with warm white or simple flame-toned candles
- Allow black to serve as the primary accent and grounding tone throughout
Cost:
- This is primarily a selection and editing principle rather than an added cost, though white and cream pumpkins can run $2-5 more per pumpkin than traditional orange ones at a farm stand or grocery store
My monochrome shift: Simply committing to buying only white, cream, and near-black pumpkins that October, rather than the traditional orange, transformed the entire entryway display without changing a single other element, and neighbors specifically commented on how “different” it looked without being able to immediately articulate why.
Monochrome Palette Tips
Look specifically for naturally white or pale pumpkin varieties rather than painting orange ones:
Sourcing consideration:
- Painted pumpkins can look artificial up close, while naturally pale varieties (like “Casper” or “Lumina” pumpkins) have a genuinely elegant, matte finish
- Many farm stands and grocery stores now carry these varieties specifically given their growing popularity
- This distinction is worth the extra sourcing effort for a noticeably more convincing result
- Ask specifically for white or heirloom pumpkin varieties if they’re not immediately visible in the display
Allow small amounts of a single accent metal, like brass or pewter, within the palette:
Adding warmth without breaking the scheme:
- A strictly black, white, and cream palette can occasionally feel a bit cold or flat without any warmth
- Introducing brass or pewter accents, in candle holders or small trays, adds richness without violating the color restriction
- This single additional material category is enough to elevate the palette without diluting its impact
- Keep this accent consistent throughout rather than mixing multiple different metal tones
2. Real, Unpainted Pumpkins Displayed Sculpturally
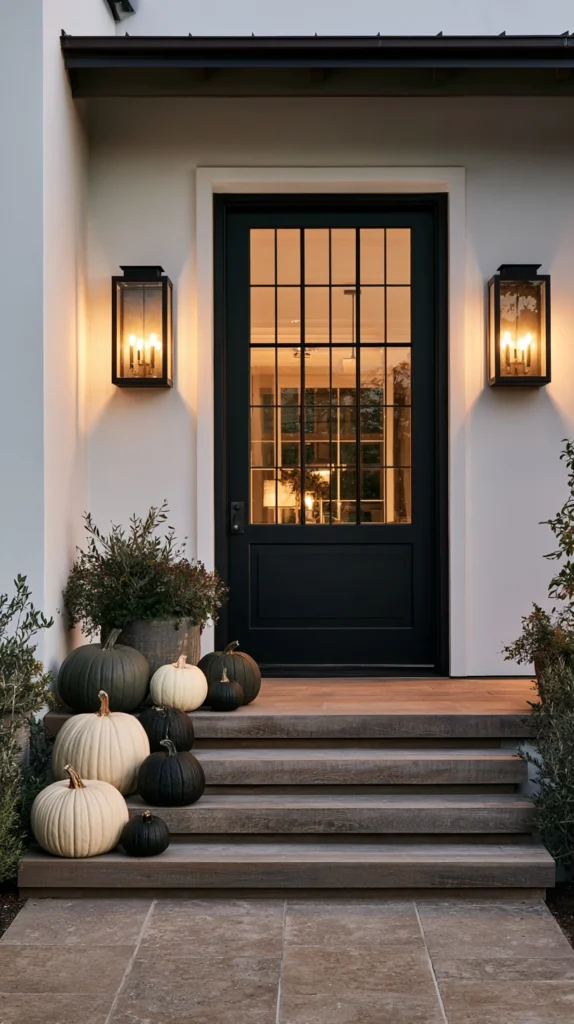
Grouping natural, unpainted pumpkins and gourds by size and shape, treating them as a sculptural display rather than a canvas for cartoon faces.
My collection of poorly carved jack-o-lanterns:
What I had:
- A row of pumpkins each carved with a slightly uneven jack-o-lantern face, none of them looking quite as good as intended
- A yearly ritual that always felt more effortful than the actual result justified
- A missed opportunity to let the pumpkins’ natural shape and texture actually be appreciated
The sculptural pumpkin solution:
Why leaving pumpkins uncarved and grouped is often more striking:
- A pumpkin’s natural ridged texture and organic shape is genuinely beautiful on its own, without any carving needed
- Grouping by size, from large anchor pumpkins down to small decorative gourds, creates a display with real visual rhythm
- Removes the pressure and mess of carving while still delivering a strong seasonal statement
- A technique borrowed directly from high-end floral and event design, where gourds are used as sculptural elements
Building the display:
Styling approach:
- Choose 3-5 pumpkins in graduated sizes, plus a scattering of smaller decorative gourds
- Mix in a few varieties with interesting texture, like warty or deeply ribbed pumpkins, for visual variety
- Arrange on a mantel, entry table, or stacked on the front steps rather than lined up in a single row
- Leave the natural stems intact, since they add to the organic, sculptural quality
Cost:
- Pumpkins and gourds at a farm stand or grocery store: $3-15 each depending on size and variety
My sculptural pumpkin display: Grouping seven unpainted, uncarved pumpkins and gourds of varying sizes and textures on the front steps, rather than carving a single row of jack-o-lanterns, created a display that felt both more sophisticated and, honestly, far less stressful to put together each year.
Sculptural Pumpkin Tips
Choose pumpkins with genuine texture and character over perfectly smooth, uniform ones:
Selection for visual interest:
- Warty, deeply ribbed, or irregularly shaped pumpkins photograph and display far more interestingly than smooth, uniform ones
- Seek out heirloom or specialty varieties specifically for their textural character
- This consideration matters more here than it would for a carved pumpkin, since the natural shape is the whole point
- Farm stands and specialty pumpkin patches typically offer far more variety than a standard grocery store display
Elevate a few pumpkins on small stands or books for added height variation:
Adding dimension:
- A display where every pumpkin sits at the same ground level can look flat despite good pumpkin selection
- Placing a few on small wood risers, books, or overturned bowls adds genuine height variation
- This small styling trick significantly improves how dynamic and considered the overall grouping looks
- Test a few different height arrangements before settling on a final layout
3. Taper Candles and a Candelabra Instead of String Lights
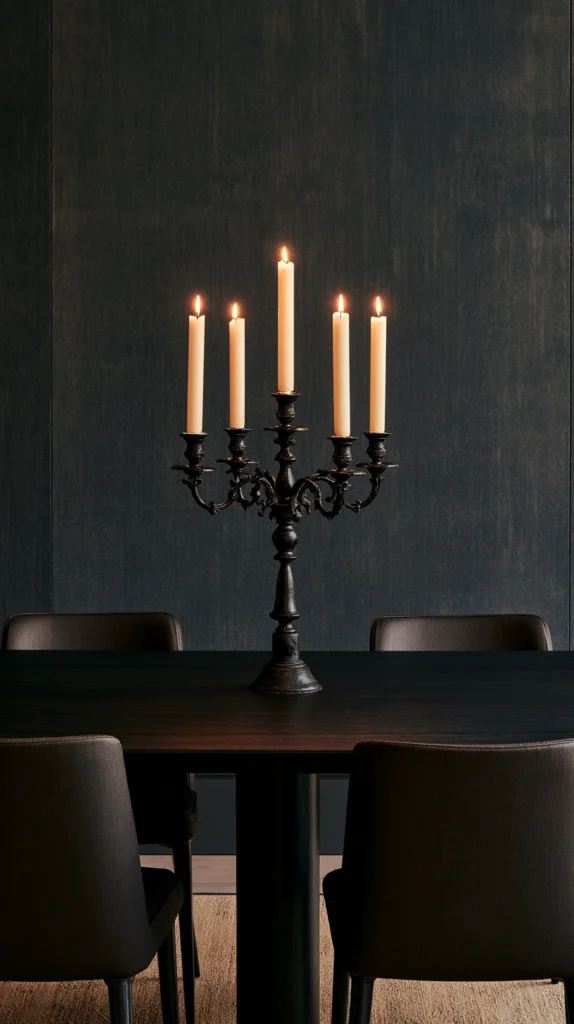
Real or flameless taper candles in a traditional candelabra, replacing string lights as the primary evening lighting element.
My purple string lights that felt more party store than dinner party:
What I had:
- Strands of purple and orange LED string lights, the default lighting choice for most seasonal displays
- A lighting scheme that read as distinctly juvenile compared to the rest of the home’s more considered year-round decor
- A missed opportunity for lighting to actually contribute to an elegant, moody atmosphere
The candelabra solution:
Why candlelight delivers a fundamentally different atmosphere than string lights:
- Warm, flickering candlelight reads as sophisticated and intentional in a way colored string lights simply don’t
- A candelabra or grouped taper candles serve as a genuine design object, not just a light source
- Works as a year-round decorating element that simply gets used more dramatically during the Halloween season
- One of the most effective single swaps for shifting an entire display’s overall mood
Choosing the right setup:
Selecting candles and holders:
- A black or aged brass candelabra, ideally with some genuine age or patina, as the central piece
- Ivory or black taper candles, avoiding brightly colored options that would undercut the palette
- Flameless taper candles as a safer alternative for high-traffic entryways or homes with young children or pets
- Positioned as a genuine table or mantel centerpiece rather than a purely decorative afterthought
Cost:
- A quality candelabra: $30-100, often available secondhand through antique or thrift stores
- Taper candles (real or flameless, per set of 6-12): $15-40
My candelabra lighting: Replacing the string lights entirely with a secondhand brass candelabra and a set of ivory taper candles on the entry table completely shifted the evening mood of the whole display, and it’s a piece that now stays out as elegant home decor well past the actual holiday.
Candelabra Tips
Source a candelabra secondhand for both better character and lower cost:
Sourcing strategy:
- Estate sales, antique shops, and thrift stores frequently carry candelabras with genuine age and patina
- These secondhand pieces often look more authentically elegant than a new, uniformly finished reproduction
- This is also typically a more affordable route than purchasing a new candelabra from a home decor retailer
- Building a small collection gradually, rather than needing to source everything in one trip, is a reasonable approach
Use dripless or dripping candles deliberately based on the exact look you want:
Wax drip aesthetic choice:
- Some candelabra styles intentionally showcase dripping wax as part of their gothic, old-world character
- Dripless candles suit a cleaner, more minimal aesthetic if that’s the specific look being pursued
- Decide on this detail intentionally rather than by accident, since it meaningfully affects the finished look
- If embracing wax drips, place the candelabra somewhere the resulting wax won’t damage a valued surface underneath
4. Dried Botanicals and Pampas Grass Arrangements
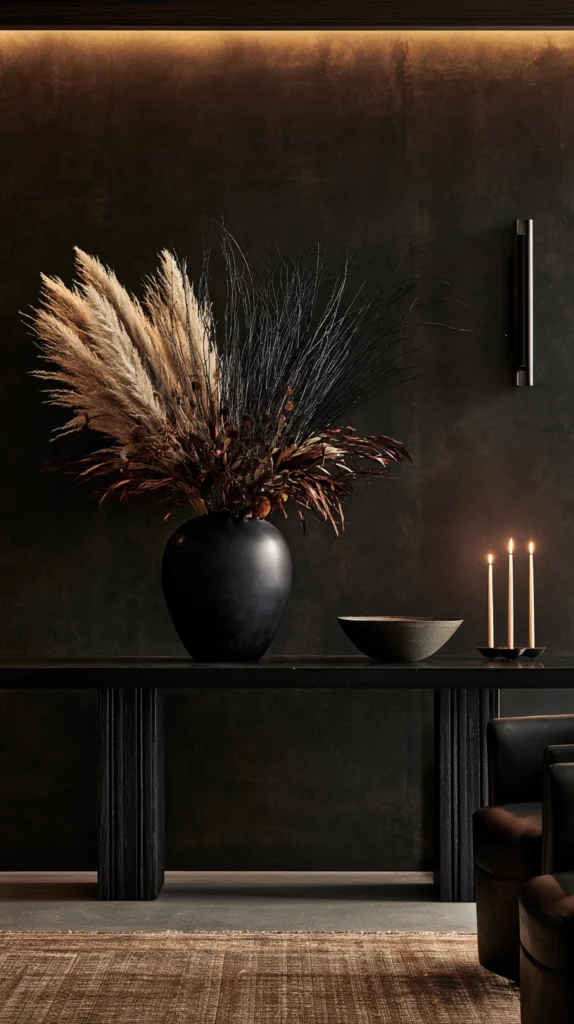
Large-scale dried floral and grass arrangements, in muted tones, replacing fresh flowers or plastic seasonal foliage.
My display with no floral element at all:
What I had:
- A Halloween display entirely made of pumpkins, lights, and small props, with no botanical or floral element whatsoever
- A missed opportunity to add softness and texture the way floral arrangements do in other seasonal decorating
- Uncertainty about how flowers would even fit into a Halloween-specific aesthetic
The dried botanical solution:
Why dried arrangements suit this aesthetic particularly well:
- Dried, muted-toned botanicals read as moodier and more sophisticated than bright fresh flowers
- Pampas grass, dried eucalyptus, and similar textural elements add softness without introducing bright color
- Dried arrangements last the entire display season without wilting, unlike fresh flowers
- A genuinely popular, broadly fashionable design element that happens to suit this specific seasonal mood perfectly
Building the arrangement:
Styling approach:
- Choose a large vase or urn in black, dark ceramic, or aged metal as the base container
- Select dried pampas grass, bunny tails, or dried wheat for volume and height
- Add darker dried elements, like black-dyed eucalyptus or dried roses, for tonal depth
- Position as a genuine statement piece, on a console table or flanking an entryway
Cost:
- Dried pampas grass and botanical stems: $15-40 depending on quantity and specific varieties
- A large decorative vase or urn: $30-80
My dried botanical arrangement: Filling a large black ceramic urn with pampas grass and a few stems of black-dyed eucalyptus, positioned at the entry, added exactly the textural softness the rest of the display had been missing, and the arrangement itself lasted the full season without any maintenance.
Dried Botanical Tips
Choose stems in a range of heights for a more naturalistic, professionally arranged look:
Arrangement technique:
- A uniform-height arrangement can look stiff and artificial compared to one with genuine height variation
- Vary the stem lengths when arranging, allowing some pieces to rise well above others
- This detail matters significantly in how professional and intentional the finished arrangement reads
- Step back and view the arrangement from a distance periodically while building it to assess the overall shape
Store the dried arrangement carefully between seasons to reuse it in future years:
Longevity consideration:
- Dried botanicals are genuinely reusable across multiple seasons if stored properly, unlike fresh flowers
- Keep the arrangement in a dry, protected space, away from moisture, between Halloween seasons
- This turns what could be an annual expense into a one-time investment that pays off over several years
- A large, sturdy box or a dedicated closet shelf works well for this kind of seasonal storage
5. Rich Velvet and Textured Throw Pillows
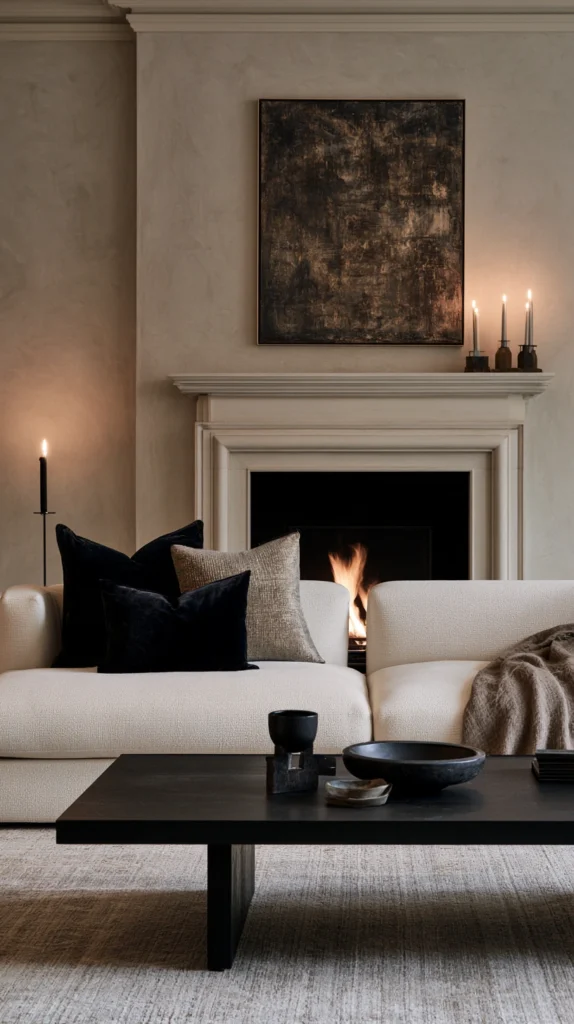
Deep-toned velvet or richly textured throw pillows, in black, deep burgundy, or charcoal, replacing bright orange or novelty-printed Halloween pillow covers.
My novelty pillow covers that felt more gift shop than home decor:
What I had:
- Orange pillow covers printed with cartoon pumpkins and bats, purchased fresh each October from a seasonal retailer
- Pillows that looked distinctly out of place once removed from the specific holiday context
- No genuine textural or material interest beyond the printed graphic itself
The velvet pillow solution:
Why rich, solid-colored textiles read as far more elevated:
- Deep, jewel-toned or moody velvet reads as luxurious and considered rather than seasonal and disposable
- A solid color or subtle texture, rather than a printed graphic, keeps the look sophisticated
- These pillows genuinely work as year-round home decor, not just a single-month purchase
- One of the more comfortable, tactile ways to bring the season’s mood into a living space
Choosing the right pillows:
Selection considerations:
- Velvet in black, deep burgundy, charcoal, or a rich forest green
- A subtle textural pattern, like a small jacquard or a raised velvet motif, over a bold graphic print
- Mixing in one or two textured knit or faux-fur pillows for additional tactile variety within the same tonal range
Cost:
- Quality velvet pillow covers (per cover): $20-45
My velvet pillow swap: Replacing four printed pumpkin pillow covers with a mix of black and deep burgundy velvet ones instantly elevated the whole living room, and unlike the previous novelty covers, these have simply stayed out as part of the home’s regular decor well beyond Halloween.
Velvet Pillow Tips
Mix textures within the same color family rather than choosing all identical velvet:
Textural layering:
- Pairing velvet with a knit, a subtle jacquard, or a faux-fur pillow within the same dark palette adds depth
- All-identical pillows, even in a great color, can look slightly flat compared to a mixed-texture arrangement
- This technique mirrors how professional interior stylists typically approach pillow arrangements year-round
- Aim for variety in texture while maintaining consistency in color for the most polished result
Choose pillow inserts sized slightly larger than the cover for a fuller, more luxurious look:
Styling detail:
- A pillow insert exactly matching the cover size can look slightly flat and understuffed
- Sizing the insert an inch or two larger than the cover creates a fuller, more plush appearance
- This small detail is a common professional styling trick that meaningfully affects how “expensive” pillows look
- Worth the minor additional cost of a properly sized insert for noticeably better results
6. A Vintage Apothecary Bottle Display
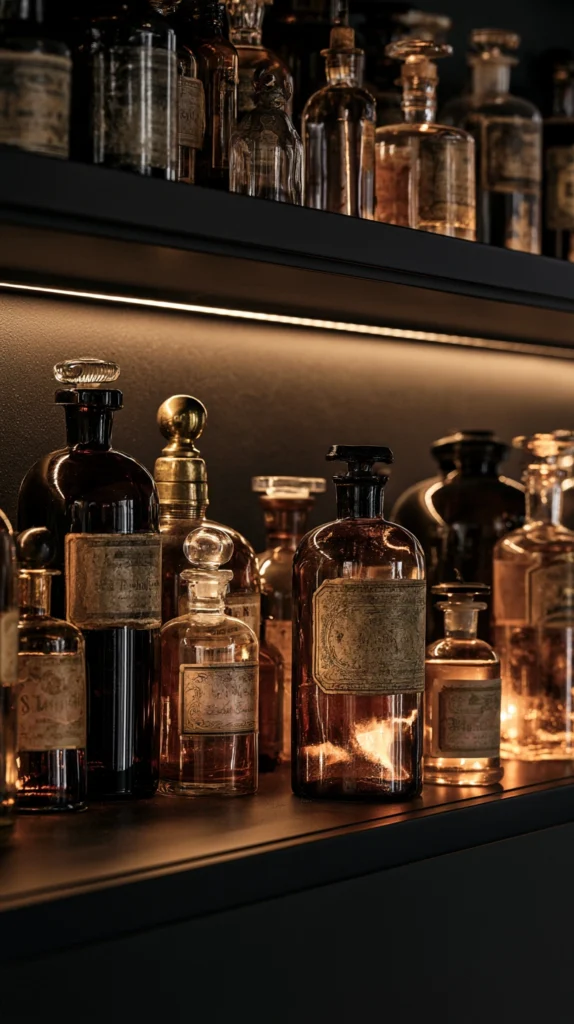
A collection of vintage or vintage-style glass apothecary bottles, labeled with mysterious tinctures and potions, displayed on a shelf or table.
My display missing any sense of storytelling or mystery:
What I had:
- A collection of straightforward decorative objects with no particular narrative connecting them
- A desire for something with genuine intrigue and detail, rewarding a closer look rather than just a glance
- An interest in apothecary-style aesthetics I hadn’t yet applied to seasonal decorating
The apothecary bottle solution:
Why this display adds a layer of genuine sophistication and narrative:
- Evokes an old-world curiosity cabinet or Victorian pharmacy aesthetic, distinct from typical Halloween imagery
- Rewards closer inspection, with each labeled bottle adding its own small detail to the overall display
- Genuinely reusable and displayable well beyond the Halloween season as general vintage-style decor
- Combines well with the candelabra and dried botanical ideas described elsewhere on this list
Building the collection:
Sourcing and styling:
- Source vintage glass bottles from antique shops, estate sales, or specialty apothecary-style retailers
- Create custom labels with evocative, mysterious names using aged-looking paper and a vintage-style font
- Fill bottles with colored liquid (water tinted with food coloring) or dried botanicals for visual variety
- Arrange on a tiered shelf or grouped on a tray for a cohesive collection display
Cost:
- Vintage or vintage-style glass bottles (per bottle): $5-20, less if sourced secondhand
- Label materials and printing: $10-20
My apothecary display: Building a collection of twelve labeled bottles, filled with everything from dried lavender to deep purple-tinted water, arranged on a small tiered shelf, became the single most examined and discussed detail of the entire display, with guests genuinely reading each individual label.
Apothecary Bottle Tips
Age paper labels intentionally using tea staining or a light singe for authenticity:
Label authenticity technique:
- Crisp white printer paper immediately reads as a modern reproduction rather than a genuine vintage object
- Staining paper with brewed tea and allowing it to dry, or lightly singeing the edges, creates a convincingly aged look
- This small extra step significantly affects how authentic the whole collection appears up close
- Test the aging technique on scrap paper first to control the exact level of staining achieved
Vary bottle shapes and sizes rather than using a single uniform bottle style throughout:
Collection authenticity:
- A genuinely collected vintage assortment naturally includes variety in shape, size, and glass color
- A display of identical bottles reads as more obviously purchased as a matching set
- Sourcing gradually from different places, rather than buying a full matching set at once, naturally builds in this variety
- This detail is part of what separates a “collected over time” feeling from a single bulk purchase
7. Brass or Aged Metal Lanterns Instead of Plastic Jack-O-Lanterns
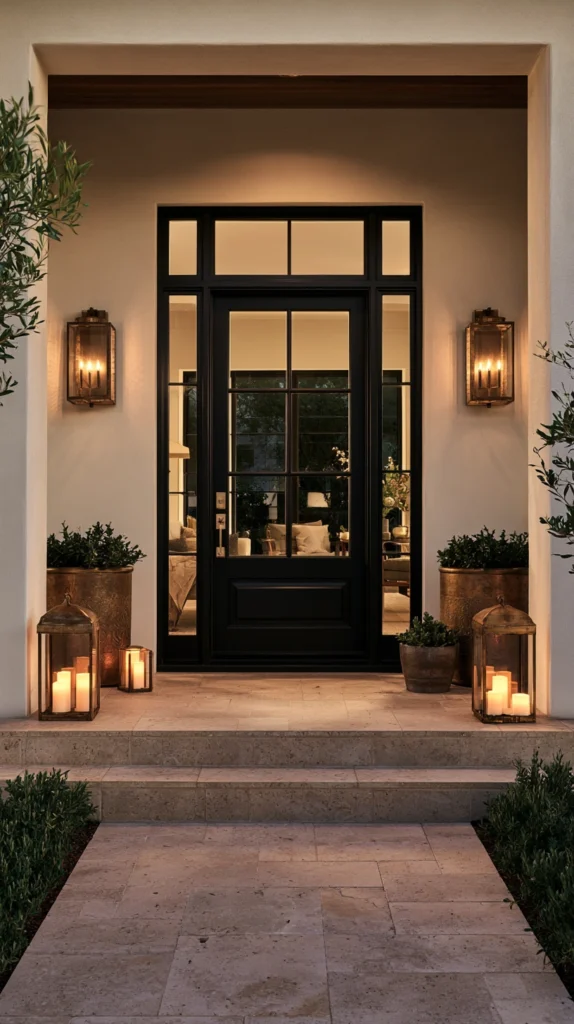
Genuine brass, iron, or aged metal lanterns, holding candles or warm-toned bulbs, replacing plastic light-up pumpkin buckets and decorations.
My plastic light-up pumpkins that looked cheap even lit up:
What I had:
- Plastic battery-operated light-up pumpkin decorations, the kind widely available at any general retailer each fall
- Lighting elements that looked plasticky and generic even once illuminated in the evening
- No sense that these pieces could function as genuine decor beyond their narrow seasonal use
The metal lantern solution:
Why real metal lanterns transform the evening presentation entirely:
- Aged brass, iron, or bronze reads as genuinely elegant in a way molded plastic simply cannot replicate
- Metal lanterns function as legitimate home decor across the full year, not just a single narrow season
- The warm glow through aged metal or glass panels creates a fundamentally richer atmosphere than plastic diffusion
- One of the more significant material upgrades available for shifting a display’s entire evening mood
Choosing the right lanterns:
Selection considerations:
- Aged brass or iron lanterns, ideally with some genuine patina rather than a bright, new finish
- Sized appropriately for their placement, larger statement lanterns for an entry, smaller ones for a table
- Filled with real or flameless candles rather than a harsh, bright electric bulb
Cost:
- Quality metal lanterns (per lantern): $25-80, less if sourced secondhand through antique or thrift shops
My lantern swap: Replacing four plastic light-up pumpkins with two aged brass lanterns holding flameless candles completely changed the evening feel of the front entry, and unlike the plastic versions, these lanterns now stay out as part of the home’s regular outdoor decor well into the winter months.
Metal Lantern Tips
Look specifically for lanterns with some visible age or patina rather than bright, polished new finishes:
Character over shine:
- A brand-new, brightly polished brass lantern can look almost as artificial as plastic in certain lighting
- Genuine age, or an intentionally applied antiqued finish, contributes significantly to the elegant, old-world mood this aesthetic relies on
- Secondhand sourcing naturally solves this, since most vintage lanterns already carry authentic wear
- If buying new, look specifically for products marketed with an “aged” or “antiqued” finish
Use amber or warm-toned glass panels if the lantern design allows for a choice:
Light quality consideration:
- Clear glass exposes the light source directly, while amber or warm-toned glass diffuses it into a richer, more atmospheric glow
- This detail affects the quality of light cast into the surrounding space, not just the lantern’s own appearance
- Worth prioritizing this feature specifically for lanterns intended as a genuine evening light source
- A relatively small difference in product selection that meaningfully affects the overall atmospheric result
8. Blackened or Bare Branch Arrangements
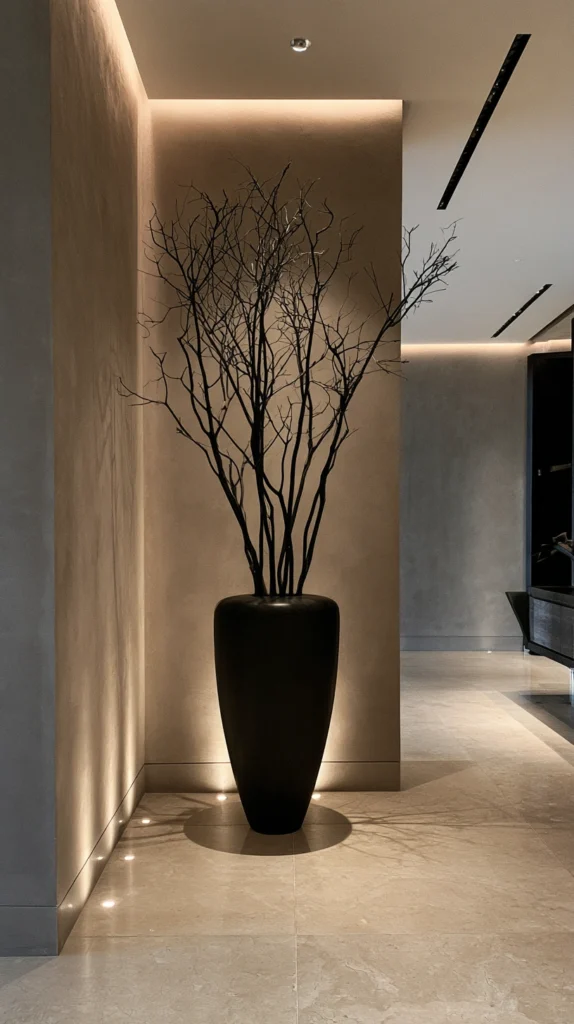
Bare tree branches, either naturally dark or lightly spray-painted black, arranged in a tall vase as a dramatic, sculptural centerpiece.
My display missing any real height or drama:
What I had:
- A collection of ground-level and tabletop items with nothing drawing the eye upward
- A desire for a genuinely dramatic, gallery-worthy centerpiece rather than another small tabletop object
- Access to fallen branches in the yard that had never been considered for decorating use
The branch arrangement solution:
Why bare branches deliver such striking visual drama:
- The stark, skeletal silhouette of bare branches is inherently moody and seasonally appropriate without needing any additional embellishment
- Adds genuine height and vertical interest that most tabletop Halloween decor entirely lacks
- Uses free, natural material, since fallen branches are often readily available at no cost
- A technique frequently used in high-end floral and event design specifically for this kind of dramatic seasonal effect
Building the arrangement:
Construction and styling:
- Gather a collection of bare, interestingly shaped branches, either naturally dark or freshly fallen
- Optionally spray paint matte black for a more uniform, dramatic finish, or leave natural for organic variation
- Arrange in a tall, weighted vase or urn, positioned as a genuine statement piece
- Consider adding small string lights woven through the branches for a subtle evening glow
Cost:
- Branches: often free if gathered from your own or a neighbor’s yard
- Matte black spray paint (if used): $8-12
- A tall, weighted vase: $30-70
My branch arrangement: Gathering a collection of bare branches from the yard, spray-painting them matte black, and arranging them in a tall black urn by the entryway created the single most dramatic, gallery-worthy element of the entire display, for a total cost under $50.
Branch Arrangement Tips
Weight the vase’s base to prevent tipping, since a tall branch arrangement is inherently top-heavy:
Stability consideration:
- A tall arrangement in an unweighted vase is a genuine tipping risk, particularly in a high-traffic entryway
- Adding sand, gravel, or floral foam to the vase’s base significantly improves stability
- This consideration matters more here than for most other decor on this list, given the height and weight involved
- Test the finished arrangement’s stability before placing it in a permanent, high-traffic location
Choose branches with interesting natural forks and angles rather than perfectly straight ones:
Selection for visual interest:
- Straight, uniform branches create a less dynamic silhouette than ones with natural forks, curves, and angles
- Seek out branches with genuine character, since this is what gives the finished arrangement its dramatic, sculptural quality
- This is one of the few projects on this list where “imperfect” natural material is specifically preferable
- A short walk through a yard or nearby wooded area after a windy day often turns up excellent material for this project
9. One Dramatic Statement Piece Instead of Many Small Props
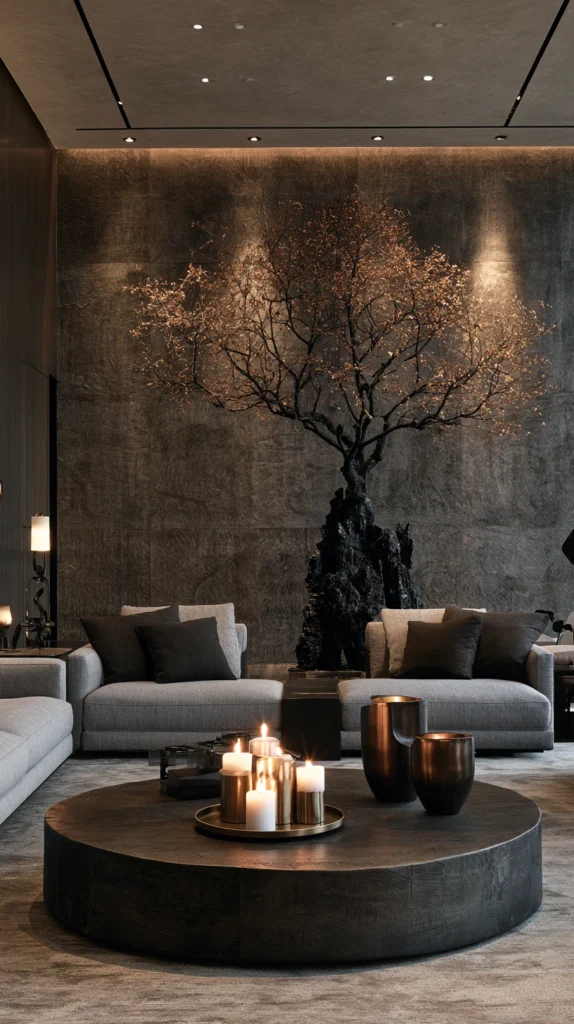
Committing to a single striking, well-executed centerpiece, whether a large art piece, an oversized floral urn, or a dramatic lighting fixture, rather than distributing decorating effort across dozens of small items.
My collection of many small, individually unremarkable props:
What I had:
- A scattering of small plastic skeletons, spiders, and novelty signs throughout the house
- No single feature that actually anchored the display or gave it a clear visual identity
- A visually busy result that, despite considerable effort, never felt genuinely finished or intentional
The single statement piece solution:
Why concentrating effort on one feature outperforms many small ones:
- A limited amount of decorating budget and effort, spread across many small items, rarely produces a strong individual result for any of them
- One genuinely well-executed centerpiece gives the whole display a clear focal point and identity
- This principle mirrors sophisticated interior design generally, where a single strong statement piece often does more work than many smaller accents
- Simplifies the whole decorating process considerably, since the effort concentrates on getting one thing right rather than managing many
Choosing the right statement piece:
Options to consider:
- The branch arrangement, apothecary bottle collection, or candelabra described elsewhere on this list, fully committed to as the singular focal feature
- A single piece of striking, gallery-style Halloween-adjacent art (a raven illustration, a gothic-style print)
- One genuinely oversized element, like a large sculptural pumpkin display or an elaborate dried floral urn
Cost:
- Varies significantly by the specific piece chosen, but budgeting $100-300 for one genuinely well-executed feature, rather than spreading that same amount across a dozen small items, delivers a noticeably stronger result
My single statement piece: Removing most of the small scattered props from the living room and committing fully to the black branch arrangement as the singular focal feature gave the whole space the clear, sophisticated identity that all the small individual items combined had never quite achieved.
Statement Piece Tips
Resist the temptation to add smaller accents once the main piece is installed:
Restraint principle:
- The instinct to keep adding small decorative touches can undermine an otherwise successful single-feature strategy
- Once the main statement piece is in place and the space feels resolved, treat additional small purchases with genuine skepticism
- This restraint is difficult but is exactly what preserves the clarity this approach is meant to achieve
- Live with the finished statement piece for a week or two before considering any further additions
Position the statement piece where it’s visible from the home’s main entry or primary sightline:
Placement for maximum impact:
- A striking piece tucked into a rarely seen corner doesn’t deliver its intended effect
- Consider where guests and household members actually look most often, and orient the piece toward that specific sightline
- This placement consideration matters as much as the piece choice itself
- Walk through the home’s typical traffic pattern before finalizing exactly where the statement piece goes
10. A Curated Scent Layer Using Candles or Diffusers
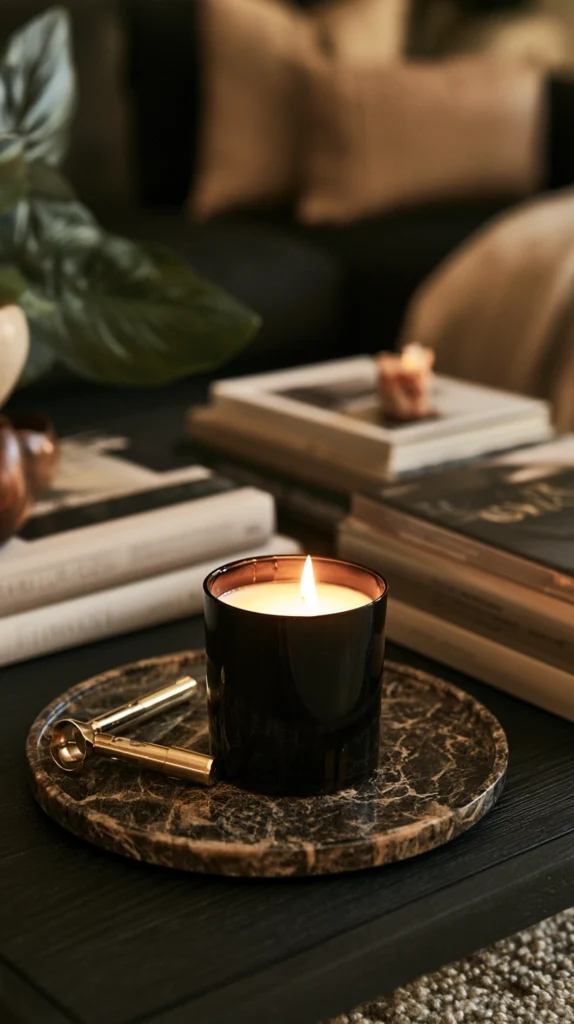
A specific, intentional fragrance, whether smoky, woodsy, or spiced, chosen deliberately as part of the seasonal atmosphere rather than left to chance.
My display with no scent consideration at all:
What I had:
- A visually decorated home with absolutely no thought given to how it actually smelled
- A missed sensory dimension that more elaborate, considered seasonal styling typically includes
- Candles purchased purely for their appearance rather than any particular scent profile
The curated scent solution:
Why fragrance adds a genuinely sophisticated final layer:
- Scent is one of the most powerful and immediate atmosphere-setters, often more so than any visual element alone
- A deliberately chosen, moody fragrance (smoke, leather, dark woods, clove) reinforces the visual aesthetic already established
- Elevates the experience for guests beyond just what they see, engaging a sense most seasonal decorating entirely ignores
- A relatively low-cost addition that meaningfully rounds out an otherwise carefully considered display
Choosing the right scent:
Fragrance selection:
- Smoky or woodsy notes (cedar, vetiver, leather) for a moody, autumnal base
- Warm spice notes (clove, black pepper, cardamom) for depth without veering sweet or overly festive
- Avoiding overtly sweet or “candy corn” style novelty scents, which undercut the sophisticated aesthetic being built elsewhere
Cost:
- A quality scented candle: $20-45
- A reed diffuser: $25-50
My scent layer: Choosing a single cedar-and-clove scented candle to burn consistently during the evening hours added a sensory dimension the display had been missing entirely, and more than one guest specifically asked what the scent was before ever commenting on any of the visual decor.
Scent Layer Tips
Choose one consistent scent throughout the main living space rather than mixing several different fragrances:
Fragrance consistency:
- Multiple competing scents throughout a home can create an unpleasant, muddled olfactory experience
- Committing to a single signature fragrance for the season creates a cohesive sensory experience, similar to the visual color palette principle
- This consistency is worth prioritizing over variety in this specific case
- Save any additional or different scents for well-separated areas of the home, like a bathroom or a distant room
Choose a genuinely high-quality candle or diffuser, since fragrance quality varies dramatically by price point:
Quality consideration:
- Inexpensive candles often use synthetic fragrance oils that can smell harsh or artificial compared to higher-quality options
- A well-made candle from a reputable maker delivers a noticeably more sophisticated, true-to-note scent experience
- This is one area worth a slightly higher investment relative to some other, more purely visual elements on this list
- Testing a candle’s scent in person, if possible, before purchasing helps confirm it matches the intended mood
11. An Elegant Tablescape With Black Plates and Gold Flatware
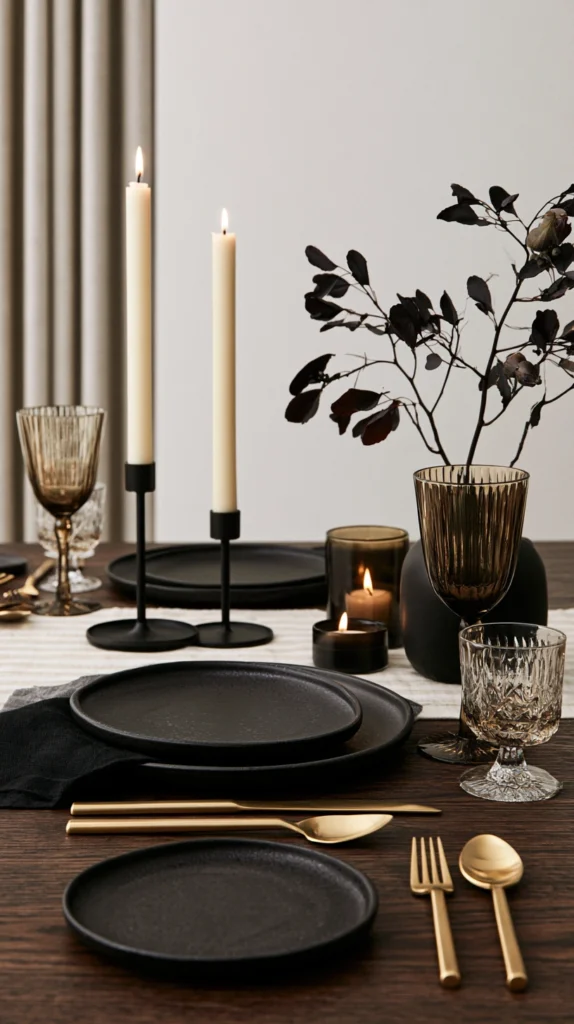
A dinner or entertaining table styled with black dinnerware, gold or brass flatware, and dark linens, rather than novelty Halloween-printed tableware.
My table setting from the seasonal paper goods aisle:
What I had:
- Disposable orange and black paper plates with cartoon jack-o-lantern prints, purchased fresh each year
- A table setting that looked distinctly like a children’s party rather than an adult dinner gathering
- No sense that the tablescape could actually reflect the same considered aesthetic as the rest of the home
The elegant tablescape solution:
Why real dinnerware in a dark palette transforms the entertaining experience:
- Black ceramic or stoneware plates read as genuinely sophisticated, working for both Halloween and general moody dinner party styling
- Gold or brass flatware adds warmth and a sense of occasion that plastic disposable cutlery never achieves
- Dark linens, whether a deep charcoal tablecloth or black cloth napkins, complete the cohesive palette
- This tableware is fully reusable well beyond Halloween, functioning as general elegant dinnerware year-round
Building the tablescape:
Styling components:
- Black stoneware or ceramic dinner plates as the base layer
- Gold or brass flatware, either purchased new or sourced secondhand
- A deep charcoal or black tablecloth, or a natural linen runner over a dark wood table
- Taper candles and a small amount of the dried botanical or branch arrangement described elsewhere on this list as the centerpiece
Cost:
- Black stoneware dinner plates (set of 4-6): $40-100
- Gold or brass flatware (set): $30-80
- Dark linens: $30-60
My tablescape transformation: Setting the table with black stoneware plates, gold flatware sourced secondhand, and a simple black linen runner, with a few taper candles down the center, turned what used to be a paper-plate Halloween dinner into a table that genuinely looked ready for a design magazine feature, and all of it gets reused for other gatherings throughout the year.
Tablescape Tips
Source gold or brass flatware secondhand for both character and cost savings:
Sourcing strategy:
- Thrift stores and estate sales frequently carry vintage gold-toned flatware sets at a fraction of new retail pricing
- These often have more genuine character and slight variation than a uniform new set
- This approach also fits the broader theme of investing in pieces that get reused well beyond a single Halloween display
- Mismatched but coordinating secondhand pieces can actually look more intentional than a perfectly matched new set
Layer a natural linen runner over, rather than instead of, a solid dark tablecloth:
Layering technique:
- A single flat tablecloth alone can look slightly less dimensional than a layered approach
- Adding a natural linen runner over a solid black or charcoal cloth introduces texture and visual interest
- This layering technique is a common professional tablescape styling trick, applicable well beyond just Halloween
- Choose the runner in a slightly different but complementary tone to the base cloth for the best result
12. Subtle Raven and Crow Accents Instead of Cartoon Bats
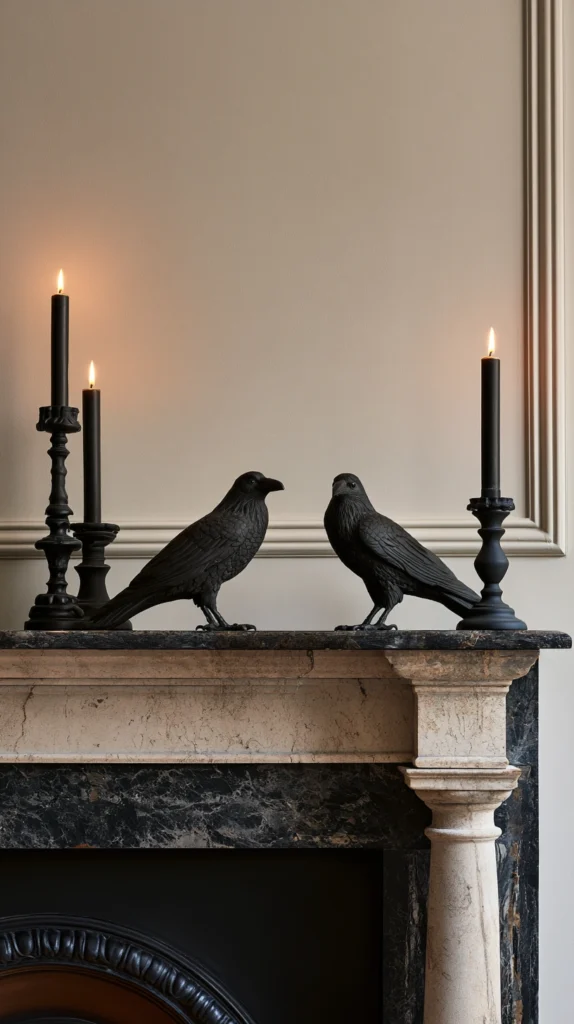
Sculptural raven or crow figures, whether ceramic, resin, or metal, replacing cartoon-style bat cutouts and plastic spider decorations.
My cartoon-style bat and spider cutouts:
What I had:
- Plastic bat silhouettes with exaggerated cartoon eyes, stuck to windows with static cling
- Bright plastic spiders in unrealistic colors scattered around the porch
- Imagery that read as distinctly juvenile compared to the more sophisticated mood being built elsewhere in the display
The raven and crow accent solution:
Why this specific imagery reads as so much more sophisticated:
- Ravens and crows carry the same seasonal, slightly ominous symbolism as bats but without the cartoonish visual baggage
- Sculptural bird figures, in matte black finishes, function as genuine art objects rather than obviously seasonal props
- Draws on a long tradition of gothic and literary imagery (Poe’s raven being the most obvious reference point) rather than costume-shop iconography
- Reusable as general decor well beyond the Halloween season specifically
Choosing the right pieces:
Selection considerations:
- Matte black ceramic or resin raven figures, sized appropriately for a mantel, shelf, or table
- A single dramatic raven perched within the branch arrangement described earlier on this list
- Metal raven silhouette art, mounted on a wall, as an alternative to a freestanding figure
Cost:
- Quality raven or crow figures: $20-60 per piece
- Metal silhouette wall art: $30-80
My raven accents: Replacing the plastic bats and spiders with three matte black ceramic ravens, one perched within the branch arrangement and two on the mantel, brought the same seasonal symbolism into the display but in a form that reads as genuinely elegant rather than costume-shop juvenile.
Raven Accent Tips
Position ravens as though caught mid-perch or mid-observation rather than scattered randomly:
Placement for narrative quality:
- A raven positioned as if watching the room, perched on a branch or the edge of a shelf, reads as more intentional and alive
- Randomly placed figures without this sense of pose or purpose can feel like an afterthought
- This small styling consideration significantly affects how the pieces are actually perceived
- Take a moment to consider each figure’s specific pose and sightline before finalizing its placement
Limit the raven motif to a few well-placed pieces rather than repeating it throughout every room:
Restraint in repetition:
- Even a sophisticated motif can start to feel like a gimmick if overused throughout an entire home
- Two or three well-placed pieces carry more weight than a dozen scattered through every room
- This restraint mirrors the broader “one statement piece” principle applied specifically to a recurring visual motif
- Choose the two or three most visible, highest-impact locations for this particular accent
13. A Gothic-Framed Mirror or Dark Artwork
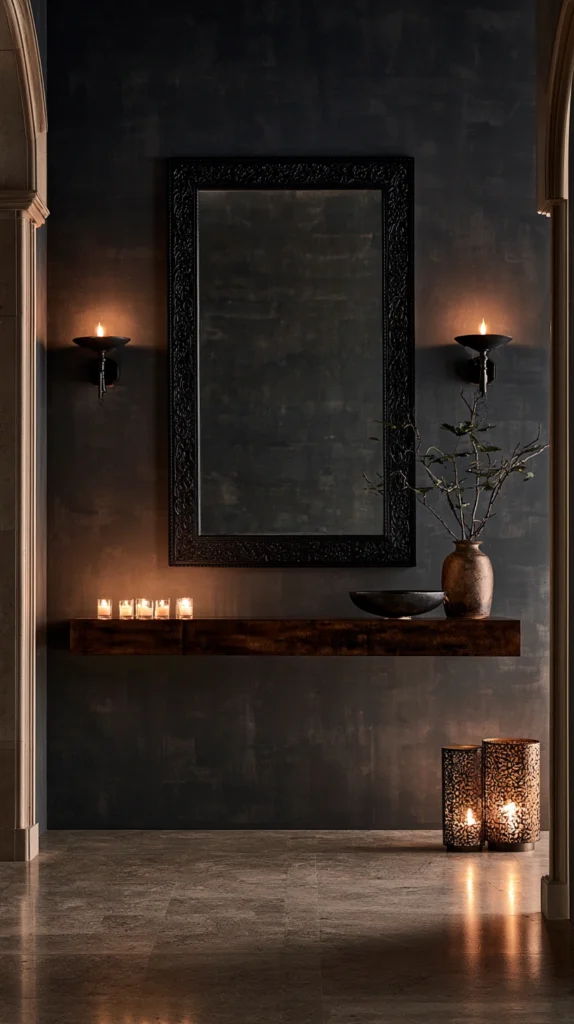
A mirror or piece of art in an ornate, dark, gothic-style frame, serving as a striking wall feature that suits the season without being explicitly Halloween-themed.
My walls with no seasonal styling at all:
What I had:
- Wall space left entirely untouched by any seasonal decorating effort
- Existing artwork and mirrors that felt disconnected from the moodier atmosphere being built elsewhere in the home
- A desire for a genuine architectural or artistic feature rather than another small tabletop object
The gothic-framed piece solution:
Why this feature bridges genuine home decor and seasonal mood so effectively:
- An ornate, dark-framed mirror or artwork works as legitimate year-round decor, needing no seasonal removal afterward
- The frame style alone carries enough gothic, moody character to suit the aesthetic without any overtly Halloween-specific imagery
- Adds genuine architectural presence to a wall, something small tabletop props can never fully achieve
- One of the more investment-worthy pieces on this list, given its extended, year-round usefulness
Choosing the right piece:
Selection considerations:
- An ornate mirror in a black, aged bronze, or dark wood frame
- Dark, moody artwork, whether a botanical illustration, a portrait, or an abstract piece, in a similarly ornate frame
- Sized appropriately to make a genuine statement without overwhelming the specific wall it’s intended for
Cost:
- A quality gothic-framed mirror: $80-250, less if sourced secondhand
- Dark artwork in an ornate frame: $60-200
My gothic mirror: Hanging a large, ornately framed antique-style mirror with a dark bronze finish above the entry console gave the whole space genuine architectural presence, and it’s a piece that now anchors that wall year-round rather than coming down the day after Halloween.
Gothic Frame Tips
Check secondhand and antique sources first, since ornate frames are commonly available and often more affordable there:
Sourcing priority:
- Estate sales and antique shops frequently carry genuinely old ornate mirrors and frames at reasonable prices
- These secondhand pieces typically have more authentic character than a new reproduction of similar style
- This sourcing approach also supports the broader theme of investing in pieces with genuine, lasting decor value
- Allow time for this kind of search, since the right piece may take a few outings to find rather than a single trip
Confirm the piece’s actual weight and use appropriate wall anchors for secure hanging:
Installation safety:
- Ornate, substantial mirrors and framed art are often significantly heavier than standard lightweight decor
- Use anchors and hardware specifically rated for the piece’s actual weight, not just whatever hardware happens to be on hand
- This consideration matters especially for a piece intended to stay hung long-term rather than being a temporary seasonal item
- A stud finder and appropriately rated picture hanging hardware are worth the small additional effort for a secure, lasting installation
14. Muted, Sculptural Pumpkin Finishes in Charcoal or Gold
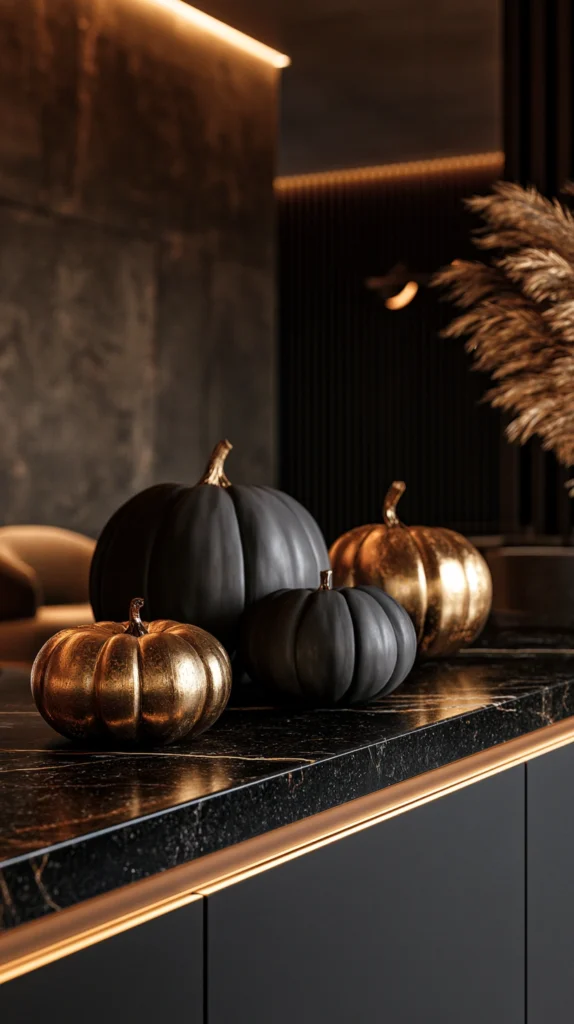
Pumpkins finished in a matte charcoal spray paint or a metallic gold, rather than left in their natural orange or painted with a cartoon face.
My traditional orange pumpkins that felt at odds with the rest of the display:
What I had:
- Standard bright orange pumpkins that clashed visually with the more muted black, white, and cream palette established elsewhere
- A desire to keep pumpkins as part of the display without reverting to the traditional bright orange that started this whole reconsideration
- Basic spray paint supplies already on hand from other projects
The finished pumpkin solution:
Why a matte or metallic finish transforms a traditional pumpkin so effectively:
- A matte charcoal or black finish integrates seamlessly into the monochrome palette established throughout the rest of the display
- A metallic gold finish adds richness and a sense of occasion, functioning almost like a piece of sculpture rather than a seasonal gourd
- Either finish transforms a very traditional, familiar object into something that reads as genuinely considered and elevated
- A simple, low-cost technique capable of meaningfully changing how a pumpkin fits into a broader design scheme
Applying the finish:
Technique for a clean result:
- Clean and dry the pumpkin’s surface thoroughly before painting
- Use a spray paint specifically formulated for a matte or metallic finish, applied in several thin, even coats
- Allow full drying time between coats to avoid drips or uneven texture
- Leave the natural stem unpainted for an interesting textural contrast against the smooth painted surface
Cost:
- Matte black or metallic gold spray paint: $8-15 per can, typically enough for 2-4 pumpkins depending on size
My finished pumpkins: Spray-painting a group of five pumpkins in a mix of matte charcoal and metallic gold, then grouping them together on the entry table, integrated the traditional pumpkin shape fully into the display’s sophisticated palette, and the finished pieces looked genuinely sculptural rather than like a typical seasonal gourd.
Finished Pumpkin Tips
Apply several thin coats rather than one heavy coat for the smoothest, most even finish:
Application technique:
- A single heavy coat is prone to drips and uneven texture, particularly on a pumpkin’s curved, ridged surface
- Multiple thin coats, allowing full drying time between each, produce a noticeably smoother and more professional result
- This is the same principle used in furniture and craft spray painting generally, applied specifically to pumpkin surfaces
- Budget slightly more time for this multi-coat process rather than rushing to a single application
Choose real pumpkins over faux ones specifically for this technique, since the natural ridged texture enhances the finished look:
Material consideration:
- A real pumpkin’s natural surface texture catches paint and light in a way that adds genuine visual interest once finished
- Faux foam pumpkins can work as a longer-lasting alternative but often lack the same natural surface variation
- If longevity across multiple seasons matters more than natural texture, a faux pumpkin remains a reasonable substitute
- Either way, the technique itself, matte or metallic spray paint, applies successfully to both real and faux options
Choosing Your Elegant Halloween Projects
By Priority
Establish the color and material foundation:
- A strict black, white, and cream color palette (idea 1)
- Real, unpainted pumpkins displayed sculpturally (idea 2)
- Rich velvet and textured throw pillows (idea 5)
Build the lighting and atmosphere:
- Taper candles and a candelabra (idea 3)
- Brass or aged metal lanterns (idea 7)
- A curated scent layer (idea 10)
Add sophisticated statement details:
- Dried botanicals and pampas grass arrangements (idea 4)
- Blackened or bare branch arrangements (idea 8)
- One dramatic statement piece (idea 9)
By Effort Level
Lowest effort:
- A strict color palette, applied to existing decor choices (idea 1)
- Rich velvet throw pillows (idea 5)
- A curated scent layer (idea 10)
Medium effort:
- Taper candles and a candelabra (idea 3)
- Muted, sculptural pumpkin finishes (idea 14)
- Subtle raven and crow accents (idea 12)
Higher commitment:
- A vintage apothecary bottle display (idea 6)
- Blackened or bare branch arrangements (idea 8)
- An elegant tablescape (idea 11)
- A gothic-framed mirror or dark artwork (idea 13)
By Budget
Under $75:
- A strict color palette (idea 1, no added cost beyond selective purchasing)
- Real, unpainted pumpkins (idea 2)
- A curated scent layer (idea 10)
- Muted pumpkin finishes (idea 14)
$75-200:
- Rich velvet throw pillows (idea 5, for a full set)
- Taper candles and a candelabra (idea 3)
- Dried botanical arrangements (idea 4)
- A vintage apothecary bottle collection (idea 6)
$200+:
- An elegant tablescape with new dinnerware and flatware (idea 11)
- A gothic-framed mirror (idea 13)
- Brass or aged metal lanterns, multiple pieces (idea 7)
Maintenance Through the Season
Setup:
- Source secondhand pieces (candelabras, mirrors, flatware) well ahead of the season for the best selection
- Test candle and lantern placements for both safety and lighting effect before finalizing the full display
Mid-season:
- Check real pumpkins periodically for any soft spots or early decay and replace as needed
- Refresh scented candles or diffusers as needed to maintain a consistent fragrance level
After Halloween:
- Store reusable pieces (velvet pillows, the candelabra, dried arrangements, framed mirror) as ongoing home decor rather than seasonal-only items
- Note which pieces earned their place as genuine year-round decor for future seasonal planning
My Complete Elegant Halloween Journey
What I built across two Octobers:
Year one ($260):
- Committed to the black, white, and cream palette across all pumpkin and prop purchases
- Added a secondhand brass candelabra and taper candles
- Swapped novelty pillow covers for black and burgundy velvet ones
- Learned that a restrained, consistent palette did more for the display’s sophistication than any individual item alone
Year two ($340):
- Built the vintage apothecary bottle collection
- Added the black branch arrangement as the season’s main statement piece
- Sourced a secondhand gothic-framed mirror for the entry
- Learned that investing in pieces with genuine year-round decor value made the whole project feel less like a seasonal expense and more like ongoing home design
Total investment: $600 across two years, with the majority of pieces still in active year-round use Most important lesson: Elegant Halloween decor is really just good, considered home decor with a slightly darker, moodier mood applied to it Single highest-impact change across both years: Committing fully to the black, white, and cream color palette, since it made every subsequent purchase decision clearer and kept the whole display cohesive
Getting Started This Weekend
Start with the palette, not a shopping list.
This weekend:
Step 1 — Commit to a specific muted color palette before buying anything new:
- Black, white, and cream is a reliable, broadly flattering starting point
- This decision informs every other choice made throughout the season
Step 2 — Swap one obviously “seasonal aisle” item for a real material equivalent:
- Plastic string lights for taper candles, or a plastic pumpkin bucket for a real lantern
- Notice how much difference even one swap makes to the overall feel
Step 3 — Choose white, cream, or naturally pale pumpkins over traditional orange:
- Often available at the same farm stands and grocery stores as traditional pumpkins
- One of the easiest, most immediate ways to shift the whole palette
Step 4 — Add one genuine statement piece rather than several small props:
- A branch arrangement, an apothecary bottle collection, or a single striking piece of art
- This single feature often does more than an entire bag of small seasonal trinkets
My recommendation:
Start with the color palette commitment and pale pumpkins:
- Both cost little to nothing beyond what you’d spend on Halloween decor anyway
- Both immediately shift the whole display’s sophistication level
- This foundation makes every future addition build on a display that already reads as intentional and considered
Look at the display in the evening once these first changes are in place, and notice how the mood has shifted before planning anything else.
Now go build the Halloween display that looks like it belongs in a design magazine, not a costume shop aisle.
Quick Summary
The 14 elegant Halloween decor ideas for a grown-up aesthetic:
Color and material foundation:
- A strict black, white, and cream color palette (idea 1): the single most important starting decision
- Real, unpainted pumpkins displayed sculpturally (idea 2): letting natural texture do the visual work
- Rich velvet and textured throw pillows (idea 5): tactile luxury replacing novelty prints
- Muted, sculptural pumpkin finishes (idea 14): integrating the traditional pumpkin into the elevated palette
Lighting and atmosphere:
- Taper candles and a candelabra (idea 3): the most significant lighting mood shift available
- Brass or aged metal lanterns (idea 7): real materials replacing plastic light-up decor
- A curated scent layer (idea 10): the sensory dimension most displays skip entirely
Statement details:
- Dried botanicals and pampas grass arrangements (idea 4): softness and texture without bright color
- A vintage apothecary bottle display (idea 6): genuine narrative and detail rewarding a closer look
- Blackened or bare branch arrangements (idea 8): dramatic height and sculptural presence
- One dramatic statement piece instead of many small props (idea 9): concentrated impact over scattered effort
Refined finishing touches:
- An elegant tablescape with black plates and gold flatware (idea 11): entertaining that matches the display’s sophistication
- Subtle raven and crow accents (idea 12): the same symbolism as bats, elevated
- A gothic-framed mirror or dark artwork (idea 13): genuine architectural presence on the walls
The universal elegant Halloween rules:
Always:
- Commit to a limited, muted color palette rather than mixing bright seasonal colors
- Choose real materials, wood, brass, wax, dried botanicals, over plastic and shiny synthetic finishes
- Invest in pieces genuinely worth keeping and reusing beyond the single season
- Let one or two statement pieces carry the display rather than scattering many small props
Never:
- Default to bright orange, purple, and green simply because they’re the traditional seasonal colors
- Fill every surface with small plastic novelty items
- Treat Halloween decor as inherently disposable or separate from a home’s actual year-round design sensibility
- Skip the scent and lighting layers in favor of purely visual decorating decisions
Common mistakes:
- Buying directly from the seasonal aisle without considering how pieces relate to the rest of the home’s design
- Mixing too many colors and materials without any unifying palette or thread
- Relying on plastic and synthetic finishes when a real material equivalent is available at a similar cost
- Overcrowding a display with small props instead of committing to one or two genuine statement pieces
- Overlooking scent and lighting quality in favor of purely visual decorating choices
Remember: elegant Halloween decor is fundamentally just thoughtful, considered home decor with a moodier palette applied to it, a limited color palette does more for sophistication than any single expensive item, real materials consistently outperform plastic regardless of the specific object, one well-executed statement piece beats a dozen small scattered props, and the best elegant Halloween display is the one that could believably stay out as beautiful home decor long after the actual holiday has passed.