
12 Windy Balcony Ideas for Wind-Resistant Outdoor Decor
My balcony is on the 14th floor. For the first two years I lived there, “decorating” meant buying something nice and watching it become a projectile within a week.
I kept assuming a windy balcony just wasn’t meant to be a real outdoor space, that the wind made the whole idea of a cozy little balcony setup pointless. Then I started paying attention to what actually survived up there versus what didn’t, and it had almost nothing to do with how expensive or nice something was. It had everything to do with weight, shape, and how each piece was actually secured.
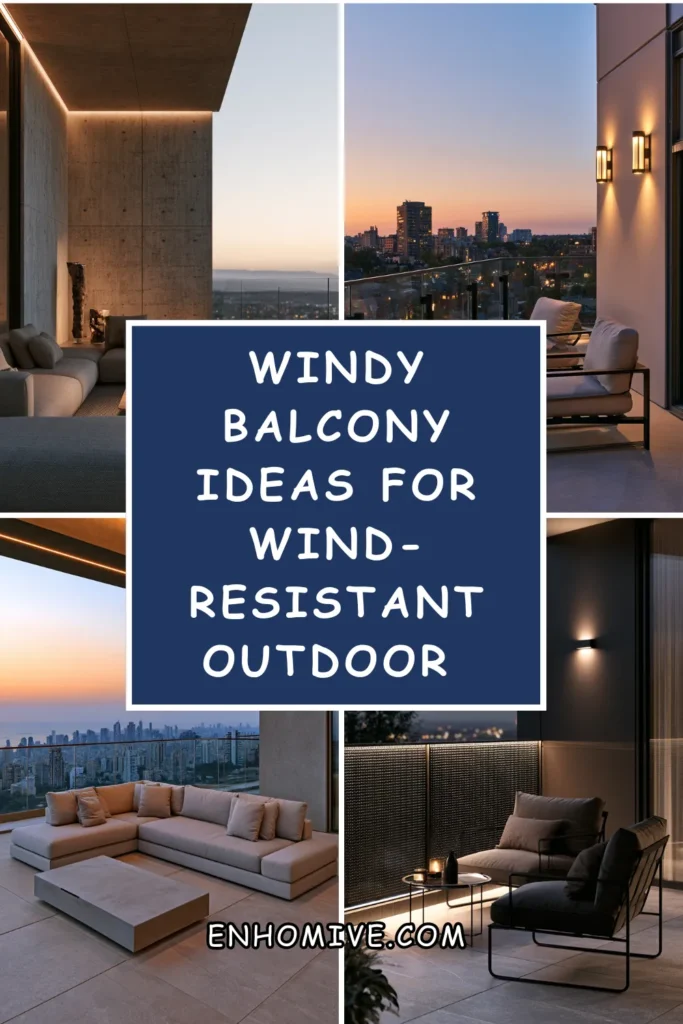
I started small. Planters that got heavier instead of lighter. Furniture with a genuinely low profile instead of anything tall and catchable. String lights anchored at actual structural points instead of just draped and hoped for.
Within a season, that same balcony that used to lose a chair cushion to the wind every other week became a space I could actually sit on during a windy afternoon without holding onto anything.
Here are 12 ideas that make a genuinely windy balcony functional, decorated, and no longer a monthly cleanup and re-purchase cycle.
Why Most Windy Balconies Never Become Usable Spaces
The common mistakes:
The standard-furniture approach:
- Regular lightweight outdoor furniture, chosen the same way it would be for a sheltered patio
- Every piece a genuine wind hazard the moment gusts pick up
- A revolving cycle of replacing blown-over or blown-away items
- Furniture chosen for looks first, with wind resistance never actually factored in
The purely decorative mindset:
- Treating wind as a problem to work around with decor alone, rather than addressing it structurally first
- Pretty additions that look good in photos but don’t survive a single real windy day
- No thought given to the physics of what stays put versus what becomes a hazard
- Decorating a windy balcony the same way you’d decorate a fully sheltered one
The all-or-nothing decision:
- Assuming a windy balcony means either full commitment to a wind-resistant redesign or giving up on decorating entirely
- No middle ground explored between “do nothing” and “completely wind-proof everything”
- A balcony left bare out of frustration rather than approached with a few smart, targeted changes
- Missing that even a few wind-specific choices can transform how usable the space actually is
What a successful windy balcony transformation does:
Chooses every element specifically for wind, not despite it:
- Weight and low profile prioritized over height and visual drama
- Genuine anchoring, not just placement, for anything that could catch wind
- Materials and shapes chosen to work with airflow rather than against it
- A balcony designed around its actual wind conditions, not decorated as if they didn’t exist
My revelation: A windy balcony becomes usable the moment every single item on it is chosen and secured specifically for wind, not just placed there and hoped for the best.
1. Weighted Planters Instead of Lightweight Pots
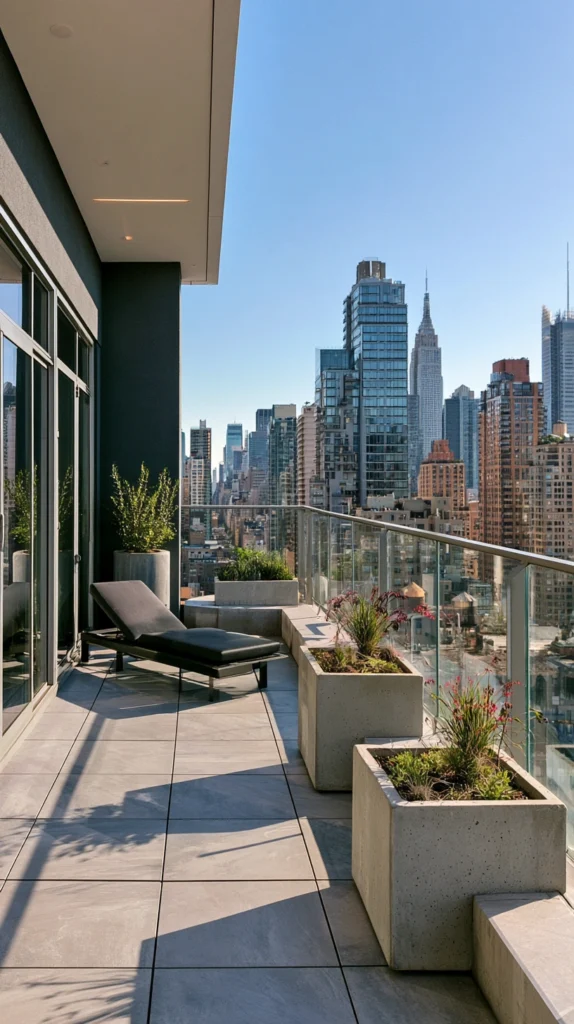
Heavy concrete, stone, or weighted resin planters replacing the lightweight plastic pots that tip or blow over in real wind.
My collection of tipped-over, cracked plastic pots:
What I had:
- Several lightweight plastic planters that tipped at the first real gust, spilling soil across the balcony
- A pattern of replacing cracked pots every few months after repeated falls
- Plants that never got the chance to establish because their containers kept getting knocked around
The weighted planter discovery:
Why heavier containers solve the problem at its actual source:
- A genuinely heavy base resists tipping in wind that would send a lightweight pot sliding or falling
- Concrete and stone planters specifically add the low center of gravity that wind resistance actually depends on
- Solves the problem structurally, rather than trying to compensate with staking or extra securing after the fact
- One of the most foundational changes for any windy balcony, since plants are usually the first thing wind claims
Choosing the right planters:
Material and sizing considerations:
- Concrete or fiber-cement planters for genuine weight without the extreme heaviness of solid stone
- Sizing planters proportionally wider at the base than tall, which further improves wind stability
- Weighted resin planters as a lighter-weight alternative that still outperforms standard plastic
Cost:
- Concrete or fiber-cement planters (per planter): $30-80
- Weighted resin planters: $25-60
My weighted planters: Replacing six lightweight plastic pots with three wider, heavier concrete planters stopped the tipping problem entirely, and the plants inside have actually thrived now that they’re not getting knocked over every few weeks.
Weighted Planter Tips
Add extra weight inside the planter itself, not just relying on the container’s own material:
Additional stability layer:
- Placing a layer of gravel or sand at the bottom of any planter, even a heavy one, further lowers its center of gravity
- This is worth doing even with concrete or stone containers for the highest possible wind resistance
- A relatively simple addition that costs almost nothing beyond the material itself
- Particularly worth doing for planters positioned right at the balcony’s edge, where wind exposure is typically strongest
Choose wider, shorter planter shapes over tall, narrow ones:
Shape and stability:
- A tall, narrow planter is inherently less stable in wind than a wider, shorter one of the same volume
- This shape principle applies regardless of the material chosen
- Prioritize this proportion specifically for any planter positioned in a high-wind zone of the balcony
- A wider base also generally supports healthier root systems for the plants themselves
2. Low-Profile Furniture Over Tall Pieces
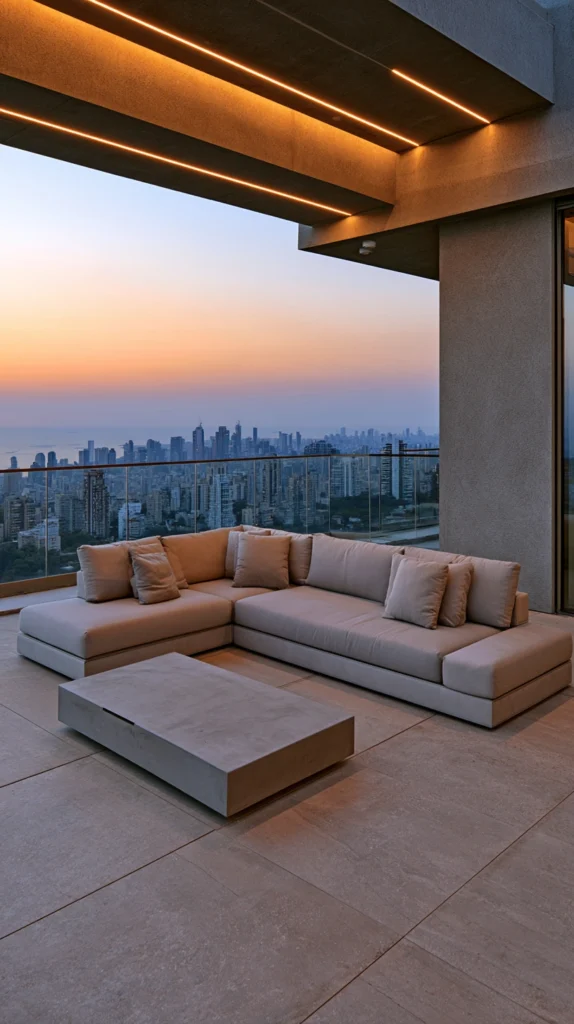
Compact, low-to-the-ground seating and tables replacing taller furniture pieces that catch more wind and are more prone to tipping.
My tall bistro set that became a hazard:
What I had:
- A standard-height bistro table and chairs, all of which caught wind like small sails
- Furniture that had to be brought inside or tied down every time the forecast called for wind
- A setup that never felt genuinely usable, since it required constant monitoring and adjustment
The low-profile furniture solution:
Why lower furniture is inherently more wind-stable:
- Less surface area exposed to horizontal wind force compared to taller pieces
- A lower center of gravity resists tipping far more effectively than standard-height furniture
- Genuinely comfortable floor cushions and low stools can replace a full standard furniture set
- One of the more significant changes available for reducing daily wind-related furniture stress
Choosing the right pieces:
Furniture options:
- Low floor cushions or a small floor-level bench instead of standard chairs
- A short, wide side table rather than a tall bistro table
- Built-in or wall-mounted seating that eliminates the tipping risk of freestanding furniture entirely
Cost:
- Low floor cushions (set of 2-3): $60-150
- A low, wide side table: $40-100
- Wall-mounted fold-down seating: $80-200
My low-profile setup: Replacing the tall bistro set with a low, wide side table and a pair of weighted floor cushions meant the furniture stopped needing to be monitored and moved with every wind forecast, and the balcony finally felt like a space that could just exist without constant management.
Low-Profile Furniture Tips
Choose furniture with a wide, low base even within the low-profile category:
Stability within the category:
- Not every low piece of furniture is equally wind-resistant; base width still matters significantly
- A low stool with a narrow base can still tip, while a wider, lower bench resists far better
- Apply the same wide-base principle used for planters to furniture selection as well
- Test any new low furniture piece in an actual windy moment before fully committing to the arrangement
Use furniture material and finish that won’t degrade from constant direct wind and weather exposure:
Material durability:
- Windy balconies often mean more direct weather exposure than a sheltered patio would experience
- Choose materials specifically rated for harsh outdoor conditions, not just standard “outdoor” labeling
- This consideration matters more here than on a typical sheltered patio, given the more extreme exposure
- Confirm specific weather ratings before purchasing furniture intended for a genuinely windy space
3. Anchored String Lights at Structural Points
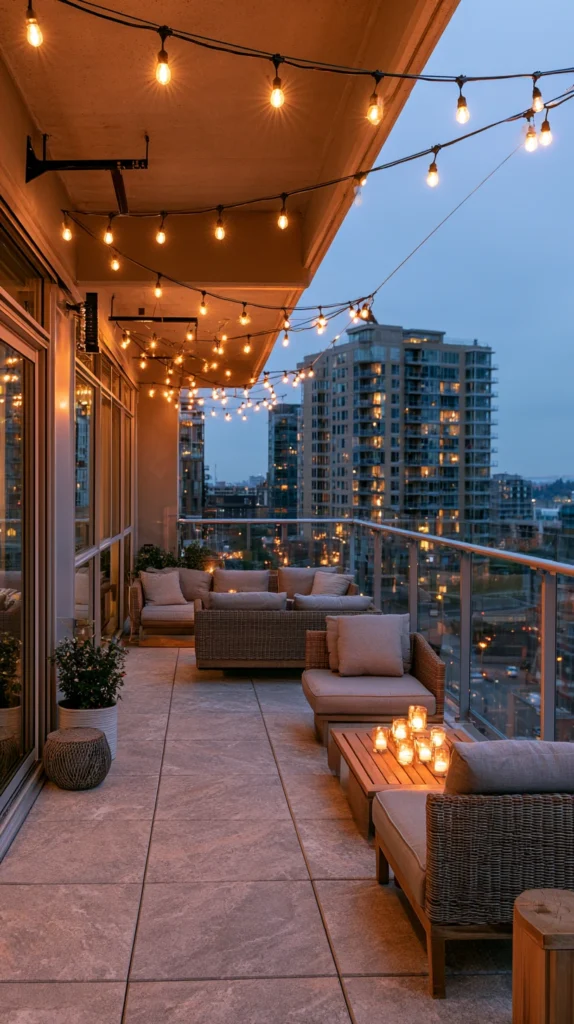
String lights secured directly to structural anchor points, like railing posts or wall-mounted hooks, rather than simply draped loosely.
My string lights that ended up tangled on the ground below:
What I had:
- String lights draped loosely across the railing, which worked fine until the first real gust sent them tangled or torn loose
- A repeated cycle of restringing lights after nearly every windy week
- A desire for the warm evening atmosphere lights provide, without the constant maintenance
The anchored lighting solution:
Why proper anchoring solves this specific frustration entirely:
- Structural anchor points, rather than simple draping, hold string lights securely regardless of wind conditions
- Eliminates the recurring cycle of restringing or replacing lights damaged by repeated wind exposure
- Allows the atmospheric benefit of string lighting without it becoming an ongoing maintenance burden
- A relatively simple hardware fix for what otherwise becomes a frustrating, repetitive problem
Setting up proper anchor points:
Installation approach:
- Install small screw-in hooks directly into railing posts or wall studs rather than balcony rails alone
- Run the string light’s cord taut between anchor points rather than allowing significant sag
- Use zip ties or cable clips at intermediate points along longer runs for additional securing
- Choose a shorter light run if the balcony is small, since shorter spans are inherently more wind-stable than long ones
Cost:
- Screw-in hooks or cable clips: $8-15
- Outdoor-rated string lights: $20-40
My anchored lighting: Installing four small screw hooks at structural points and running the lights taut between them, rather than loosely draping them across the railing, completely solved the tangling and falling problem that had made string lights feel like more trouble than they were worth.
Anchored Lighting Tips
Anchor into actual structural material, not just balcony railing spindles alone:
Hardware placement:
- Thin railing spindles can flex or the hooks can pull loose under sustained wind pressure
- Anchoring into a solid post, a wall stud, or a structural beam provides significantly more reliable holding power
- This distinction matters more the windier the specific balcony’s typical conditions
- Identify the sturdiest available anchor points before finalizing hook placement
Choose LED lights specifically, since they’re lighter weight than incandescent options:
Weight consideration:
- Lighter bulbs put less overall strain on the anchor points and cord itself
- LED string lights have become widely available and are typically the lighter, more wind-appropriate choice
- This small material choice adds up meaningfully across a longer light run
- Also a more energy-efficient and longer-lasting choice independent of the wind consideration
4. A Wind-Resistant Privacy Screen With Gaps
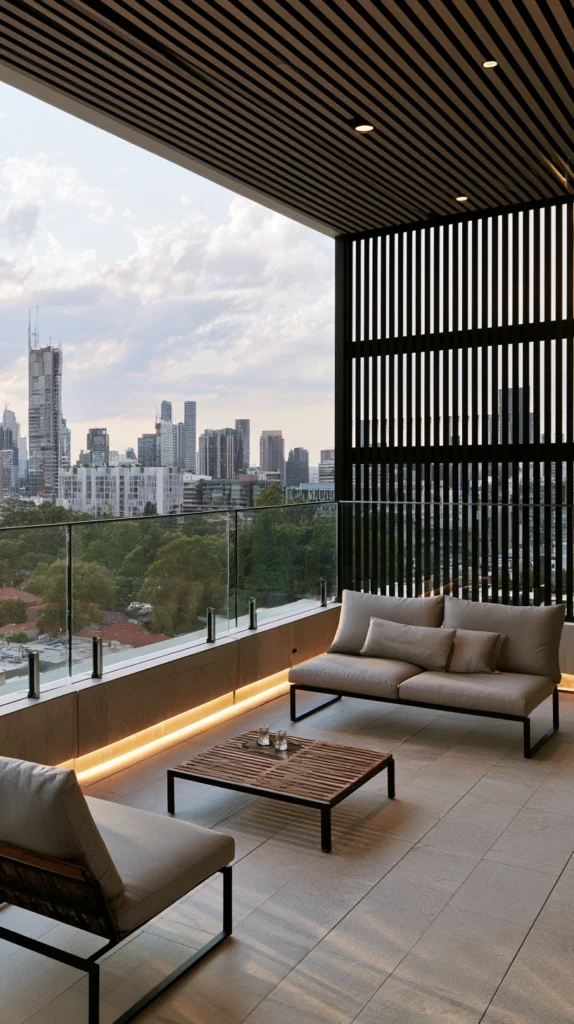
A slatted or perforated privacy screen, rather than a solid panel, allowing wind to pass through rather than pushing against a full flat surface.
My solid screen that became a sail:
What I had:
- A solid fabric or panel screen intended for privacy, which acted like a sail and nearly blew off the balcony in a single strong gust
- A genuine safety concern, given how much force a solid panel catches in real wind
- A need for privacy that a solid screen clearly couldn’t deliver safely at this specific location
The gapped screen solution:
Why a slatted design solves both the privacy and safety problem simultaneously:
- Gaps between slats allow wind to pass through rather than building up pressure against a solid surface
- Still provides genuine visual privacy from most viewing angles, despite not being fully solid
- Dramatically reduces the risk of the screen itself becoming a dangerous, wind-caught object
- The standard professional approach used in genuinely windy exterior design specifically for this reason
Choosing the right screen:
Design options:
- A wood or composite slatted panel with consistent gaps between each board
- A perforated metal screen panel, offering a more modern aesthic with built-in wind permeability
- Woven reed or bamboo screening, providing a more affordable, lighter-weight gapped option
Cost:
- Slatted wood or composite panel: $80-200
- Perforated metal panel: $100-250
- Woven reed screening: $30-70
My gapped privacy screen: Replacing the solid fabric screen with a slatted wood panel solved the safety concern entirely while still providing genuine privacy from the neighboring balcony, and it’s stayed securely in place through wind conditions that would have sent the old solid screen flying.
Gapped Screen Tips
Secure the screen at multiple points along its full height, not just the top or bottom alone:
Installation thoroughness:
- Even a wind-permeable screen benefits from secure mounting at several points rather than just one or two
- Multiple secure attachment points distribute wind load more evenly across the whole structure
- This matters especially for taller screen panels, which have more surface area exposed overall
- Budget for proper mounting hardware as part of the total project cost, not as an afterthought
Choose a gap width that balances privacy with genuine wind permeability:
Finding the right balance:
- Very narrow gaps provide more privacy but also more wind resistance, partially reintroducing the sail effect
- Wider gaps allow better airflow but reduce the actual privacy benefit
- A moderate gap width, roughly matching the width of each individual slat, tends to balance both needs reasonably well
- Consider your actual privacy priority relative to your specific wind conditions when choosing a screen design
5. Ground-Level or Wall-Mounted Decor Instead of Freestanding
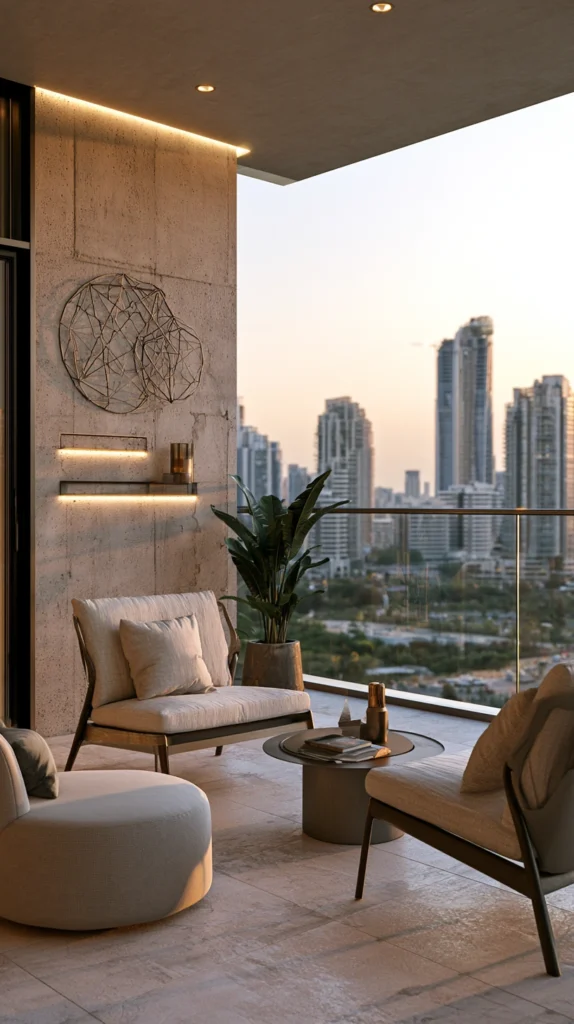
Wall-mounted decorative elements and ground-level accents replacing freestanding decor items prone to blowing over or away.
My freestanding decor that kept disappearing:
What I had:
- Small freestanding decorative items, a lantern, a small statue, a decorative sign, that regularly blew over or off the balcony entirely
- A frustrating pattern of losing or replacing small decor pieces after nearly every windy day
- A hesitancy to add any new decorative touches given the track record
The wall-mounted decor solution:
Why moving decor off the floor and onto the wall solves the problem directly:
- Wall-mounted items simply can’t blow away the way freestanding pieces can
- Removes the entire category of risk rather than trying to weight or secure freestanding items after the fact
- Opens up decorating options that would otherwise be too risky to place on an exposed, windy balcony
- One of the more straightforward mindset shifts for approaching decor on a genuinely windy space
Choosing wall-mounted alternatives:
Decor ideas:
- Wall-mounted planters or a vertical garden system instead of freestanding pots
- A securely mounted piece of outdoor art or a metal wall sculpture
- Wall-mounted lanterns or sconces instead of freestanding lantern decor
- A mounted chalkboard or small sign, securely screwed rather than simply propped
Cost:
- Wall-mounted planters: $20-50 each
- Outdoor wall art or sculpture: $40-150
- Wall-mounted lanterns: $25-60 each
My wall-mounted decor: Moving away from freestanding lanterns and small statues entirely, in favor of a wall-mounted planter system and a securely screwed metal sun sculpture, finally let me add real personality to the balcony without losing a single piece to the wind since making the switch.
Wall-Mounted Decor Tips
Use anchors rated for the specific wall or railing material you’re mounting into:
Hardware matching:
- Concrete, brick, wood, and metal railings all require different anchor types for a secure hold
- Using the wrong anchor type for the actual material risks the mounted item eventually pulling loose
- Confirm the correct anchor and hardware type for your specific balcony construction before installing anything
- A hardware store employee can typically help identify the right anchor type if you’re unsure
Check mounted items periodically for any loosening over time:
Ongoing maintenance:
- Constant wind exposure and vibration can gradually loosen even properly installed hardware over months of use
- A quick periodic check, tightening anything that’s begun to loosen, prevents an eventual failure
- This is a small, easy habit that meaningfully protects both the decor item and anyone below the balcony
- Worth doing at the start of each new season at minimum
6. A Windbreak Panel at the Balcony’s Most Exposed Point
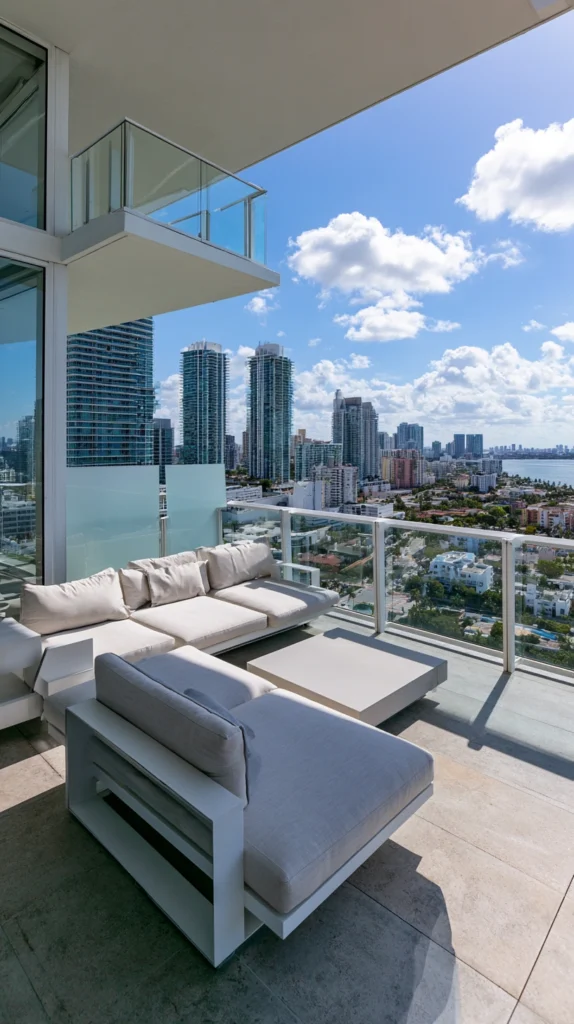
A single dedicated windbreak, whether a solid panel section, a dense planting, or a mesh screen, positioned specifically at the balcony’s primary wind entry point.
My whole balcony affected by wind coming from one specific direction:
What I had:
- Wind consistently entering from one particular direction, affecting the entire usable space
- No single element addressing this specific entry point directly
- Every other decorating decision made harder by not addressing the actual source of the problem first
The targeted windbreak solution:
Why addressing the specific entry point matters more than general wind-resistant choices alone:
- Identifying and blocking the primary wind direction reduces the overall wind impact across the whole balcony
- More effective than trying to wind-proof every single item without addressing the source
- Creates a genuinely calmer zone behind the windbreak, where more standard furniture and decor choices become viable
- One of the more strategic, high-leverage changes available, since it affects everything else on the balcony
Choosing the right windbreak:
Options based on balcony type:
- A solid panel section specifically at the identified wind entry point, secured robustly given its role
- A dense row of wind-tolerant plants in heavy planters, serving as a living windbreak
- A mesh or shade cloth panel, offering partial wind reduction with less visual weight than a solid option
Cost:
- A dedicated solid panel section: $60-150
- Dense planting windbreak (multiple heavy planters and plants): $150-350
- Mesh or shade cloth panel: $30-70
My targeted windbreak: Identifying that wind consistently entered from the northwest corner and installing a single solid panel section specifically there made a noticeable difference across the entire balcony, creating a genuinely calmer zone where standard furniture finally became viable.
Windbreak Tips
Spend time actually observing your specific wind pattern before choosing a windbreak location:
Observation before action:
- Wind direction and intensity often varies more specifically by exact location than people initially assume
- Spend a few different windy days simply observing where the wind seems to enter and how it moves across the space
- This observation period, though it requires patience, ensures the windbreak actually gets placed where it will do the most good
- A windbreak placed based on assumption rather than observation may not deliver the expected improvement
Secure a solid windbreak panel more robustly than you might for a typical decorative screen:
Structural consideration:
- A windbreak is, by definition, absorbing significant wind force that would otherwise hit the rest of the balcony
- This means it needs more robust anchoring than a purely decorative element positioned in a more sheltered spot
- Consider professional installation for a more substantial windbreak panel, particularly on a higher-floor balcony
- This is not an area to under-invest in, given both the structural stakes and what’s below the balcony
7. Battery-Powered or Solar Lighting Over Corded Options
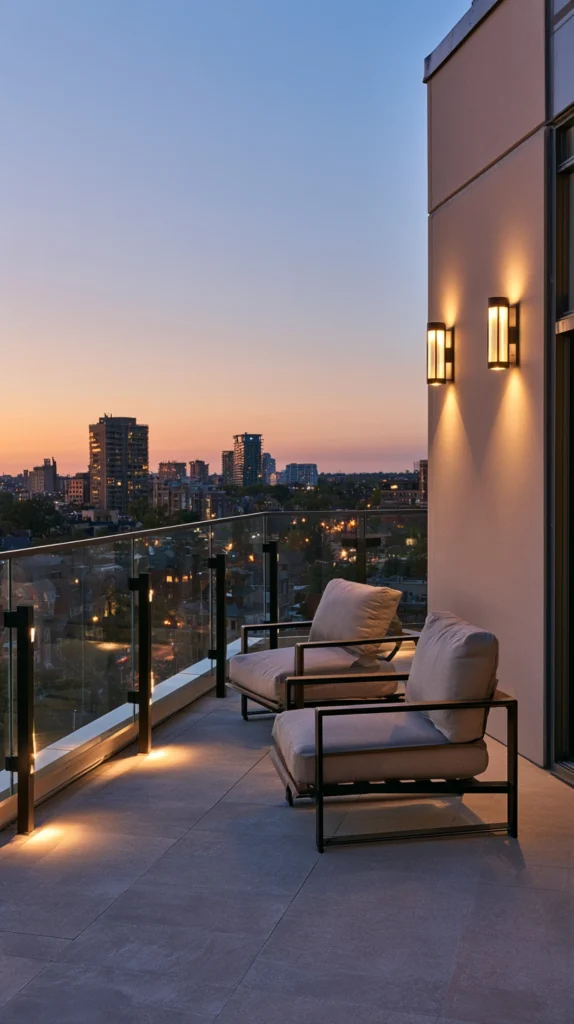
Battery-powered and solar lighting fixtures replacing corded electric lighting, eliminating loose cords that can catch wind or create tripping hazards.
My tangled extension cord problem:
What I had:
- A single corded lighting setup with an extension cord running across the balcony floor
- A cord that whipped around in wind and created both an eyesore and a genuine tripping hazard
- A lighting setup that felt more like a hazard to manage than an atmospheric addition to enjoy
The battery and solar lighting solution:
Why eliminating cords entirely solves multiple problems at once:
- Removes the specific hazard of a loose cord whipping around in wind
- Battery and solar options have improved significantly in both brightness and reliability in recent years
- Simplifies the entire lighting setup, since there’s no cord routing or extension cord management involved at all
- One of the more straightforward swaps available for meaningfully improving both safety and appearance
Choosing the right fixtures:
Options to consider:
- Solar-powered string lights or lanterns, charging during the day and running automatically each evening
- Battery-powered LED puck lights or lanterns for spots without reliable direct sun exposure
- A combination of both, using solar for exposed areas and battery-powered for shadier corners
Cost:
- Solar string lights: $20-40
- Battery-powered lanterns or puck lights (set of 4-6): $25-50
My cordless lighting switch: Replacing the corded lighting setup entirely with a mix of solar string lights and a few battery lanterns eliminated the tripping hazard and the constant cord management, and the lighting itself has actually looked more consistent since making the change.
Cordless Lighting Tips
Position solar panels or collection points where they’ll genuinely receive several hours of direct sun daily:
Charging reliability:
- A solar light positioned in a shaded or partially blocked spot won’t charge adequately and will underperform after dark
- Confirm actual sun exposure at the specific mounting location before committing to solar over battery options
- This consideration prevents disappointment with a solar product that seemed like it should work but doesn’t in practice
- A battery-powered alternative may be the better choice for any spot that doesn’t get reliable direct sun
Keep spare batteries on hand for any battery-powered fixtures:
Practical maintenance:
- Battery-powered lights require periodic replacement, and running out at an inconvenient moment is a common frustration
- Keeping a small stock of the correct battery size on hand avoids this recurring minor annoyance
- This is a small, low-cost habit that keeps the lighting setup reliably functional
- Rechargeable batteries are worth considering for fixtures used regularly, reducing both cost and waste over time
8. A Secured Outdoor Rug With Corner Weights or Adhesive Grip
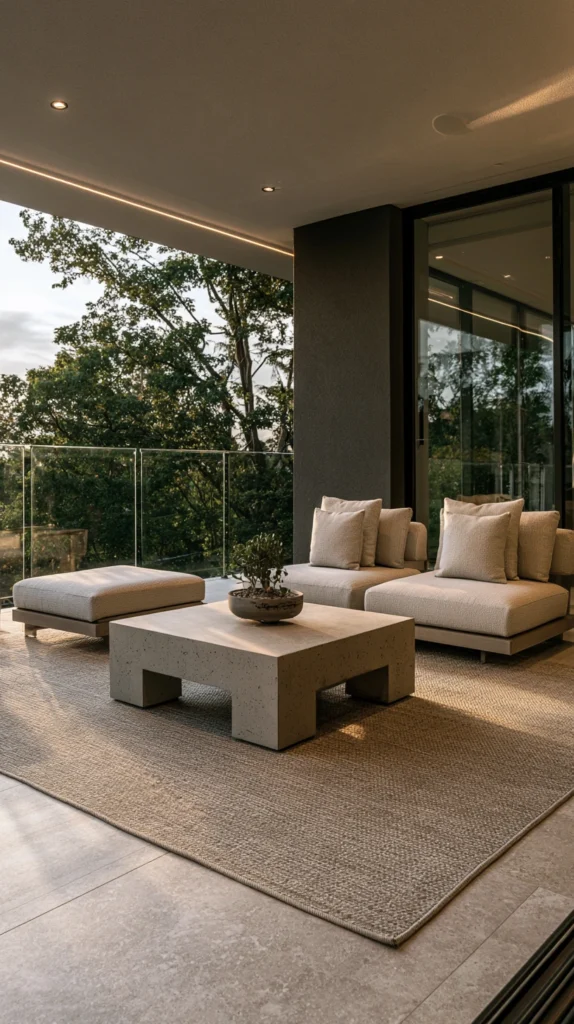
An outdoor rug secured specifically against wind lift, using corner weights, double-sided outdoor tape, or a rug pad with grip backing.
My rug that kept flipping up at the edges:
What I had:
- An outdoor rug that constantly flipped up at the corners and edges in wind, creating both a tripping hazard and a source of ongoing frustration
- A rug that had genuinely improved the space visually but felt like more trouble than it was worth
- No real securing method beyond hoping the rug’s own weight would be enough, which it clearly wasn’t
The secured rug solution:
Why proper securing methods solve this specific frustration:
- Corner weights or adhesive strips address the exact point where wind actually catches and lifts a rug
- Allows the genuine visual and comfort benefit of an outdoor rug without the constant re-flattening frustration
- A relatively simple, low-cost fix for a problem that otherwise makes an outdoor rug feel impractical on a windy balcony
- Solves the issue directly rather than requiring a heavier, more expensive rug as the only alternative
Securing methods to use:
Options and approaches:
- Rug corner weights, specifically designed small weighted discs that tuck under each corner
- Outdoor-rated double-sided carpet tape applied around the rug’s full perimeter
- A non-slip rug pad with a grippy underside, adding both cushioning and wind resistance
Cost:
- Rug corner weights (set of 4): $15-30
- Outdoor double-sided tape: $10-20
- Non-slip rug pad: $20-45
My secured rug: Adding corner weights combined with a strip of outdoor double-sided tape around the full perimeter completely stopped the flipping and lifting problem, and the rug has stayed flat and in place through wind conditions that previously would have sent it curling up within minutes.
Secured Rug Tips
Combine two securing methods rather than relying on just one:
Layered security approach:
- Corner weights alone may not fully address lifting along the rug’s edges between corners
- Combining weights at the corners with tape along the full perimeter addresses both specific failure points
- This layered approach is more reliable than betting on any single method fully solving the problem
- The combined cost is still relatively low compared to how much frustration it eliminates
Choose a rug material and weave that inherently resists wind lift better than a lightweight, loose weave:
Material consideration:
- A denser, tighter weave rug is inherently heavier and less prone to catching wind than a loose, lightweight weave
- This material choice works alongside, not instead of, the physical securing methods described above
- Consider this factor when initially selecting a rug for a genuinely windy space, not just after the fact
- A slightly higher-quality, denser rug often costs a bit more but delivers meaningfully better wind performance
9. Wind-Tolerant Plant Varieties Over Delicate Species
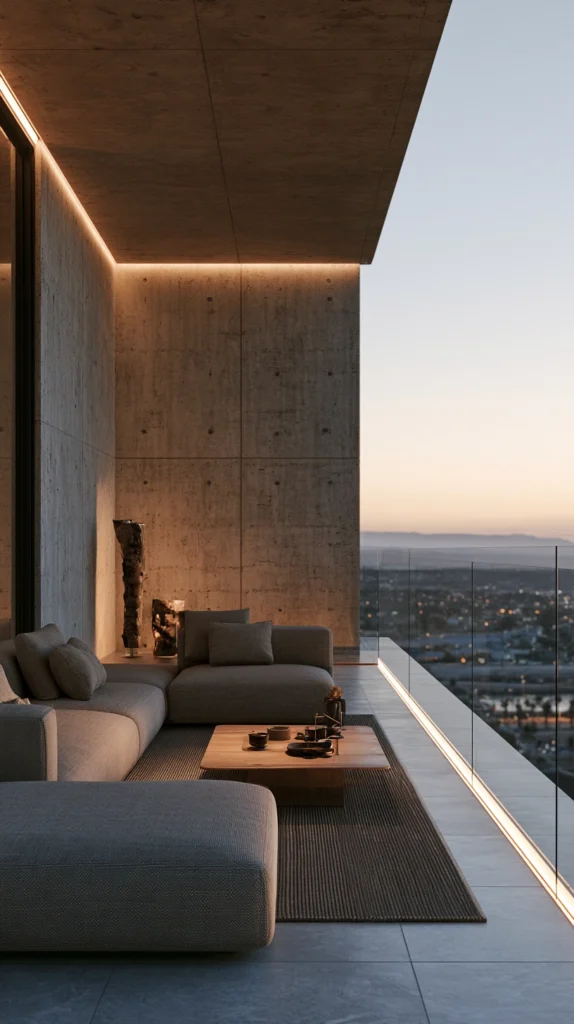
Choosing plants specifically known for wind tolerance, rather than delicate or top-heavy varieties that snap or shred in consistent wind exposure.
My repeatedly damaged, delicate plants:
What I had:
- Beautiful but delicate flowering plants that consistently got shredded, snapped, or blown right out of their pots
- A pattern of buying plants that looked lovely in the store but simply weren’t suited to the balcony’s actual conditions
- Real frustration at the ongoing plant replacement cost and the disappointment of watching each new plant struggle
The wind-tolerant plant solution:
Why matching plant choice to actual conditions solves an ongoing struggle:
- Certain plant varieties have naturally sturdier stems, smaller leaves, or lower growth habits that genuinely resist wind damage
- Solves the problem at the plant-selection stage, rather than trying to protect an inherently unsuited plant after the fact
- Significantly reduces the ongoing replacement cost and disappointment of plants that simply can’t handle the conditions
- One of the more satisfying changes, since it finally allows genuine gardening success on a previously frustrating balcony
Plant options for windy conditions:
Varieties known for wind tolerance:
- Ornamental grasses, which are naturally adapted to bending and flexing in wind without breaking
- Succulents and sedums, with sturdy, low-growing structures less prone to wind damage
- Lavender, rosemary, and other Mediterranean herbs, naturally adapted to breezy, exposed conditions
- Compact, low-growing flowering varieties over tall, top-heavy blooms
Cost:
- Wind-tolerant plants (per plant): $8-20, similar in cost to more delicate alternatives but with a far better survival rate
My wind-tolerant planting switch: Replacing several delicate flowering annuals with ornamental grasses, sedums, and rosemary meant the balcony finally had thriving, established plants instead of a revolving door of replacements, and the overall look actually reads as more considered and intentional as a result.
Wind-Tolerant Plant Tips
Research specific plant varieties rather than relying on general category assumptions:
Specificity matters:
- Not every plant within a generally hardy category performs equally well in wind specifically
- A quick search for “wind-tolerant” varieties within a category you’re interested in reveals more specific, reliable options
- This extra research step meaningfully improves the odds of actual success compared to a general guess
- A local nursery familiar with your specific climate can also offer targeted recommendations for wind-exposed balconies
Prune and pinch back top growth periodically to keep plants from becoming top-heavy:
Ongoing plant maintenance:
- Even wind-tolerant plants can become more vulnerable if allowed to grow tall and top-heavy without any pruning
- Regular light pruning keeps the plant’s overall shape more compact and wind-resistant over time
- This small maintenance habit extends the benefit of choosing wind-tolerant varieties in the first place
- Worth building into a regular balcony gardening routine rather than treating pruning as optional
10. A Retractable or Foldable Awning Instead of a Fixed Umbrella
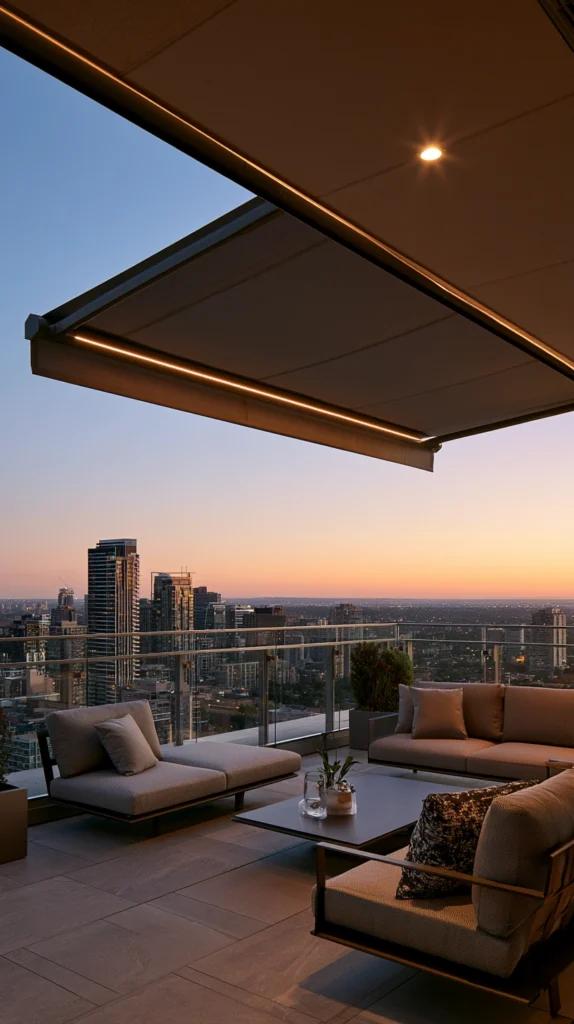
A wall-mounted retractable awning, or a foldable shade sail, replacing a standard umbrella that catches wind and becomes an actual projectile risk.
My umbrella that became genuinely dangerous:
What I had:
- A standard patio umbrella that had actually taken flight off the balcony during a particularly strong gust
- A real safety concern, given the balcony’s height and what an airborne umbrella could do below
- A continued desire for shade without repeating the same dangerous situation
The retractable shade solution:
Why this alternative solves the umbrella’s fundamental wind problem:
- A retractable awning can be closed entirely during high-wind conditions, removing the risk completely when not needed
- Mounted directly to the wall, eliminating the tipping and flying risk inherent to a freestanding umbrella base
- Provides genuine shade during calmer conditions without the standing safety hazard of an open umbrella
- One of the more significant safety-focused upgrades available for a windy balcony specifically
Choosing the right shade solution:
Options to consider:
- A wall-mounted retractable awning, manually cranked or motorized, that folds flat against the wall when not in use
- A foldable shade sail, secured at multiple wall or railing points, that can be taken down entirely in high wind
- A smaller, low-profile shade cloth panel as a more budget-friendly, though less substantial, alternative
Cost:
- Manual retractable awning: $200-600
- Foldable shade sail: $40-100
- Basic shade cloth panel: $20-50
My retractable awning: Installing a small manually operated retractable awning solved the safety problem entirely, since it folds flat against the wall the moment wind picks up, while still providing genuine shade during the many calmer afternoons when it’s actually usable.
Retractable Shade Tips
Confirm the awning or shade solution’s specific wind rating before purchasing:
Product verification:
- Products vary significantly in how much wind exposure they’re actually designed to handle even when extended
- Check the manufacturer’s specific wind rating and recommendations before committing to a purchase
- This verification prevents investing in a product that isn’t actually suited to a genuinely windy balcony’s conditions
- When in doubt, err toward a product explicitly marketed for higher-wind exposure situations
Build the habit of retracting or folding the shade proactively, not reactively:
Behavioral habit:
- Waiting until wind is already strong to retract a shade structure risks it happening too late
- Checking the forecast and retracting proactively, before wind actually picks up, is a safer standard practice
- This habit matters more on a high or exposed balcony, where the consequences of a failure are more significant
- Treat this as a non-negotiable routine rather than an occasional afterthought
11. A Mesh or Perforated Balcony Rail Cover
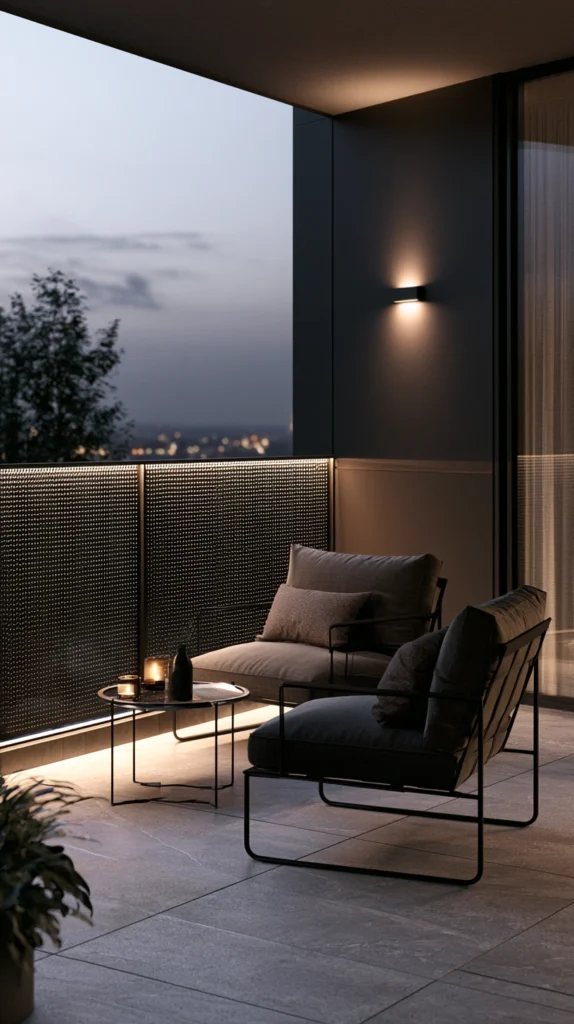
A mesh or perforated privacy and safety cover applied to the balcony railing itself, addressing both airflow and any gaps a strong wind might otherwise exploit.
My railing with uncomfortable, unaddressed gaps:
What I had:
- A standard railing with open gaps that let small items, and occasionally strong gusts, pass directly through
- A slight but real concern about small decor items or plant debris being pushed straight through the railing gaps
- No particular privacy from the railing itself, in addition to the airflow consideration
The mesh rail cover solution:
Why this addresses a specific gap other wind solutions don’t:
- A mesh or perforated cover reduces what can pass directly through the railing without fully blocking airflow the way a solid panel would
- Adds a layer of privacy and containment beyond what the open railing structure alone provides
- Specifically useful for balconies with wider gaps between railing bars or slats
- Complements other wind-resistant choices on this list rather than replacing them
Choosing the right cover:
Material options:
- A weatherproof mesh screen, zip-tied or clipped along the full railing length
- A perforated metal or vinyl panel, offering more structure than fabric mesh
- Removable panels, allowing the cover to come down entirely during particularly severe weather
Cost:
- Weatherproof mesh screening: $30-70 for a standard balcony railing length
- Perforated panel covering: $60-150
My mesh rail cover: Adding a simple weatherproof mesh cover along the railing addressed the gap concern directly, without blocking the airflow the way a solid panel would have, and it’s held up well through a full season of regular wind exposure.
Mesh Rail Cover Tips
Choose a mesh density that balances your specific privacy and containment needs with airflow:
Density selection:
- A denser mesh provides more privacy and containment but also more wind resistance
- A more open mesh allows better airflow but offers less privacy benefit
- Consider your actual priority, privacy versus airflow, before selecting a specific mesh density
- Samples are often available from suppliers, letting you assess the actual density in person before a full purchase
Check attachment points regularly, since railing-mounted covers see constant wind exposure:
Ongoing maintenance:
- Zip ties, clips, or other attachment hardware can wear or loosen faster here than in more sheltered mounting locations
- A regular check, tightening or replacing any worn attachment points, prevents an eventual full detachment
- This is a small maintenance habit worth building into a regular balcony check routine
- Address any wear promptly, given both the safety and the aesthetic stakes of a failed attachment
12. A Seasonal Storage Routine for Vulnerable Items
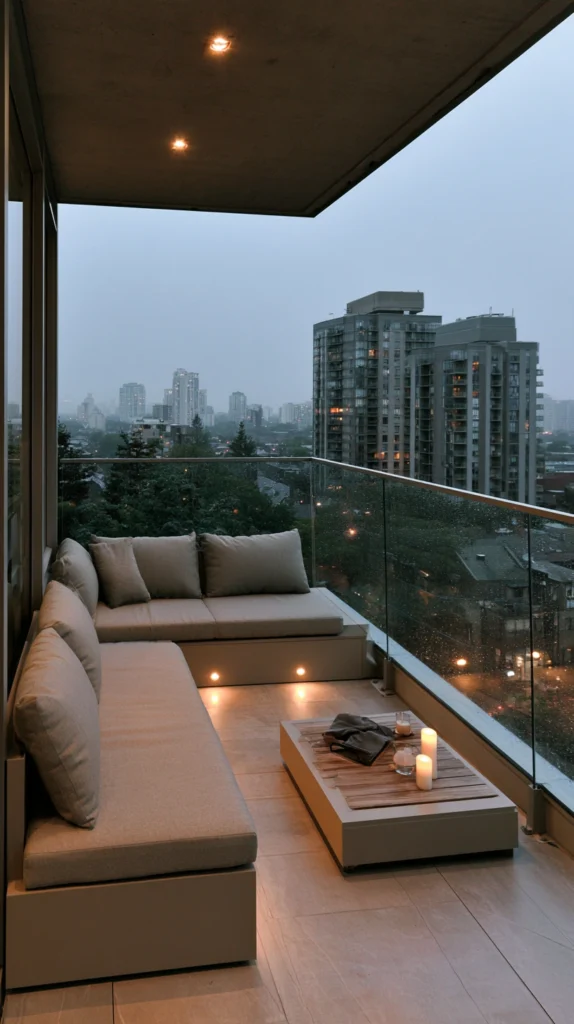
A dedicated routine for bringing lighter, more vulnerable decor items inside ahead of known high-wind weather events, rather than leaving everything out year-round regardless of conditions.
My habit of leaving everything out regardless of forecast:
What I had:
- A habit of decorating the balcony once and leaving everything in place indefinitely, regardless of upcoming weather
- Repeated losses of smaller, lighter items during forecasted high-wind events that could have been anticipated
- No actual routine or system for managing the balcony’s decor relative to changing conditions
The seasonal storage routine solution:
Why a proactive routine solves problems the other ideas on this list can’t fully address:
- Some items, however nice, simply aren’t going to be fully wind-proof regardless of securing methods
- A quick check of the forecast, with lighter items brought inside ahead of known severe wind events, prevents entirely avoidable losses
- This complements, rather than replaces, the structural and material choices described throughout this list
- One of the lowest-cost, highest-value habits available, since it costs nothing beyond a few minutes of attention
Building the routine:
Practical approach:
- Check the forecast specifically for wind advisories or unusually high sustained wind predictions
- Keep a small, easily accessible storage bin or closet specifically for balcony items that need to come inside temporarily
- Identify in advance which items on the balcony are genuinely wind-secure versus which ones still need this kind of active management
- Build this check into an existing routine, like a weekly weather check already being done for other reasons
Cost:
- A storage bin or accessible closet space: $0-30 if a new bin is needed
My storage routine: Simply checking the forecast each week and bringing in the handful of items that still aren’t fully wind-secure, a small lantern, a couple of throw pillows, ahead of any forecasted high-wind days, eliminated nearly all the remaining occasional losses that the structural changes alone hadn’t fully addressed.
Storage Routine Tips
Identify your specific “still vulnerable” items honestly, rather than assuming everything is now fully wind-proof:
Honest assessment:
- Even after making several wind-resistant upgrades, some smaller or more delicate items may still need occasional active management
- Take stock of what’s genuinely secure versus what still benefits from being brought in during severe conditions
- This honest assessment prevents assuming a false sense of complete security after making some, but not all, possible upgrades
- Revisit this assessment periodically as the overall balcony setup continues to evolve
Keep the storage process genuinely simple to ensure the routine actually gets followed:
Sustainability of the habit:
- A complicated or time-consuming storage process is less likely to actually happen consistently
- A single easily accessible bin near the balcony door, rather than items stored in multiple scattered locations, keeps the process quick
- This simplicity is what separates a routine that becomes a lasting habit from one that gets skipped after a few weeks
- Design the system around actual realistic behavior, not an idealized version of how diligent you’ll be
Choosing Your Windy Balcony Projects
By Priority
Address safety first:
- A retractable or foldable awning instead of a fixed umbrella (idea 10)
- A windbreak panel at the balcony’s most exposed point (idea 6)
- Battery-powered or solar lighting over corded options (idea 7)
Solve the most common daily frustrations:
- Weighted planters instead of lightweight pots (idea 1)
- A secured outdoor rug (idea 8)
- Anchored string lights at structural points (idea 3)
Build long-term resilience:
- Wind-tolerant plant varieties (idea 9)
- Low-profile furniture over tall pieces (idea 2)
- A seasonal storage routine (idea 12)
By Effort Level
Lowest effort:
- A seasonal storage routine (idea 12)
- Battery-powered or solar lighting (idea 7)
- Wind-tolerant plant varieties (idea 9)
Medium effort:
- Weighted planters (idea 1)
- A secured outdoor rug (idea 8)
- Anchored string lights (idea 3)
- Wall-mounted decor instead of freestanding (idea 5)
Higher commitment:
- A wind-resistant privacy screen with gaps (idea 4)
- A windbreak panel (idea 6)
- A retractable awning (idea 10)
- A mesh balcony rail cover (idea 11)
By Budget
Under $75:
- A seasonal storage routine (idea 12)
- A secured outdoor rug (idea 8)
- Anchored string lights (idea 3)
- Battery or solar lighting (idea 7)
$75-250:
- Weighted planters (idea 1)
- Low-profile furniture (idea 2)
- Wall-mounted decor (idea 5)
- A mesh balcony rail cover (idea 11)
$250+:
- A wind-resistant privacy screen (idea 4)
- A windbreak panel (idea 6)
- A retractable awning (idea 10)
Maintenance Through the Seasons
Spring:
- Reassess plant choices and replace anything that struggled through winter wind exposure
- Check all mounting hardware and anchors after winter weather for any loosening
Summer:
- Monitor the retractable awning or shade sail’s condition given increased peak-season use
- Refresh the seasonal storage routine as outdoor entertaining picks up
Fall:
- Increase forecast-checking frequency as wind patterns often shift seasonally
- Bring in any items not rated for winter exposure ahead of the colder months
Winter:
- Store more delicate items for the season if the balcony sees minimal winter use
- Plan any structural upgrades, like a windbreak or awning, for installation before next spring
My Complete Windy Balcony Journey
What I built across two years:
Year one ($310):
- Weighted concrete planters replacing all lightweight pots
- Anchored string lights at proper structural points
- A secured outdoor rug with corner weights and tape
- Learned that most of the recurring frustration came from a handful of specific, fixable weak points, not the wind itself being unsolvable
Year two ($480):
- A slatted wood windbreak panel at the balcony’s main wind entry point
- A small retractable awning replacing the umbrella that had actually blown away
- Wind-tolerant plants replacing the delicate varieties that never survived
- Learned that addressing the wind at its actual entry point improved everything else on the balcony simultaneously
Total investment: $790 across two years Most important lesson: Wind resistance is about weight, anchoring, and shape more than it is about spending more money on “nicer” items Single highest-impact change across both years: The windbreak panel, since it made every other decorating decision on the balcony noticeably easier afterward
Getting Started This Weekend
Start with the items causing the most repeated frustration, not a full redesign.
This weekend:
Step 1 — Identify your specific wind entry point:
- Spend part of a windy day simply observing where and how wind actually moves across your balcony
- This single observation informs nearly every other decision on this list
Step 2 — Swap your lightest, most frequently tipped planters for heavier ones:
- Even replacing just one or two of the worst offenders makes an immediate difference
- Add gravel or sand to the base of any planters you’re keeping for extra stability
Step 3 — Secure your rug and anchor any string lights properly:
- Both are quick, low-cost fixes for two of the most commonly frustrating windy balcony problems
- These changes are often noticeable within the very next windy day
Step 4 — Start a simple forecast-check habit for the items still not fully secured:
- Costs nothing and immediately reduces the risk of losing anything else to an unexpected gust
My recommendation:
Start with weighted planters and a secured rug:
- Both are achievable in a single weekend with materials available at most hardware or garden stores
- Both address two of the most commonly frustrating, recurring windy balcony problems directly
- This foundation makes it much easier to evaluate what other changes the space genuinely needs next
Sit outside on the next windy day, once both changes are in place, and notice what still moves or feels unstable before planning your next project.
Now go build the windy balcony that finally feels like a real outdoor space instead of a monthly cleanup project.
Quick Summary
The 12 windy balcony ideas for wind-resistant outdoor decor:
Foundational fixes:
- Weighted planters instead of lightweight pots (idea 1): solves the most commonly recurring frustration
- Low-profile furniture over tall pieces (idea 2): reduces wind exposure at the furniture level
- A secured outdoor rug (idea 8): stops the flipping and lifting problem directly
Safety-focused upgrades:
- A wind-resistant privacy screen with gaps (idea 4): privacy without the sail effect
- A windbreak panel at the exposed point (idea 6): addresses wind at its actual source
- A retractable or foldable awning (idea 10): shade without the projectile risk of a standard umbrella
- A mesh balcony rail cover (idea 11): addresses gaps a standard railing leaves open
Lighting and smaller details:
- Anchored string lights at structural points (idea 3): ends the tangling and falling cycle
- Battery-powered or solar lighting (idea 7): removes cord-related hazards entirely
- Wall-mounted decor instead of freestanding (idea 5): removes an entire category of wind risk
Long-term resilience:
- Wind-tolerant plant varieties (idea 9): matches plant choice to actual conditions
- A seasonal storage routine (idea 12): the lowest-cost, highest-value ongoing habit
The universal windy balcony rules:
Always:
- Choose weight and low profile over height and visual drama for every item
- Anchor into genuine structural points, not just railing spindles or loose placement
- Match plant and material choices specifically to actual wind conditions
- Build a simple forecast-checking habit for anything not fully wind-secured
Never:
- Choose furniture or decor the same way you would for a fully sheltered space
- Rely on an item’s own weight alone without genuine anchoring or securing
- Leave a solid, sail-like structure (an umbrella, a solid screen) unaddressed in a high-wind zone
- Assume a windy balcony can’t be a genuinely usable, decorated space
Common mistakes:
- Buying furniture and decor based on looks alone without ever factoring in wind resistance
- Treating wind as an unsolvable problem rather than addressing it at its specific entry point
- Leaving freestanding items on the floor when a wall-mounted alternative would remove the risk entirely
- Choosing delicate plant varieties poorly suited to the balcony’s actual conditions
- Never developing a simple routine for the handful of items that still need active management
Remember: wind resistance comes down to weight, anchoring, and shape far more than it comes down to spending more money, addressing the specific wind entry point improves everything else on the balcony simultaneously, moving decor off the floor and onto the wall removes an entire category of risk, matching plant and material choices to actual conditions solves problems generic choices never will, and the best windy balcony transformation is the one where you stop thinking about the wind at all once you’re actually out there enjoying the space.