
15 DIY Halloween Yard Decor Ideas on a Budget
My yard used to get one plastic pumpkin bucket by the front door every October and nothing else. I told myself decorations were expensive and I’d get to it “next year.”
I kept assuming a genuinely spooky, photo-worthy yard required a garage full of purchased props and a few hundred dollars at the seasonal store. Then I started noticing that the yards people actually stopped their cars to look at weren’t necessarily the most expensive ones, they were the ones with a few clever, well-executed DIY pieces that looked far more elaborate than they actually cost.
I started small. A few cardboard tombstones cut from old moving boxes. Milk jugs turned into glowing pumpkin lights. A trash bag stretched and cut into a spider silhouette on the garage door.
Within a single October, that same forgettable front yard became the house kids specifically asked to walk past, assuming we’d ordered everything from a specialty Halloween shop.
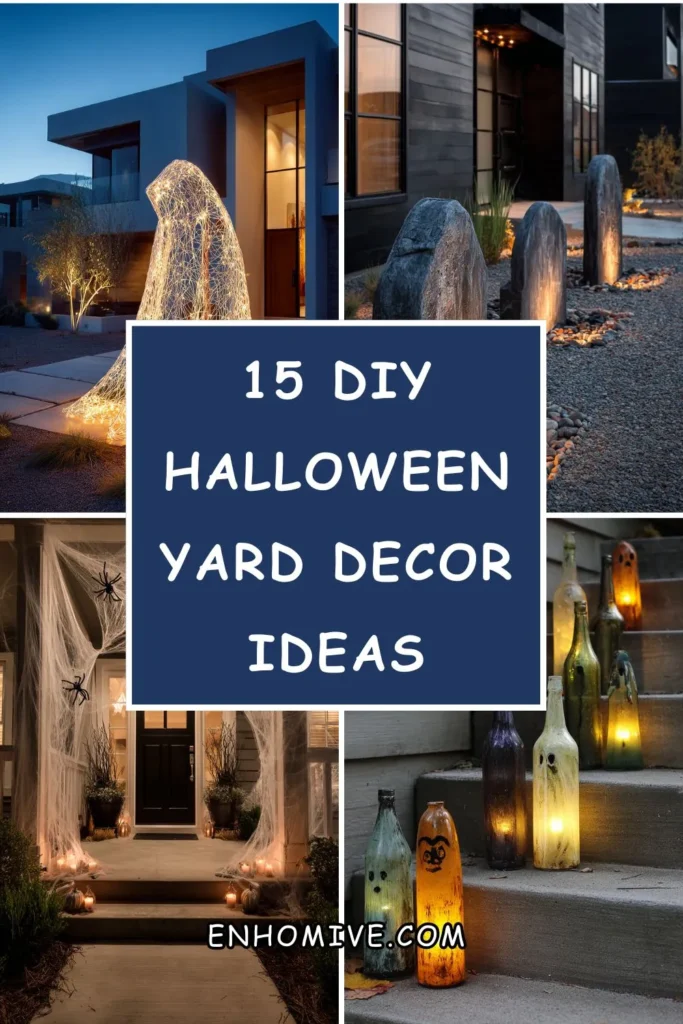
Here are 15 DIY ideas that make any yard look like a genuinely elaborate Halloween display, for a fraction of what it looks like it cost.
Why Most DIY Halloween Yards Look Cheap Instead of Spooky
The common mistakes:
The single-item approach:
- One plastic pumpkin or a single inflatable prop sitting alone in an otherwise bare yard
- No sense of a cohesive scene, just isolated objects scattered without relationship to each other
- A yard that reads as “we own one Halloween thing” rather than genuinely decorated
- Individual items, however nice, rarely add up to a real display on their own
The daytime-only display:
- Every decoration chosen and placed based only on how it looks in daylight
- No lighting plan for the evening hours, which is when Halloween decor actually gets seen by trick-or-treaters and neighbors
- A collection that looks like scattered clutter after dark instead of an intentional scene
- Missing the reality that most people experience holiday yard decor specifically at night
The flat, ground-level layout:
- Everything placed directly on the lawn at the same low height
- No vertical elements drawing the eye upward or creating any real depth
- A display that reads as smaller and less impressive than it actually is because nothing varies in height
- Missed opportunity to use trees, the porch, windows, and the air above the ground
What a successful budget Halloween yard does:
Builds a cohesive scene, not a scattered collection:
- A few well-executed DIY pieces working together rather than many disconnected items
- Real evening lighting planned specifically for how the display will actually be seen
- Height variation using trees, stakes, and porch elements, not just ground-level props
- A display designed to be discovered gradually, the way a real haunted attraction paces itself
My revelation: A Halloween yard looks elaborate the moment the pieces work together as one scene, not the moment more money gets spent on individual props.
1. Cardboard Tombstones From Moving Boxes
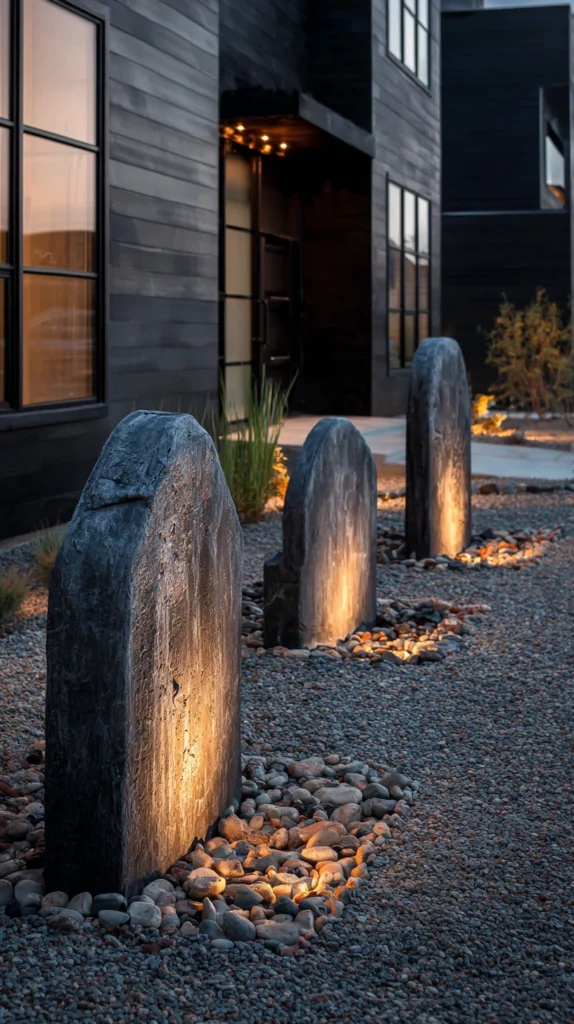
Flat tombstone shapes cut from cardboard, painted, and staked into the lawn to create an instant graveyard scene.
My yard with no graveyard scene at all:
What I had:
- A stack of leftover moving boxes sitting in the garage with no other purpose
- A desire for a classic graveyard display without the cost of purchased foam tombstones
- An empty front lawn that felt like it needed some kind of grounded, thematic element
The cardboard tombstone discovery:
Why this project delivers such a convincing result for almost no cost:
- Uses material that would otherwise be thrown away or recycled
- Painted and textured properly, cardboard reads convincingly as aged stone from typical yard viewing distance
- Endlessly customizable in shape, size, and the epitaphs written on each one
- One of the highest-volume, lowest-cost ways to fill a graveyard scene with genuine variety
Building the tombstones:
Construction steps:
- Cut classic rounded-top tombstone shapes from flattened cardboard boxes
- Reinforce each one by gluing two layers of cardboard together for added sturdiness
- Paint with a gray base coat, then add black and white dry-brushing for a weathered stone texture
- Attach a wood stake or dowel to the back with strong tape or hot glue for ground insertion
Cost:
- Cardboard: free from existing boxes
- Paint (gray, black, white): $15-25
- Wood stakes or dowels: $5-10 for a full set
My tombstone graveyard: Cutting eight varied tombstone shapes from old moving boxes and painting them with a simple gray wash and black dry-brushing, at a total cost under $30, created a graveyard scene neighbors regularly compare to a store-bought version.
Cardboard Tombstone Tips
Waterproof the finished tombstones with an outdoor sealant spray:
Weather protection:
- Untreated cardboard will sag and disintegrate quickly if exposed to rain or heavy dew
- A clear outdoor sealant spray, applied after painting, adds meaningful water resistance
- This step is what allows the tombstones to survive the full month leading up to Halloween outdoors
- Skipping this step is the most common reason DIY cardboard props don’t last the season
Vary the heights and angles of each tombstone rather than lining them up evenly:
Layout authenticity:
- A perfectly even row of identical-height tombstones looks obviously artificial
- Staggering heights and tilting a few slightly creates the aged, settled look of a real old graveyard
- This small styling choice significantly affects how convincing the overall scene reads
- Arrange and rearrange a few times before finalizing the stake positions in the ground
2. Milk Jug Pumpkin and Ghost Luminaries
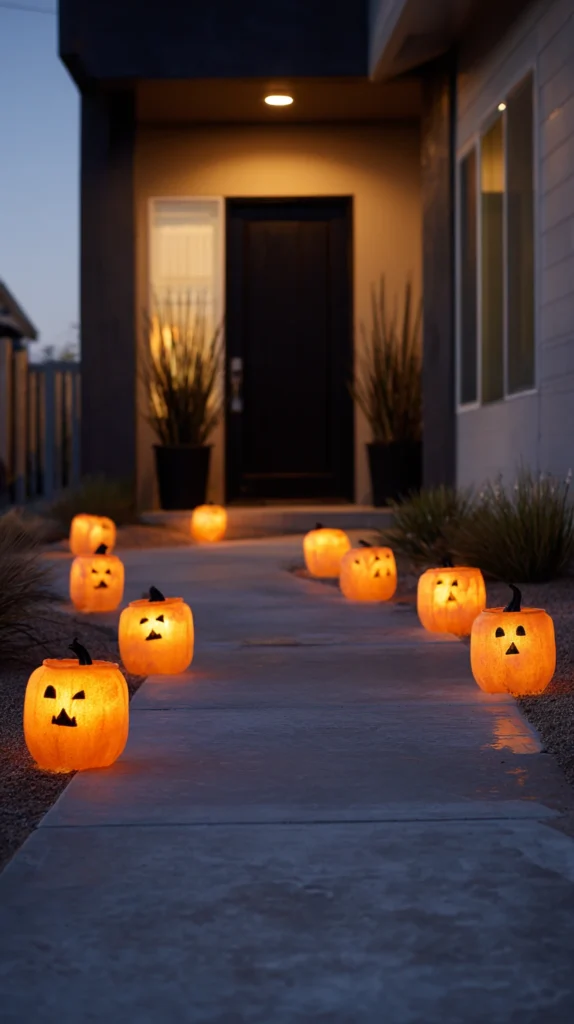
Plastic milk jugs, painted and lit from within with battery-powered lights, transformed into glowing pumpkin or ghost lanterns lining a walkway.
My dark, unlit front walkway:
What I had:
- A collection of empty milk jugs already accumulating in the recycling bin
- A front walkway with no lighting or decoration marking the path to the door
- A desire for the warm, glowing luminary look seen in more elaborate displays
The milk jug luminary solution:
Why this project delivers genuine glowing atmosphere for almost nothing:
- Uses material that’s already being thrown away, making the raw cost close to zero
- The jug’s semi-translucent plastic diffuses light beautifully once painted and lit
- Battery-powered lights eliminate any need for outdoor extension cords along the walkway
- A classic, widely loved effect that reads as far more elaborate than its actual cost
Building the luminaries:
Construction steps:
- Clean empty milk jugs thoroughly and remove any labels
- Paint orange for pumpkins (adding a black jack-o-lantern face) or leave white with simple painted features for ghosts
- Cut a small access flap in the base or back for inserting a battery-powered tea light or LED puck light
- Line the walkway with the finished luminaries, spaced evenly on both sides
Cost:
- Milk jugs: free from household recycling
- Paint: $10-20
- Battery-powered tea lights or LED pucks (set of 10-15): $15-30
My milk jug luminaries: Lining the front walkway with ten painted pumpkin jugs, each lit from within with a simple battery tea light, created a warm, glowing path that guests and trick-or-treaters consistently photograph, for a total project cost under $40.
Milk Jug Luminary Tips
Use battery-powered lights with a timer function specifically:
Convenience detail:
- Manually turning on 10-15 individual lights each evening becomes a genuine chore that often gets skipped
- Lights with a built-in timer automatically turn on at the same time each evening without any daily effort
- This small additional cost meaningfully increases how consistently the display actually gets lit
- Worth the modest upcharge over basic non-timer tea lights
Weight the base of each jug with a small amount of sand or gravel:
Wind stability:
- Empty plastic jugs are lightweight enough to tip or blow away in even moderate wind
- A small handful of sand or gravel inside each base adds stability without being visible once painted
- This simple step prevents a frustrating scenario of resetting knocked-over luminaries throughout the season
- Add the weight before the final paint coat for the cleanest finished result
3. Trash Bag Spider Silhouettes
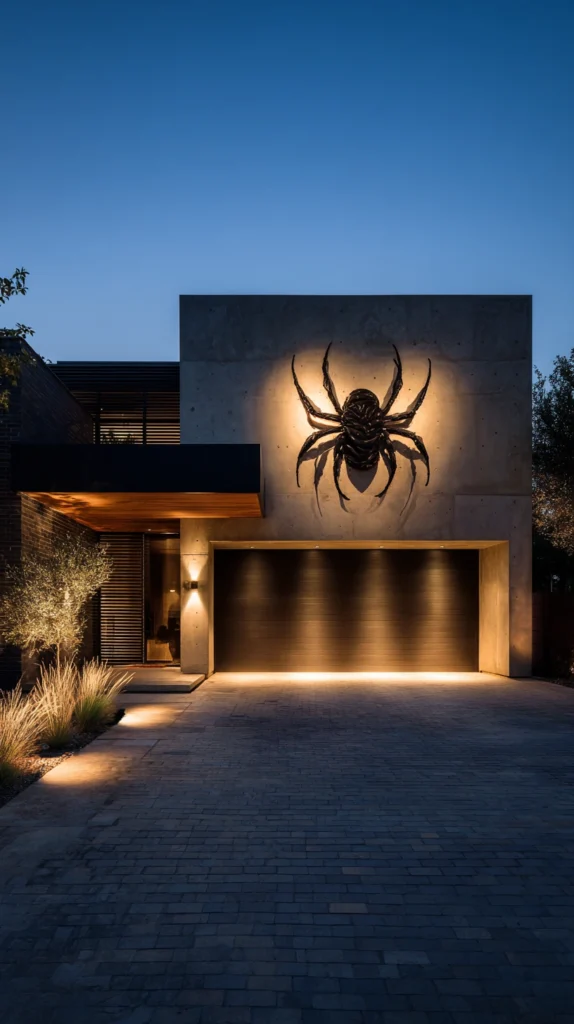
Large black plastic trash bags, cut and stretched to form giant spider shapes, mounted flat against the garage door or house siding.
My blank, undecorated garage door:
What I had:
- A large, completely blank garage door taking up significant visual space on the house’s front facade
- A desire for a dramatic, oversized Halloween element without the cost of a purchased giant prop
- A box of black contractor bags already on hand for yard work
The trash bag spider solution:
Why this project delivers such dramatic scale for so little cost:
- A single large trash bag creates a spider silhouette far bigger than most purchased decorations at this price point
- The flat, black silhouette style reads as bold and graphic from street viewing distance
- Contractor-grade bags are durable enough to survive outdoor exposure for the full season
- One of the most dramatic size-to-cost ratios of any project on this entire list
Building the spider silhouette:
Construction steps:
- Cut a large oval body shape from one or two flattened contractor bags
- Cut eight long, tapered leg shapes from additional bag material
- Arrange and tape or staple the pieces into a spider shape directly against the garage door or wall
- Add simple round eye shapes cut from white or yellow paper or cardstock for extra detail
Cost:
- Contractor-grade trash bags (if not already on hand): $8-15
- Tape or staples, plus paper for eyes: $5-10
My trash bag spider: Building a single spider spanning nearly the full width of the garage door, using four contractor bags total, cost under $20 and became the most-commented-on single element of the entire display, purely due to its dramatic scale.
Trash Bag Spider Tips
Use exterior-rated double-sided tape or a staple gun for mounting, not standard tape:
Durability for the full season:
- Standard tape often fails within days when exposed to temperature swings and any moisture
- Exterior-rated mounting tape or a simple staple gun into the garage door trim holds up significantly better
- This detail determines whether the display survives the full month or needs constant re-mounting
- Test the mounting method on a small section before committing to the full spider installation
Add a warm spotlight or uplight to backlight the silhouette after dark:
Nighttime visibility:
- A flat black silhouette against a dark garage door can become nearly invisible once the sun sets
- A simple spotlight or uplight, even a basic clip light with a colored bulb, keeps the silhouette visible and dramatic in the evening
- This addition ensures the project’s full impact is visible during the hours it’s actually likely to be seen
- A relatively small additional cost that significantly extends the display’s effectiveness after dark
4. Pool Noodle Skeleton Bones
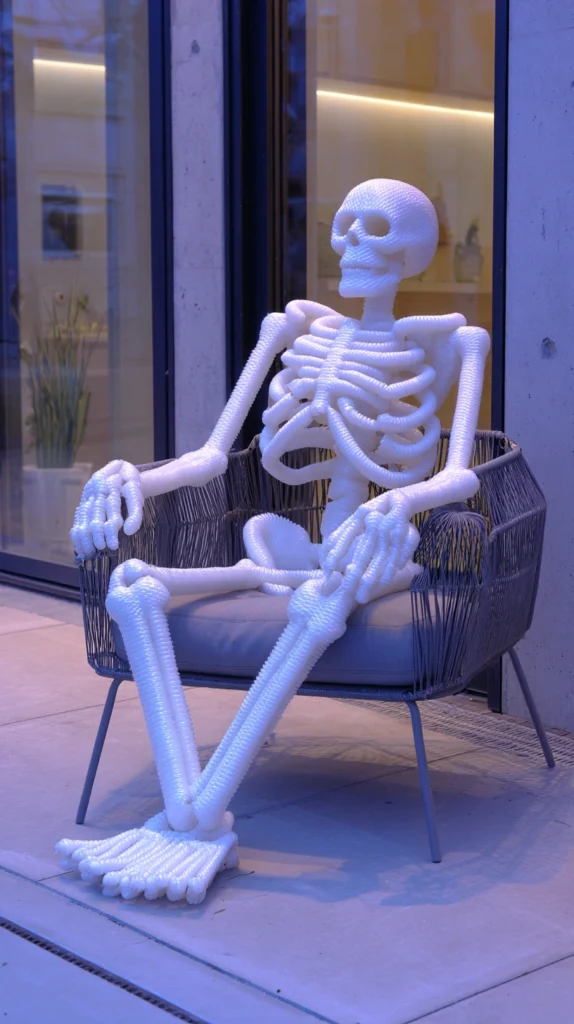
Foam pool noodles, cut and painted white, assembled into a life-sized skeleton figure staked into the ground or propped against a porch railing.
My yard missing a genuine skeleton figure:
What I had:
- Several leftover pool noodles from summer, sitting unused once swim season ended
- A desire for a life-sized skeleton prop without the cost of a purchased plastic version
- Basic craft supplies already on hand from other projects
The pool noodle skeleton solution:
Why foam noodles make a surprisingly convincing skeleton:
- The rounded, slightly irregular shape of cut noodle segments genuinely resembles bone shapes once painted
- Extremely lightweight, making the figure easy to pose, stake, and reposition throughout the season
- A fraction of the cost of a purchased foam or plastic skeleton prop of similar scale
- Forgiving material to work with, requiring no special tools beyond a sharp utility knife
Building the skeleton:
Construction steps:
- Cut pool noodles into bone-length segments for arms, legs, and a spine section
- Cut a rounded noodle segment or use a foam ball for the skull, adding simple painted eye and mouth details
- Paint all pieces white, adding light gray shading in the crevices for dimension
- Connect segments with wire, string, or skewers threaded through the foam, then pose and stake the assembled figure
Cost:
- Pool noodles (if not already on hand): $1-2 each, needing roughly 6-8 for a full figure
- White and gray paint: $10-15
- Wire or string for connecting joints: $5-10
My pool noodle skeleton: Building a full-sized seated skeleton from eight repurposed pool noodles, propped in a chair on the porch, cost under $25 total in new materials and consistently gets mistaken for a purchased prop by visiting trick-or-treaters.
Pool Noodle Skeleton Tips
Use a wire coat hanger or floral wire threaded through the noodle segments for poseable joints:
Functional assembly:
- Wire threaded through the length of connected bone segments allows the figure to be bent and posed naturally
- This is what gives the finished skeleton a more dynamic, lifelike posture than a stiff, straight assembly
- Floral wire is flexible enough to work with but sturdy enough to hold a pose outdoors
- Worth sourcing this specific material rather than substituting standard string, which won’t hold a pose
Seal the painted foam with a clear outdoor spray sealant:
Weather protection:
- Unsealed craft paint on foam can chip, fade, or wash off with rain exposure over several weeks outdoors
- A clear sealant spray, applied after the paint fully dries, protects the finish for the full season
- This step is inexpensive but meaningfully extends how good the finished prop looks by the actual holiday
- Apply in a well-ventilated outdoor area and allow full drying time before final assembly
5. Painted Rock Mini Pumpkins and Ghosts
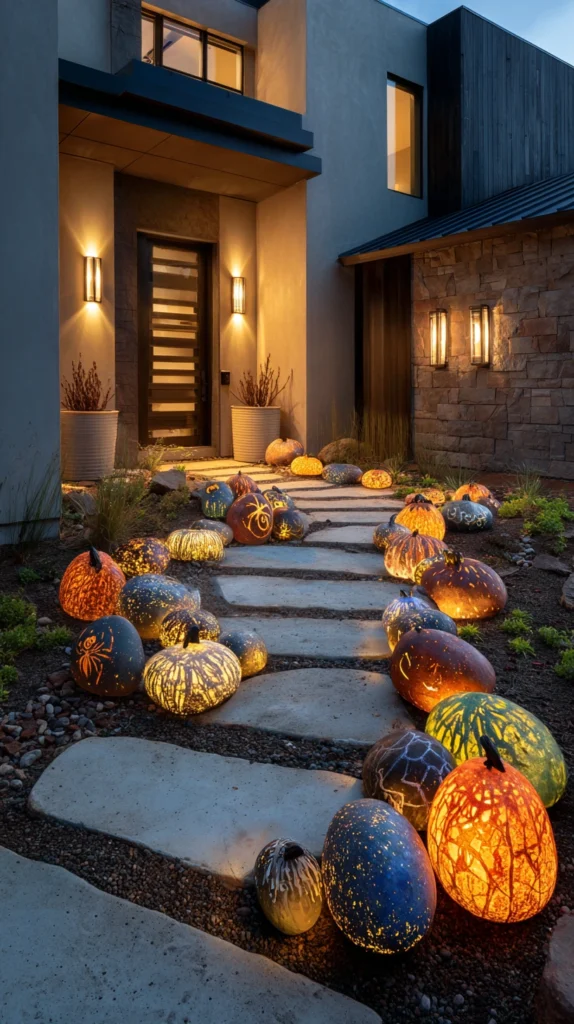
Smooth stones or rocks, painted as tiny pumpkins, ghosts, or spiders, scattered through garden beds and along walkway edges.
My garden beds with no Halloween touch at all:
What I had:
- Existing garden beds and walkway borders that felt untouched by any seasonal decorating
- A collection of smooth landscaping rocks already present in the yard
- A desire for small, charming details to complement the larger display pieces
The painted rock solution:
Why this small-scale project adds genuine charm at almost no cost:
- Uses rocks likely already present somewhere in the yard or easily and cheaply sourced
- Small, detailed touches like this fill in a display’s smaller gaps and edges effectively
- A low-effort, high-charm project well suited to involving kids in the decorating process
- Adds Halloween character to garden beds and borders that larger props don’t typically reach
Painting the rocks:
Simple technique:
- Clean and dry rocks thoroughly before painting
- Paint a base coat (orange for pumpkins, white for ghosts, black for spiders) and let fully dry
- Add simple painted details, jack-o-lantern faces, ghost eyes, spider legs, with a fine brush or paint pen
- Seal with a clear outdoor spray for weather resistance
Cost:
- Rocks: often free from the existing yard or landscaping supply
- Acrylic paint: $10-15
- Sealant spray: $8-12
My painted rocks: Painting a dozen smooth landscaping rocks as tiny jack-o-lanterns and ghosts, then scattering them through the front garden bed, added a charming detail layer that ties the smaller elements of the display together, for about $25 total.
Painted Rock Tips
Use outdoor or exterior-rated acrylic paint for the longest-lasting color:
Material selection:
- Standard craft paint can fade noticeably faster than paint specifically formulated for outdoor exposure
- Look for “outdoor” or “exterior” labeling on the paint specifically for this project
- This distinction matters more here than on larger props, since these small pieces are handled and viewed up close
- A slightly higher cost for outdoor-rated paint is worth it for a display element meant to be examined closely
Involve kids in the painting process for an easy, low-pressure family project:
Family activity angle:
- This is one of the most forgiving projects on the entire list in terms of skill level required
- Simple designs are genuinely achievable by children with minimal supervision
- This turns a decorating task into a shared seasonal activity rather than a solo chore
- The charming imperfection of kid-painted rocks often adds to, rather than detracts from, the display’s personality
6. Repurposed Bedsheet Ghosts
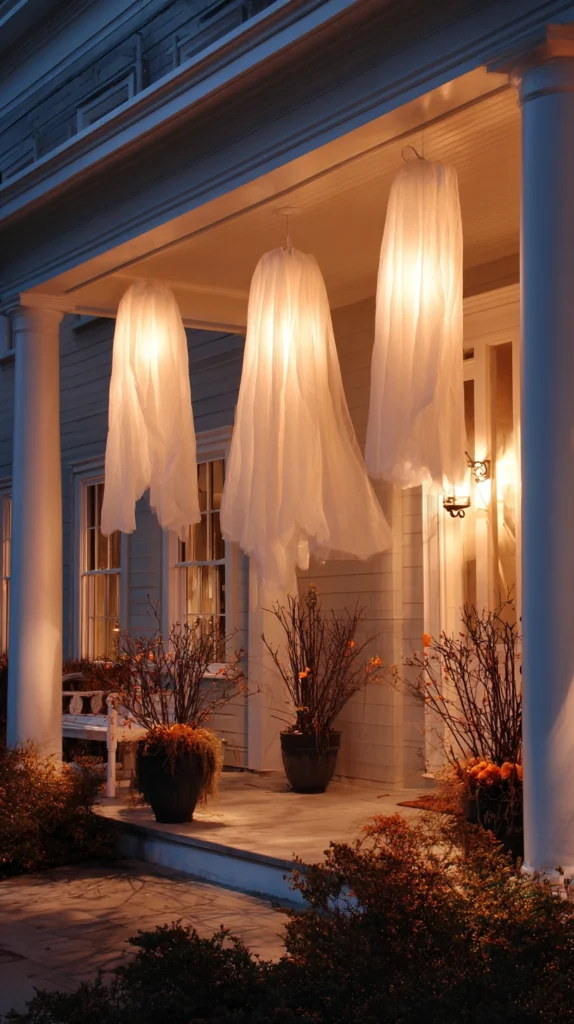
Old white or light-colored bed sheets, stuffed or draped over a simple frame, hung from tree branches or porch eaves as classic floating ghost figures.
My yard with no vertical, hanging elements:
What I had:
- Old bed sheets no longer in regular household use, sitting in a closet
- Trees and a porch overhang with genuine hanging potential that had gone completely unused
- A desire for the classic, nostalgic ghost figure most associated with simple Halloween decorating
The bedsheet ghost solution:
Why this is one of the most iconic budget Halloween projects for good reason:
- Uses material that’s otherwise headed for storage or donation, at zero material cost
- Hanging ghosts add genuine height and movement that ground-level props can’t provide
- A gentle breeze animates the sheets naturally, adding a dynamic quality static props lack
- One of the most recognizable, nostalgic Halloween images, instantly read by anyone passing by
Building the ghosts:
Construction steps:
- Cut a rounded head shape from foam, a small ball, or simply gather and tie the sheet’s fabric to create a head form
- Drape the sheet over the head form, securing with string or a rubber band at the “neck”
- Cut simple oval eye holes, or paint on eyes with black fabric paint
- Hang from a tree branch or porch eave using fishing line for a subtle, floating appearance
Cost:
- Bed sheets: free if repurposing existing linens, or $5-10 each secondhand from a thrift store
- String, fishing line, and paint for faces: $10-15
My bedsheet ghosts: Hanging three ghosts from the large tree in the front yard, using old sheets and simple fishing line for a nearly invisible hanging effect, created the fluttering, floating look that’s become the single most requested element for photos from trick-or-treaters each year.
Bedsheet Ghost Tips
Use fishing line rather than visible string or rope for hanging:
Visual effect:
- Fishing line is nearly invisible from typical viewing distance, enhancing the illusion of a genuinely floating ghost
- Visible rope or thick string breaks the effect and makes the construction obvious
- This small material choice significantly affects how convincing and magical the finished ghosts actually look
- Fishing line is inexpensive and widely available at any hardware or craft store
Weight the bottom hem of each ghost slightly for a more natural drape:
Shape and movement:
- An unweighted sheet can twist and bunch unnaturally in wind rather than draping and swaying convincingly
- A few small fishing weights or washers sewn or taped into the bottom hem corrects this
- This detail is what separates a ghost that looks intentionally spooky from one that just looks like a tangled sheet
- Test the hanging ghost in actual outdoor wind conditions before finalizing the weighting
7. Dollar Store Spider Web and Spider Clusters
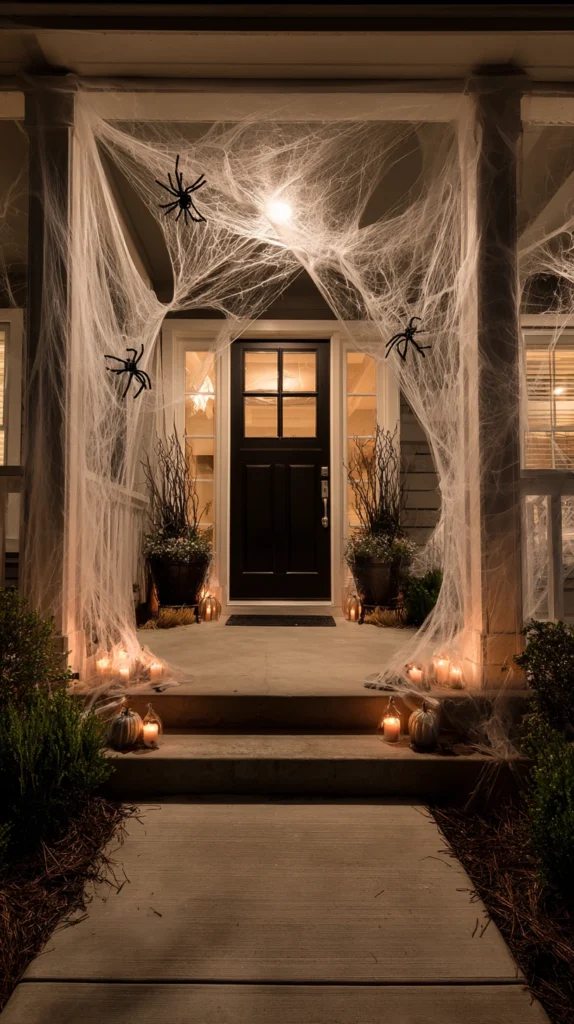
Stretchable synthetic spider web material combined with plastic spider rings or figures, draped across bushes, railings, and doorways.
My bushes and porch railings with nothing on them:
What I had:
- Existing landscaping bushes and a porch railing sitting completely undecorated
- A budget that didn’t stretch to elaborate custom props for every single area of the yard
- A desire to fill visual gaps between the larger statement pieces already planned
The spider web solution:
Why this remains one of the most cost-effective coverage options available:
- Dollar store stretch web material covers significant area for very little money
- Genuinely effective at filling the gaps between larger, more elaborate DIY projects
- Combined with a cluster of small plastic spiders, creates convincing detail at any viewing distance
- One of the fastest projects on this entire list to execute, often completed in under an hour
Applying the web material:
Technique for a convincing result:
- Pull the stretchable web material apart slowly and thoroughly before draping, rather than leaving it in dense clumps
- Drape across bushes, railings, and doorway frames, allowing some natural sagging and layering
- Add plastic spiders in small clusters rather than evenly spaced individual placements
- Layer a bit of web material over other props (the tombstones, the mailbox) to visually connect separate elements
Cost:
- Stretch spider web bags (2-3 needed for a full yard): $6-15
- Plastic spider rings or figures (bag of assorted sizes): $5-10
My spider web layer: Stretching three bags of web material across the front bushes and porch railing, with clusters of small spiders tucked throughout, cost under $25 and did more to visually connect the tombstones, the pumpkins, and the ghosts into one cohesive scene than any single other addition.
Spider Web Tips
Pull the web material apart thoroughly rather than applying it in dense clumps:
Application technique:
- Web material straight from the bag often looks like a dense, unrealistic white mass if not stretched properly
- Pulling and separating the fibers slowly creates a much more realistic, gauzy web appearance
- This step takes a few extra minutes but dramatically affects how convincing the final result looks
- Work in small sections, stretching thoroughly before moving to the next area
Use web material to visually connect separate props rather than only decorating them individually:
Cohesion strategy:
- Draping a bit of web between the tombstones and a nearby bush ties the two elements together as one scene
- This connective use of an inexpensive material does real work in making a scattered collection read as cohesive
- Consider the display as a whole rather than treating each prop’s web decoration in isolation
- A relatively small amount of material used strategically for connection often matters more than heavy coverage on any single item
8. Corn Stalk Bundles With Twine
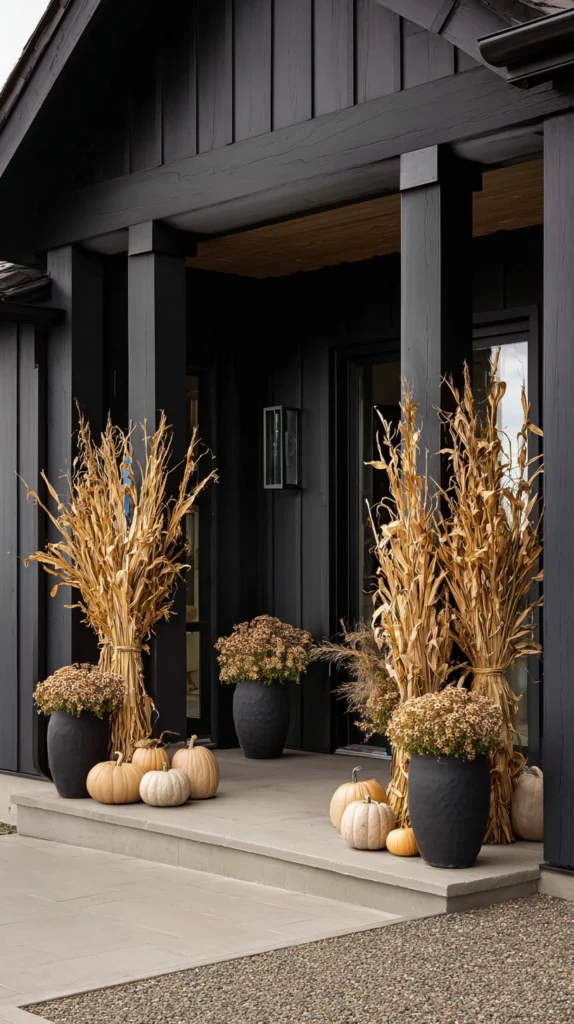
Dried corn stalks, gathered and tied into bundles with natural twine, flanking the front door or mailbox for a classic autumn-meets-Halloween look.
My front entry with no seasonal framing at all:
What I had:
- A front door that looked exactly the same in October as it did every other month of the year
- A desire for the classic harvest-and-Halloween combined look seen in more elaborate seasonal displays
- Access to a local farm stand or garden supply source for dried corn stalks
The corn stalk bundle solution:
Why this project bridges harvest and Halloween so effectively:
- Corn stalks are widely available and inexpensive during the actual fall season specifically
- Creates an immediate sense of height and framing at the entry, an area many budget displays overlook
- Works well combined with pumpkins, mums, or the painted rock pumpkins described earlier on this list
- One of the more traditional, broadly appealing elements, working for guests who prefer harvest style over overtly spooky decor
Building the bundles:
Assembly steps:
- Gather 8-12 dried corn stalks per bundle, trimming to a consistent height
- Tie securely with natural jute twine at two or three points along the bundle’s height
- Position bundles flanking the front door, secured to a porch post or simply leaned and tied in place
- Add a few pumpkins or gourds at the base for a completed, layered look
Cost:
- Dried corn stalks (per bundle): $8-15, often sold specifically for this purpose at farm stands during fall
- Twine: $3-5
My corn stalk bundles: Tying two full bundles and positioning them on either side of the front door, along with a few real pumpkins at the base, gave the entry a genuine sense of seasonal framing that the door had been missing entirely, for about $30 total.
Corn Stalk Tips
Secure bundles firmly against wind, since dried stalks are lightweight and prone to tipping:
Stability consideration:
- Untethered corn stalk bundles can blow over or scatter in even moderate wind
- Tying the bundle to a porch post, railing, or a stake driven into the ground nearby prevents this
- This step is worth the extra few minutes, since a fallen, scattered bundle looks far worse than no bundle at all
- Check bundle stability after any significant wind event throughout the season
Source stalks locally from a farm stand rather than a general retailer when possible:
Sourcing consideration:
- Farm stands and local agricultural sources typically offer fresher, more full-looking stalks at a better price than general retail
- This is also often a more affordable option than pre-made decorative bundles sold at seasonal specialty stores
- A quick search for local farms or farmers markets during fall usually turns up several options
- Buying directly from a local source also tends to support smaller agricultural businesses during their peak season
9. Chicken Wire and Light String Ghost Figures
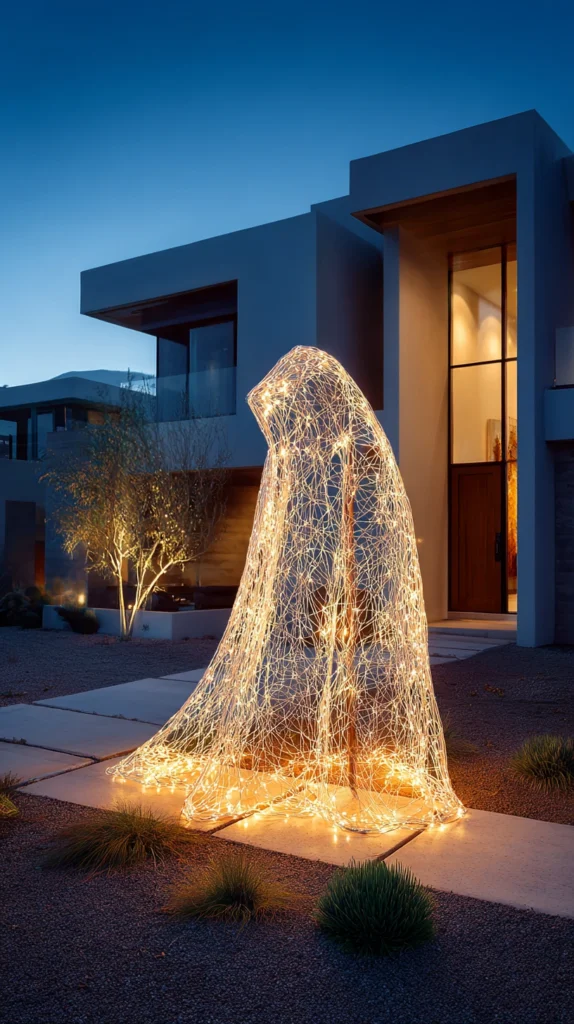
Chicken wire, shaped into a simple humanoid ghost silhouette and wrapped with white or warm string lights, creating a glowing figure visible from a distance.
My yard lacking any illuminated figures:
What I had:
- Extra chicken wire left over from a garden project, sitting unused in the garage
- A string of white lights not currently in use
- A desire for a genuinely glowing, illuminated prop beyond just ambient string lighting
The chicken wire ghost solution:
Why this project creates such a striking illuminated figure:
- Chicken wire holds a three-dimensional shape far better than flat fabric or paper alone
- Wrapped in lights, the wire frame becomes a genuinely glowing, dimensional figure rather than a flat silhouette
- Visible and effective from a significant distance, making it a strong choice for larger yards or corner lots
- A relatively advanced but still genuinely affordable project for anyone comfortable with basic wire shaping
Building the figure:
Construction steps:
- Bend and shape chicken wire into a simple, rounded humanoid form, roughly 4-5 feet tall
- Wrap the entire form with a string of white or warm-white lights, securing with small pieces of wire as needed
- Stake or weight the base for outdoor stability
- Position in a spot visible from the street, ideally away from other bright light sources that would compete with its glow
Cost:
- Chicken wire (if not already on hand): $15-25 for enough material for one figure
- String lights (100 count): $10-20
My chicken wire ghost: Building a single glowing ghost figure from leftover chicken wire and a spare string of lights, positioned prominently on the front lawn, became the display’s clear nighttime centerpiece, visible from well down the street, for a total cost under $40.
Chicken Wire Ghost Tips
Wear gloves when shaping chicken wire to avoid cuts from the cut edges:
Safety reminder:
- Freshly cut chicken wire edges are sharp and can cause real injury during shaping
- Basic work gloves are essential for this specific project, more so than most others on this list
- Fold or tape over any particularly sharp cut edges once the shape is finalized
- This is a simple precaution worth taking seriously given the material involved
Use battery-powered or solar string lights to avoid running an extension cord across the lawn:
Practical safety and convenience:
- A cord running across open lawn creates both a tripping hazard and an inconvenient daily setup
- Battery-powered or solar string lights eliminate this entirely, though they may offer slightly less brightness
- This tradeoff is generally worth it for the added safety and simplicity, particularly in a yard with trick-or-treaters walking through
- Test battery life and brightness before the actual display period to confirm the choice meets expectations
10. Balloon Spider Clusters
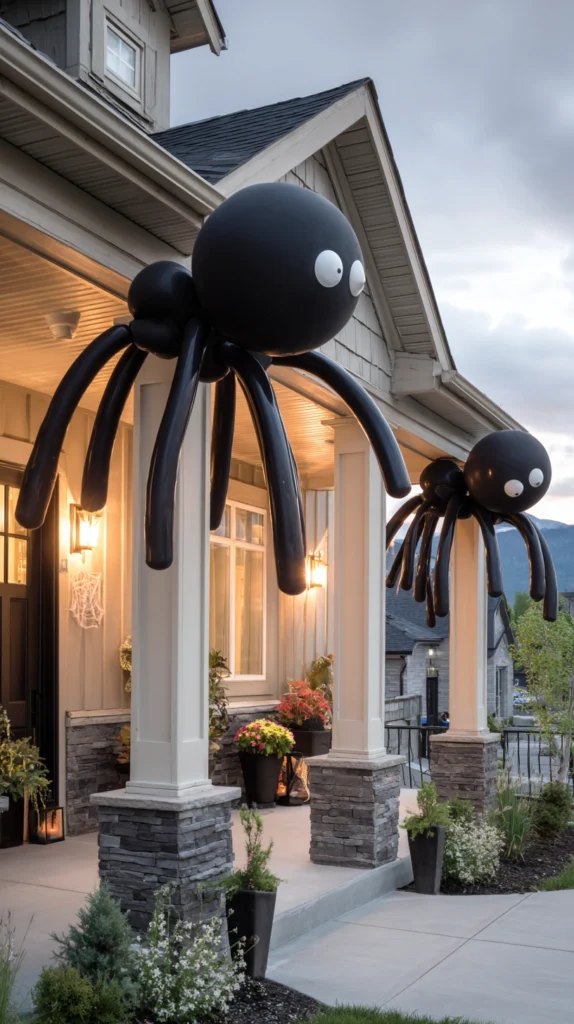
Black balloons, grouped and taped together with simple pipe cleaner or foam legs added, creating oversized spider clusters for porch columns or tree branches.
My porch columns with nothing drawing the eye upward:
What I had:
- Plain porch columns with no decoration at all, despite being a prominent, eye-level feature
- A bag of black balloons left over from a previous party
- A desire for a playful, slightly whimsical element to balance out the more traditionally spooky pieces
The balloon spider solution:
Why balloons create such an effective, low-cost sculptural element:
- Extremely inexpensive material capable of creating genuinely large-scale, eye-catching shapes
- The round, bulbous shape of clustered balloons naturally resembles a spider’s body
- A fun, relatively quick project well suited to last-minute additions or filling in a specific bare spot
- Works particularly well at a slightly whimsical, family-friendly gathering rather than a more serious haunted theme
Building the spider clusters:
Assembly steps:
- Inflate 5-7 black balloons per spider and cluster them together, taping or tying at the center
- Add eight legs using black pipe cleaners, foam strips, or bent wire, taped into the cluster’s center
- Add simple white or red googly eyes for character
- Attach to a porch column, railing, or tree branch using string or tape
Cost:
- Black balloons (bag of 50-100): $8-15
- Pipe cleaners or foam strips for legs: $5-10
- Googly eyes: $3-5
My balloon spider clusters: Building three different-sized balloon spiders and attaching them to the porch columns added an unexpectedly charming, slightly playful element that balanced out the more serious tombstones and ghosts, for a total cost under $25.
Balloon Spider Tips
Use balloon-safe adhesive or string rather than direct tape on painted surfaces:
Surface protection:
- Standard tape can damage paint or finish on porch columns and railings when removed later
- Command-style hooks, string, or balloon-safe adhesive strips avoid this issue entirely
- This consideration matters specifically for surfaces you want to protect for the rest of the year
- A slightly different attachment approach here saves potential touch-up work after the season ends
Plan for balloon deflation over time and check the display every few days:
Maintenance reality:
- Standard latex balloons gradually deflate over one to two weeks, even without popping
- A quick check every few days lets you catch and replace any noticeably deflated balloons before the display looks tired
- This is one of the shorter-lifespan projects on this list, best suited to being refreshed partway through the season
- Consider this reality when deciding whether to build this element early or closer to the actual holiday
11. Silhouette Cutouts on Foam Board
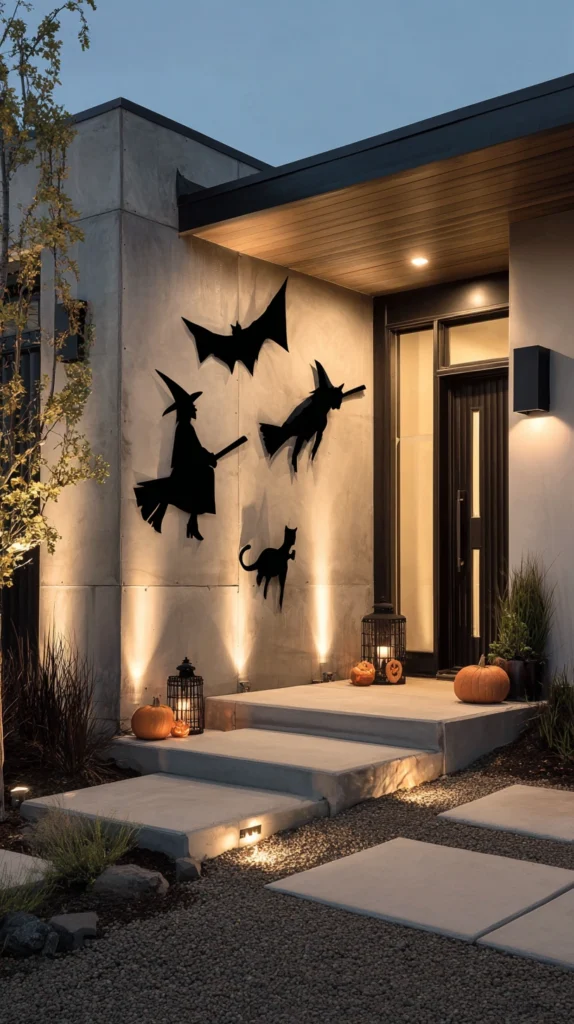
Classic witch, cat, or bat silhouettes cut from black foam board or poster board, staked into the lawn or propped against a fence.
My yard missing any classic, recognizable Halloween shapes:
What I had:
- A yard full of scattered smaller elements but nothing immediately, instantly readable as “Halloween” from a distance
- Leftover foam board from a previous project
- A desire for the kind of bold, iconic imagery associated with the most classic Halloween decorating style
The silhouette cutout solution:
Why simple black silhouettes read so clearly from any distance:
- Bold, solid black shapes are immediately recognizable even from across the street or while driving past
- Foam board is easy to cut with a basic craft knife and holds its shape well outdoors
- Classic imagery (a witch on a broom, a black cat, a flying bat) instantly communicates the holiday without needing any additional context
- One of the more beginner-friendly projects on this list, requiring only basic cutting skills
Building the silhouettes:
Construction steps:
- Print or freehand a simple silhouette template (witch, cat, bat, or a classic haunted house shape)
- Trace onto black foam board and cut carefully with a sharp craft knife
- Attach a wood stake or dowel to the back for ground insertion, or lean directly against a fence or wall
- Position at varying heights and distances for a more dynamic overall composition
Cost:
- Black foam board (per sheet, yields 1-2 silhouettes depending on size): $5-8 per sheet
- Wood stakes or dowels: $5-10
My silhouette cutouts: Cutting a large witch-on-a-broom silhouette and a cluster of three flying bats from foam board, positioned at different heights across the front lawn, added the kind of instantly recognizable Halloween imagery the rest of the display’s smaller details had been missing, for about $25 total.
Silhouette Cutout Tips
Choose a sturdy, weather-resistant foam board rather than standard poster board:
Material durability:
- Standard poster board warps and disintegrates quickly with any rain or dew exposure
- Foam board holds its shape significantly better and can be further protected with a waterproof sealant spray
- This distinction matters given how many weeks these pieces typically stay outdoors before the actual holiday
- The modest additional cost of foam board over poster board is worth it for a display meant to last the full season
Position silhouettes at varying heights, some staked low, some propped higher against a fence or tree:
Composition principle:
- A row of silhouettes all at the exact same height reads as flat and less dynamic
- Varying the height, some in the grass, some propped against a taller structure, creates more visual interest
- This same height-variation principle appears throughout effective Halloween displays, not just with silhouettes specifically
- Consider the overall composition, not just each individual cutout, when finalizing placement
12. Glow Stick Jack-O-Lanterns
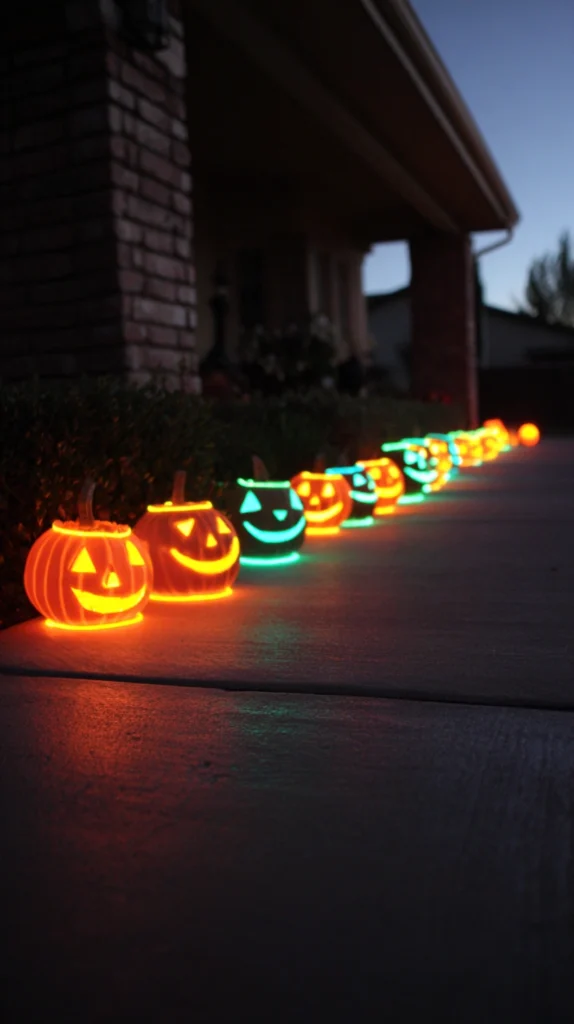
Real or plastic pumpkins carved or painted with cutout faces, lit from within using glow sticks instead of candles or electric lights, for a safe, low-cost glowing effect.
My carved pumpkins with no safe, reliable lighting option:
What I had:
- Real carved pumpkins each Halloween, but candles that blew out constantly or presented a fire risk near the front door
- A desire for consistent, safe illumination without running electrical cords to each individual pumpkin
- A local dollar store or party supply shop with inexpensive glow sticks readily available
The glow stick solution:
Why this lighting method solves a genuine seasonal frustration:
- Completely eliminates fire risk, particularly valuable near a high-traffic entry with excited trick-or-treaters
- Glow sticks are inexpensive, require no batteries or cords, and simply need to be cracked and dropped inside
- Available in multiple colors, allowing for a more varied, colorful glow than standard orange candlelight
- A genuinely practical safety upgrade that also happens to look great
Setting up the pumpkins:
Simple execution:
- Carve or cut pumpkin faces as usual, with a slightly larger top opening for easy glow stick insertion
- Crack 2-4 glow sticks per pumpkin, depending on size, and drop inside just before dusk
- For a multi-color effect, mix orange, green, and purple glow sticks across different pumpkins in the display
- Replace glow sticks as needed throughout the display period, since they typically last 6-12 hours per stick
Cost:
- Glow sticks (bulk pack of 25-50): $10-20, providing enough for multiple nights across several pumpkins
My glow stick pumpkins: Switching from candles to glow sticks in the carved pumpkins lining the front steps eliminated the constant candle-relighting frustration entirely, and the mixed orange and green glow across different pumpkins actually looked more varied and interesting than uniform candlelight ever did.
Glow Stick Tips
Buy glow sticks in bulk rather than small individual packs for meaningfully better cost per use:
Cost efficiency:
- Bulk packs of 25-50 glow sticks cost significantly less per stick than small party-favor packs
- Given that each stick only lasts one evening, a full month of display use adds up quickly in individual purchases
- Buying in bulk upfront is both more convenient and more cost-effective across the full display period
- Check bulk party supply retailers or online sources specifically for the best per-unit pricing
Store extra glow sticks in a cool, dark place to preserve their shelf life until needed:
Storage consideration:
- Glow sticks exposed to heat or light before use can lose some of their charge and glow less brightly when activated
- A cool drawer or closet keeps unused sticks at full potential for whenever they’re needed throughout the season
- This small storage consideration ensures consistent brightness across the entire display period
- Purchase in advance without worry, provided storage conditions are reasonable
13. Repurposed Wine Bottle Ghosts and Witches
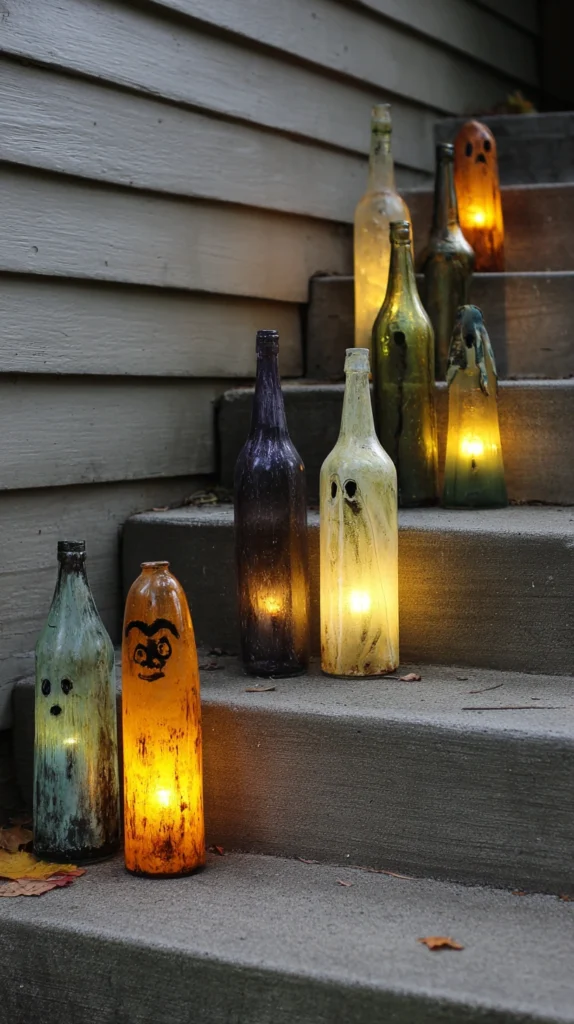
Empty glass wine or beer bottles, painted white or black and detailed with simple facial features, grouped as small ghost or witch figures along a walkway or porch step.
My recycling bin full of bottles with a second use waiting:
What I had:
- A steady accumulation of empty glass bottles from regular household use
- A desire for small, charming accent figures to complement the larger props already planned
- Basic craft paint already on hand from other projects
The bottle figure solution:
Why repurposed bottles make such charming small-scale decor:
- Uses material otherwise headed directly to recycling, at essentially zero raw material cost
- The bottle’s natural shape, especially with a slightly rounded shoulder, lends itself well to a simple ghost or witch silhouette
- Small-scale figures like this fill in a display’s edges and smaller surfaces effectively
- A satisfying, low-pressure project for anyone who enjoys detailed small-scale painting
Building the figures:
Painting technique:
- Clean bottles thoroughly and remove labels completely
- Paint white for ghosts (adding simple black eye and mouth details) or add a black witch hat shape and simple facial features for a witch figure
- Allow full drying time between coats for even coverage
- Group 3-5 bottles together on a step, windowsill, or porch table for a cohesive small display
Cost:
- Bottles: free from household recycling
- Craft paint: $10-15
My bottle ghost family: Painting six repurposed wine bottles as a small ghost family, arranged in graduated sizes on the front steps, became one of the most charming small details in the entire display, and it cost essentially nothing beyond a bit of paint already on hand.
Bottle Ghost Tips
Remove labels completely using warm soapy water and a bit of scraping before painting:
Prep for a clean finish:
- Leftover label adhesive shows through paint and creates an uneven, unprofessional-looking finish
- A thorough soak in warm soapy water, followed by scraping off any remaining residue, solves this completely
- This prep step takes a few extra minutes but meaningfully affects the finished project’s overall polish
- Some bottles benefit from a final rubbing alcohol wipe to remove any lingering adhesive film
Add a small battery tea light beneath or inside larger bottles for a subtle glow effect:
Optional lighting enhancement:
- Wide-mouth bottles can accommodate a small battery tea light dropped inside for a soft internal glow
- This works particularly well for ghost bottles, adding a gentle luminous quality after dark
- This is an optional enhancement rather than a necessary step, but it elevates the display’s evening presence
- Test the light’s visibility through the painted glass before committing to this addition across the full bottle collection
14. A Chalkboard or Painted Wood Welcome Sign
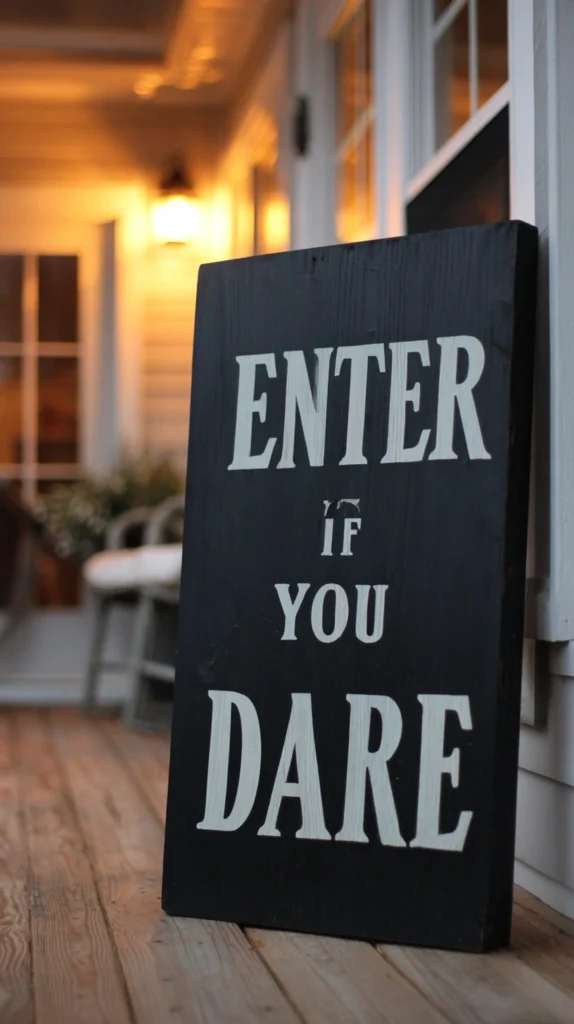
A simple wood sign or repurposed chalkboard, hand-lettered with a spooky greeting, positioned near the front door or at the start of the walkway.
My display with no clear “welcome” moment:
What I had:
- A collection of individual Halloween elements throughout the yard with nothing tying them together as one intentional display
- A leftover piece of wood or an old chalkboard sign no longer in regular use
- A desire for a clear, personal touch that felt distinct from purely purchased or generic decor
The welcome sign solution:
Why this small addition ties the whole display together:
- Signals clear intentionality, confirming for anyone passing by that the display is deliberate, not accidental clutter
- A personal, hand-lettered message adds genuine character that mass-produced signs don’t offer
- Works as a natural focal point positioned right at the entry, where guests and trick-or-treaters first arrive
- One of the lowest-cost projects on this list relative to how much polish it adds to the overall presentation
Making the sign:
Simple execution:
- Use an existing chalkboard, or paint a piece of scrap wood with chalkboard paint
- Hand-letter a simple, playful spooky greeting using chalk or a paint pen
- Add a small decorative border or a simple illustration (a bat, a spider, a small pumpkin) alongside the text
- Position at the start of the walkway or propped near the front door, at a height easily read by both kids and adults
Cost:
- Wood scrap or existing chalkboard: free to $10
- Chalkboard paint (if needed): $10-15
- Chalk or paint pens: $5-10
My welcome sign: Painting a scrap piece of fence board with chalkboard paint and hand-lettering a simple “Enter if you dare” message, propped at the start of the front walkway, gave the whole display the clear sense of intentional welcome it had been missing, for under $20 total.
Welcome Sign Tips
Choose a font style or lettering approach matching the display’s overall tone:
Style consistency:
- A playful, bubbly lettering style suits a family-friendly, whimsical display better than a dramatic gothic font
- A more elaborate, scratchy gothic-style lettering fits a moodier, more genuinely spooky display better
- Matching this detail to the rest of the yard’s tone keeps the whole presentation feeling cohesive
- Sketch a few lettering options on paper before committing to the final chalk or paint version
Protect a chalk-lettered sign with a light spray fixative if it will stay up for several weeks:
Longevity consideration:
- Chalk lettering can smudge or wash away with rain and handling over an extended display period
- A light coat of clear spray fixative, the same product used for pastel or charcoal artwork, helps the lettering last
- This step is optional for a sign only displayed briefly but worthwhile for one staying up the full month
- Test the fixative on a small section first, since some products can slightly alter the chalk’s appearance
15. A DIY Fog Effect Using Dry Ice or a Humidifier
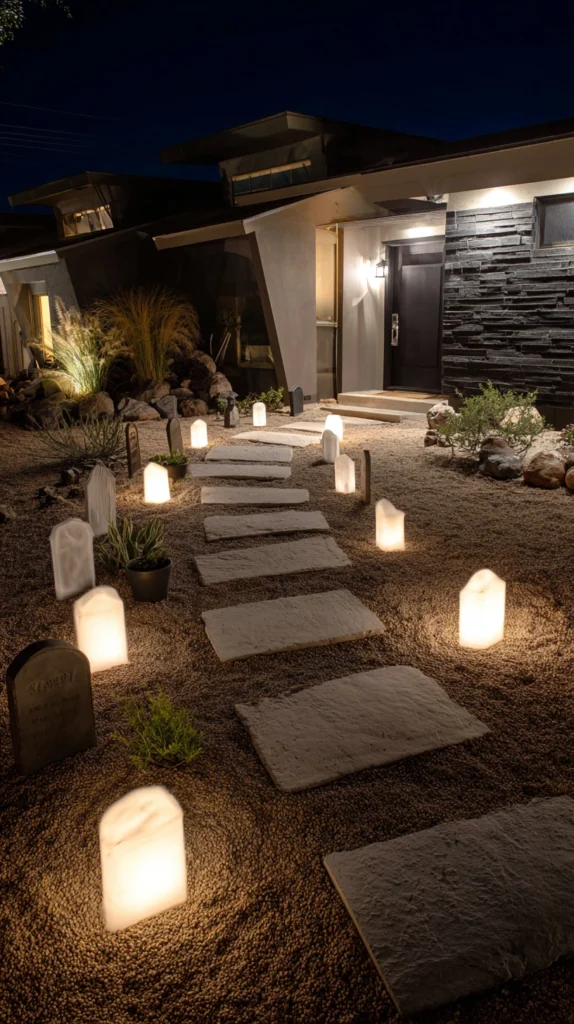
Low-lying fog created with dry ice in a container of warm water, or a basic ultrasonic humidifier, adding genuine atmospheric fog to the display for a fraction of a fog machine’s cost.
My display missing the dramatic fog effect seen in more elaborate setups:
What I had:
- A well-built collection of the other DIY projects on this list, but nothing creating actual atmospheric movement
- No budget for a full fog machine, which can run considerably more than most individual items on this list
- A desire to add the single effect most associated with genuinely elaborate haunted displays
The DIY fog solution:
Why this effect delivers such outsized atmospheric impact:
- Low-lying fog is one of the most immediately recognizable signals of a “real” haunted display
- A simple dry ice and warm water setup, or an inexpensive humidifier, achieves a similar effect to an expensive fog machine
- Works particularly well combined with colored lighting elsewhere in the display for dramatic visual layering
- One of the more surprising budget swaps on this entire list, given how expensive purchased fog machines typically run
Creating the fog effect:
Two approaches:
- Dry ice method: place dry ice chunks into a container of warm water, positioned low near the graveyard or entry scene; always handle dry ice with gloves and keep it away from direct skin contact and out of reach of children and pets
- Humidifier method: a basic ultrasonic humidifier, filled with plain water, produces a continuous, safer, lower-maintenance mist effect, though with less dramatic volume than dry ice
Cost:
- Dry ice (per outing, from a grocery store or ice supplier): $10-20
- Basic ultrasonic humidifier: $20-40, reusable for many future seasons
My DIY fog effect: Using a basic humidifier positioned low near the tombstone display, running continuously through the evening, added exactly the kind of atmospheric fog effect that had been missing, for a one-time cost of about $30 and no ongoing per-use expense.
DIY Fog Tips
Always handle dry ice with insulated gloves and never let it contact bare skin directly:
Safety requirement:
- Dry ice causes genuine skin burns on direct contact due to its extremely cold temperature
- Insulated gloves are essential any time dry ice is handled, from purchase through placement
- Keep dry ice and its container well out of reach of children and pets throughout the display period
- This is not an area to cut corners on safety precautions, regardless of how simple the overall setup seems
Choose the humidifier method for a lower-maintenance, safer option if young children will be nearby:
Practical safety comparison:
- A basic humidifier requires no special handling precautions and runs safely for extended periods unattended
- Dry ice requires sourcing before each use and more careful ongoing supervision
- For households with young trick-or-treaters regularly in and around the display, the humidifier’s simplicity is often the better choice
- Both methods deliver a genuine fog effect, so this decision comes down to a household’s specific safety priorities
Choosing Your Halloween Yard Projects
By Priority
Fill the graveyard scene:
- Cardboard tombstones from moving boxes (idea 1)
- Painted rock mini pumpkins and ghosts (idea 5)
- Silhouette cutouts on foam board (idea 11)
Add nighttime glow and atmosphere:
- Milk jug pumpkin and ghost luminaries (idea 2)
- Chicken wire and light string ghost figures (idea 9)
- Glow stick jack-o-lanterns (idea 12)
- A DIY fog effect (idea 15)
Add scale and drama:
- Trash bag spider silhouettes (idea 3)
- Pool noodle skeleton bones (idea 4)
- Repurposed bedsheet ghosts (idea 6)
By Effort Level
Lowest effort:
- Painted rock mini pumpkins and ghosts (idea 5)
- Dollar store spider web and spider clusters (idea 7)
- A chalkboard or painted wood welcome sign (idea 14)
Medium effort:
- Cardboard tombstones from moving boxes (idea 1)
- Milk jug pumpkin and ghost luminaries (idea 2)
- Repurposed bedsheet ghosts (idea 6)
- Repurposed wine bottle ghosts and witches (idea 13)
Higher commitment:
- Trash bag spider silhouettes (idea 3)
- Pool noodle skeleton bones (idea 4)
- Chicken wire and light string ghost figures (idea 9)
- A DIY fog effect (idea 15)
By Budget
Under $25:
- Painted rock mini pumpkins and ghosts (idea 5)
- Dollar store spider web and spider clusters (idea 7)
- Repurposed wine bottle ghosts and witches (idea 13)
- A chalkboard or painted wood welcome sign (idea 14)
$25-50:
- Cardboard tombstones from moving boxes (idea 1)
- Milk jug pumpkin and ghost luminaries (idea 2)
- Pool noodle skeleton bones (idea 4)
- Balloon spider clusters (idea 10)
$50+:
- Chicken wire and light string ghost figures (idea 9)
- A DIY fog effect using a humidifier (idea 15)
Maintenance Through the Season
Setup week:
- Waterproof and seal any painted cardboard or foam pieces before the display period begins
- Test all lighting elements, timers, and battery levels before the first evening of display
Mid-season:
- Check and replace deflating balloons and any weather-worn paper or cardboard elements
- Reposition any props knocked over or shifted by wind or weather
Final week before Halloween:
- Stock up on glow sticks or fresh batteries for the peak trick-or-treating night
- Do a full evening walkthrough to confirm every lighting element still functions correctly
After Halloween:
- Store reusable elements (silhouettes, the welcome sign, chicken wire frames) for next season
- Note which projects held up best and which need rebuilding next year for future planning
My Complete Budget Halloween Yard Journey
What I built across two Octobers:
Year one ($95):
- Cardboard tombstones and painted rock pumpkins
- Milk jug luminaries lining the walkway
- Dollar store spider web tying the smaller elements together
- Learned that a few cohesive projects looked far more elaborate than many scattered purchased items ever had
Year two ($140):
- Trash bag spider on the garage door
- Chicken wire glowing ghost figure
- Bedsheet ghosts hung from the front tree
- Learned that adding height and genuine nighttime lighting made the biggest difference in how the display actually got experienced by trick-or-treaters
Total investment: $235 across two years, plus reused elements from year one Most important lesson: A cohesive scene built from a few well-executed projects beats scattered individual purchases every time Single highest-impact change across both years: The milk jug luminaries, for the amount of warm, glowing atmosphere they added relative to their essentially free material cost
Getting Started This Weekend
Start with one graveyard scene, not fifteen scattered projects at once.
This weekend:
Step 1 — Cut a few cardboard tombstones from boxes already in the garage:
- The fastest, cheapest way to establish the display’s core scene
- Requires only cardboard, paint, and a few stakes
Step 2 — Save and paint a handful of milk jugs for walkway lighting:
- Start collecting jugs now if Halloween is still a few weeks out
- This project can be done gradually, a few jugs at a time
Step 3 — Add one height element, whether a hanging ghost or a chicken wire figure:
- This is what separates a flat, ground-level display from one with genuine visual depth
- Even a single hanging ghost meaningfully changes the display’s overall impression
Step 4 — Tie it together with dollar store spider web across the connecting spaces:
- The fastest way to make separate elements read as one cohesive scene
- A relatively small material cost for a meaningful visual payoff
My recommendation:
Start with the tombstones and milk jug luminaries:
- Both are genuinely achievable in a single afternoon with materials likely already on hand
- Both establish the core “scene” that everything else on this list can be layered onto
- This foundation makes every future addition build on a display that already reads as intentional
Walk to the end of the driveway after dark once both projects are in place and look back at the display the way a trick-or-treater actually would, before planning anything else.
Now go build the Halloween yard that gets remembered, for a fraction of what it looks like it cost.
Quick Summary
The 15 DIY Halloween yard decor ideas on a budget:
The graveyard scene:
- Cardboard tombstones from moving boxes (idea 1): the foundational, highest-volume budget project
- Painted rock mini pumpkins and ghosts (idea 5): small charming details filling in the gaps
- Silhouette cutouts on foam board (idea 11): instantly recognizable classic imagery
Nighttime glow and atmosphere:
- Milk jug pumpkin and ghost luminaries (idea 2): the single highest-impact lighting project
- Chicken wire and light string ghost figures (idea 9): a genuinely glowing, dimensional centerpiece
- Glow stick jack-o-lanterns (idea 12): safe, reliable pumpkin lighting
- A DIY fog effect (idea 15): the atmospheric detail most associated with elaborate displays
Scale and drama:
- Trash bag spider silhouettes (idea 3): dramatic size for almost no cost
- Pool noodle skeleton bones (idea 4): a convincing life-sized figure from summer leftovers
- Repurposed bedsheet ghosts (idea 6): the classic, nostalgic hanging ghost
Filling in the details:
- Dollar store spider web and spider clusters (idea 7): the connective tissue tying elements together
- Corn stalk bundles with twine (idea 8): a harvest-meets-Halloween entry frame
- Balloon spider clusters (idea 10): a playful, whimsical accent
- Repurposed wine bottle ghosts and witches (idea 13): charming small-scale figures
- A chalkboard or painted wood welcome sign (idea 14): the personal touch tying the whole display together
The universal budget Halloween decorating rules:
Always:
- Waterproof and seal painted cardboard, foam, and paper elements before the display period
- Plan real evening lighting, since that’s when most people actually see the display
- Use height variation, trees, hanging elements, and stakes, not just ground-level props
- Connect separate elements visually with spider web or shared color and material choices
Never:
- Rely on a single isolated prop to carry the whole display
- Skip weatherproofing on paper or cardboard pieces meant to stay outside for weeks
- Use materials that pose genuine safety risks (unsecured dry ice, exposed sharp wire edges) without proper precautions
- Assume expensive purchased props are required for a display to look genuinely elaborate
Common mistakes:
- Buying one or two purchased decorations instead of building a few connected DIY scenes
- Designing the whole display around daytime appearance and forgetting nighttime lighting entirely
- Leaving props at a single flat height instead of using trees, porches, and stakes for variation
- Skipping the small connective details, like spider web, that tie separate props into one scene
- Waiting until the last minute, which rules out the more involved but higher-impact projects on this list
Remember: a cohesive scene built from a handful of well-executed DIY projects consistently outperforms many scattered purchased items, nighttime lighting matters as much as daytime appearance since that’s when the display actually gets seen, height variation using trees and hanging elements adds drama that ground-level props alone can’t achieve, small connective details like spider web and painted rocks tie a whole display together, and the best budget Halloween yard is the one where nobody can guess how little it actually cost to build.