
14 Freestanding Bathtub Corner Ideas
The corner tub placement changed how my bathroom felt more than the tub itself ever could have on its own. Not a bigger bathroom. Not a more expensive tub. Not better tile or a nicer faucet or a bigger window.
The position.
Because where the tub actually sat in the room did more work than the tub’s own design. Before it: a beautiful freestanding tub centered awkwardly in a room too small to give it proper breathing space on every side, the tub feeling cramped despite being the room’s clear focal point. After it: the same tub, moved into a considered corner, suddenly reading as intentional rather than squeezed in, the corner’s two walls doing what open floor space alone never managed.
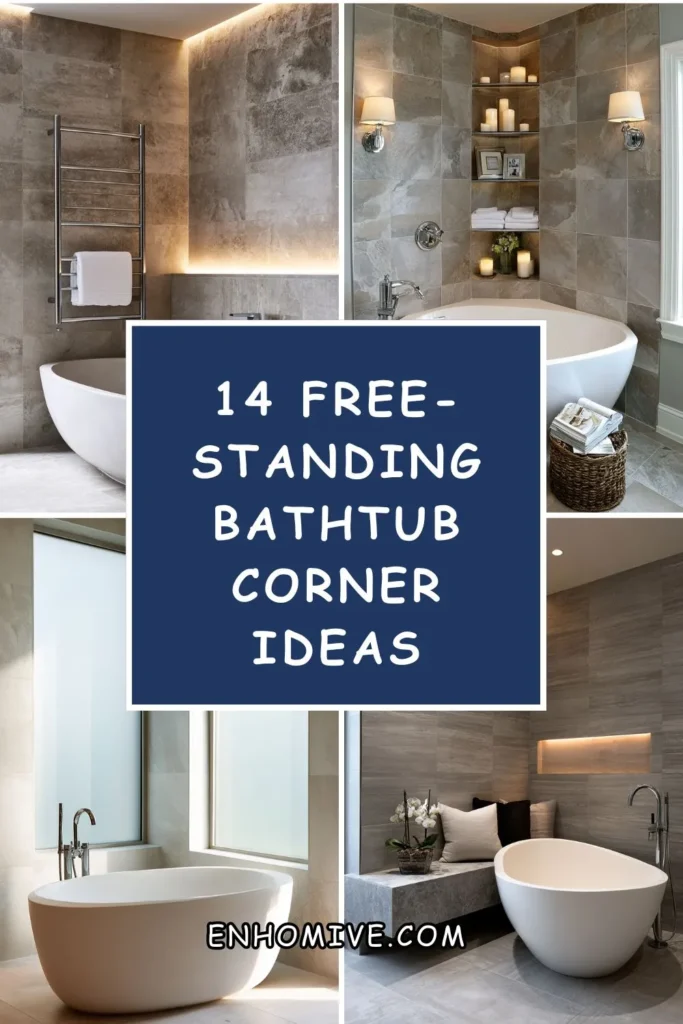
A corner is not a compromise position for a freestanding tub, chosen only because a room lacks the space for central placement. It is often the better design choice entirely, giving the tub two walls for backdrop, support, and styling opportunity that a fully open floor placement does not provide. The tub: no longer floating in the middle of a room fighting for definition, but anchored by architecture that gives it context.
Here are 14 freestanding bathtub corner ideas — from the simplest tiled niche to the most fully considered corner retreat — built on that understanding.
Why a Corner Often Suits a Freestanding Tub Better Than Center Placement
The backdrop advantage
A freestanding tub placed in an open floor position has no natural backdrop, requiring the surrounding room’s walls, art, or window to provide visual context from a distance. A corner placement provides two immediate walls as a built-in backdrop, simplifying the room’s overall design considerably.
The small bathroom reality
Without corner placement:
A freestanding tub centered in a small bathroom, requiring clearance on all four sides that the room’s actual dimensions may not comfortably provide.
The room: cramped, the tub’s clearance requirements dominating nearly the entire floor plan.
With corner placement:
The tub tucked into a genuine corner, using two existing walls rather than requiring clearance on every side.
The room: the tub occupying its footprint efficiently, freeing floor space elsewhere for other bathroom functions.
The plumbing efficiency case
A corner placement is frequently closer to existing plumbing lines running along exterior or shared walls, often reducing the plumbing rerouting cost compared with a fully centered tub placement requiring pipes run to the room’s middle.
The styling opportunity
Two walls flanking the tub provide natural surfaces for sconces, shelving, art, or a window treatment, opportunities a fully open, four-sided tub placement does not offer in the same way.
The Five Corner Tub Placement Approaches
Before choosing any specific design:
The tiled niche corner
The tub set within a fully tiled corner alcove, using tile to define and finish the surrounding walls.
The most polished, spa-like approach.
Suits both a full bathroom renovation and a more targeted corner update.
The window corner placement
The tub positioned in a corner where two walls meet near a window, taking advantage of natural light and a view.
Particularly effective in a primary bathroom with a private outdoor view.
Requires privacy consideration depending on the window’s exposure.
The shelving and storage corner
Built-in shelving on one or both flanking walls, providing storage and display immediately at hand from the tub.
The most functional approach, adding genuine storage value.
Suited to a household wanting the tub corner to do double duty.
The freestanding faucet corner
A floor-mounted or wall-mounted faucet positioned specifically for the corner layout, rather than a standard center-of-tub faucet placement.
Requires specific plumbing planning suited to the asymmetrical corner position.
Often the detail most easily overlooked in a corner tub plan.
The symmetrical mirrored corner
Two matching corner elements — sconces, shelving, or artwork — mirrored on each flanking wall for a formal, balanced look.
Suits a more traditional or classically styled bathroom.
Provides visual balance despite the tub’s inherently asymmetrical corner position.
1. The Fully Tiled Corner Niche
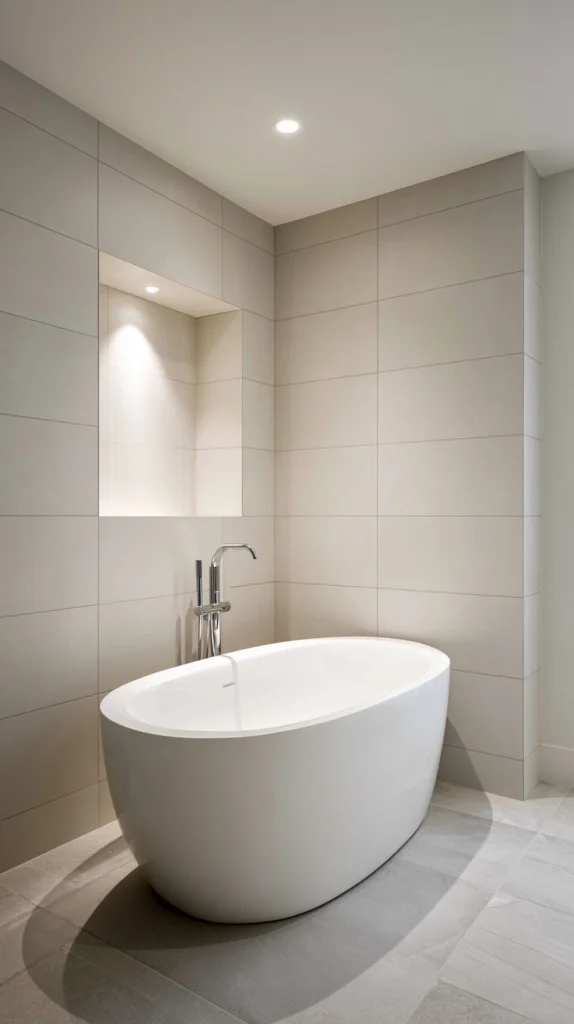
A freestanding tub set within a corner where both flanking walls are tiled floor to ceiling in a single material, creating a cohesive, spa-like alcove around the tub.
Why full tiling elevates a corner placement beyond a simple furniture arrangement
Tiling both flanking walls, rather than leaving them painted drywall, transforms the corner into a genuine architectural feature specifically built around the tub, rather than a tub simply pushed into an existing, untreated corner.
The tile selection
Large-format porcelain or natural stone tile, minimizing grout lines for a clean, continuous surface that reads as one unified backdrop rather than a busy, segmented one.
The tile height
Floor to ceiling on both flanking walls, rather than a partial height treatment, maximizing the sense of an intentional, fully designed alcove.
The color and tone
A tone that complements the tub’s own material and color — a warm stone tone against a white tub, or a deeper, richer tile against a black or colored tub — chosen deliberately rather than defaulting to whatever tile the rest of the bathroom uses.
The waterproofing consideration
Proper waterproofing membrane behind the tile essential given the corner’s proximity to regular water exposure from the tub itself, a detail worth confirming with whoever handles the installation.
The lighting integration
A small recessed light or a wall sconce built into the tiled surface, providing both function and an additional design detail within the tiled niche.
Cost breakdown: Tile (both flanking walls, floor to ceiling): $600–1,800 Waterproofing membrane: $150–350 Installation: $800–2,000 Total: $1,550–4,150
2. The Corner Window Bath
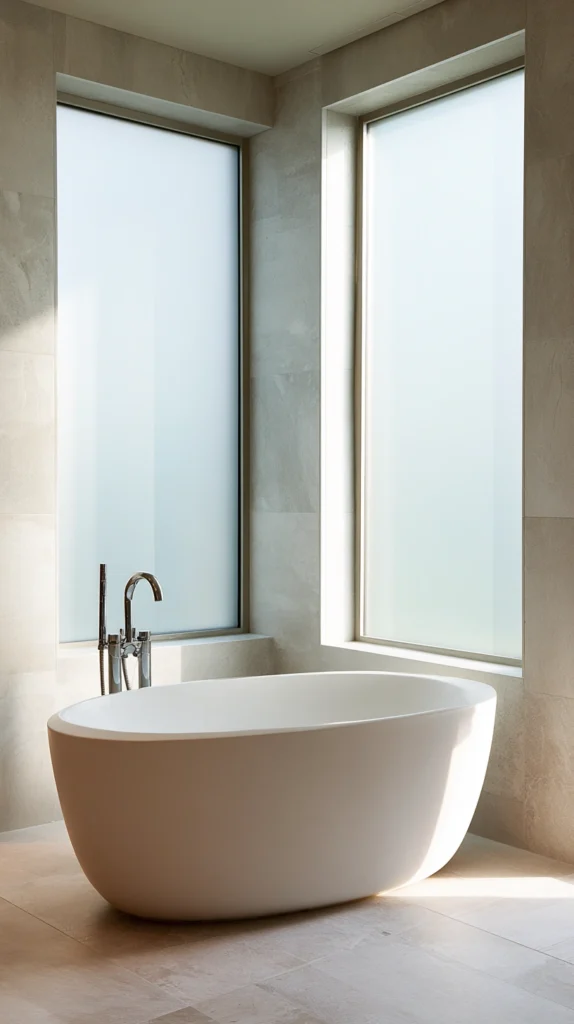
The freestanding tub positioned in a corner specifically because two windows, or a single window near the corner, provide natural light and a view directly to the bather.
Why a window corner placement maximizes what a freestanding tub experience can offer
A soak in a freestanding tub is meant to be a genuinely relaxing experience, and few elements enhance that more directly than natural light and a private view, making a window-adjacent corner one of the most desirable placements available when the room’s layout allows it.
The window consideration
Existing windows near a corner assessed for their privacy level, since a window without adequate privacy will require either frosted glass, a window treatment, or careful landscaping consideration before the tub can be positioned to take full advantage of it.
The privacy solutions
Frosted or reeded glass, a high-mounted transom window, or sheer privacy film, allowing light in while maintaining appropriate privacy for the tub’s specific location and orientation.
The view orientation
Where genuine privacy exists — an upper floor, a private garden, or a secluded lot — the tub positioned to take full advantage of an actual outdoor view, elevating the bathing experience considerably beyond an interior-facing corner.
The window treatment
A simple, water-resistant treatment such as a wood blind or a café curtain, if additional privacy or light control is needed beyond the glass treatment itself.
The overall effect
A tub corner that feels genuinely luxurious and connected to the outdoors, rather than simply an efficient use of interior wall space.
Cost breakdown: Window privacy treatment (frosted film or reeded glass): $100–400 Window treatment (blinds or curtain): $60–150 Total: $160–550
3. The Built-In Corner Shelving Display
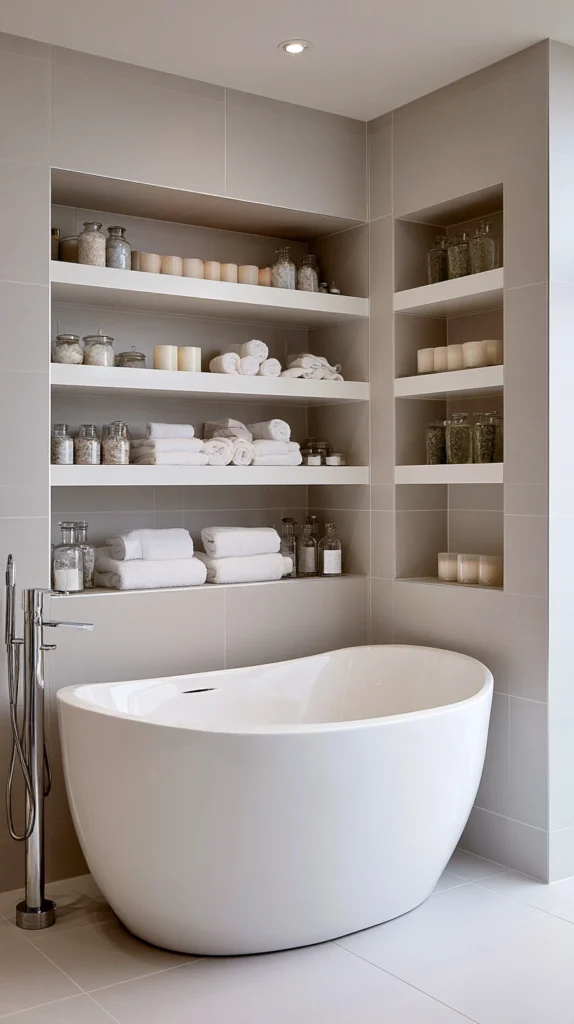
Open shelving built into one or both walls flanking the tub, holding candles, plants, and bath essentials within easy reach of the bather.
Why built-in shelving suits a corner tub particularly well
A corner tub already has two available walls that a centrally placed tub lacks, making built-in shelving directly beside the tub a natural extension of the space’s own layout, rather than requiring a separate, freestanding storage piece elsewhere in the room.
The shelving construction
Recessed niches or surface-mounted shelves, built into one or both flanking walls at a height easily reached from within the tub without requiring the bather to stand or stretch significantly.
The styling contents
Candles, a small plant, bath salts in a glass jar, and a folded towel, arranged with the same intentional, varied-height styling principle used in any well-considered vignette.
The material choice
Shelving material matched to the surrounding tile or wall treatment, whether a floating wood shelf against a plaster wall or a tiled niche matching the surrounding tile work.
The water exposure consideration
Materials and finishes chosen with genuine water exposure in mind, given the shelving’s direct proximity to the tub, favoring sealed wood, tile, or metal over materials vulnerable to moisture damage.
The overall function
A corner that serves both the tub’s aesthetic backdrop and a genuinely useful storage need, maximizing the value the corner placement provides beyond visual styling alone.
Cost breakdown: Built-in shelving (recessed or surface-mounted): $150–500 Styling objects: $30–80 Total: $180–580
4. The Floor-Mounted Corner Faucet
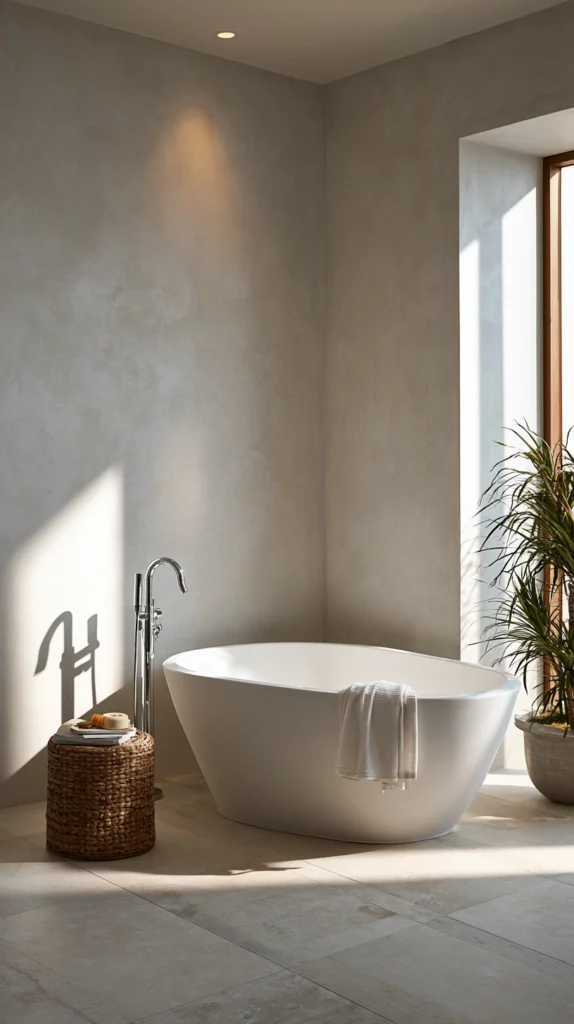
A floor-mounted tub filler positioned specifically to suit the tub’s corner placement, rather than a standard wall-mounted or deck-mounted faucet designed for central positioning.
Why faucet placement requires specific planning in a corner layout
Most standard tub fillers are designed with a centrally placed tub in mind, positioned either at the tub’s foot or mounted to the wall behind a centrally placed tub. A corner placement often requires reconsidering exactly where and how the faucet mounts to properly suit the tub’s actual position relative to the two flanking walls.
The floor-mounted option
A freestanding floor-mounted filler, positioned at whichever end of the tub makes most sense given the corner’s specific layout, rather than assuming a standard faucet position will translate directly to the new corner arrangement.
The wall-mounted option
Alternatively, a wall-mounted filler positioned on one of the two flanking walls, taking advantage of the corner’s available wall surface rather than requiring floor plumbing.
The plumbing planning
Corner placement often changes exactly where water supply lines need to run, worth planning carefully with a plumber before finalizing the tub’s exact position, since moving a faucet after installation is a costly correction.
The finish coordination
A finish matching the room’s other fixtures and hardware, maintaining visual consistency between the faucet and the rest of the bathroom’s material palette.
The overall consideration
One of the details most likely to be overlooked when planning a corner tub placement, since faucet position is often assumed rather than deliberately reconsidered for the new layout.
Cost breakdown: Floor-mounted or wall-mounted filler: $400–1,200 Plumbing adjustment: $300–800 Total: $700–2,000
5. The Symmetrical Sconce Pairing
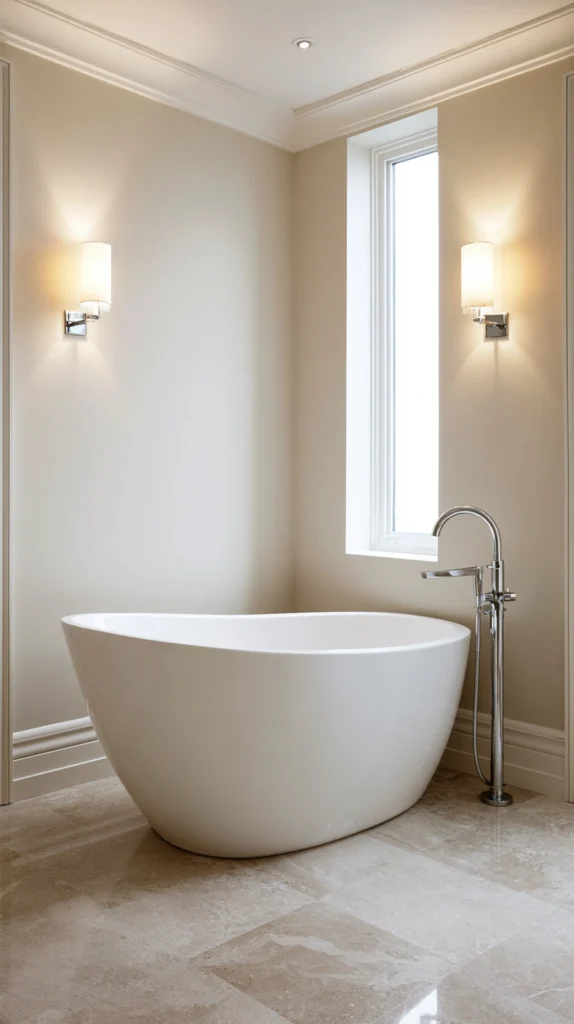
Matching wall sconces mounted on each flanking wall, positioned symmetrically relative to the tub, providing balanced task and ambient lighting for evening baths.
Why symmetry works particularly well for a corner tub’s lighting
Despite a corner tub’s inherently asymmetrical position within the room, matching sconces on each flanking wall create a sense of formal balance directly around the tub itself, even if the broader room layout remains asymmetrical.
The sconce placement
One sconce on each flanking wall, positioned at an equal height and equal distance from the tub’s edge, creating the symmetrical framing effect.
The fixture style
Brass, aged bronze, or a finish matching the room’s other fixtures, chosen in a design that complements rather than competes with the tub’s own material and style.
The bulb warmth
Warm, dimmable bulbs, allowing the sconces to provide both brighter functional light for daytime bathing and a softer, warmer glow for an evening soak.
The dimmer control
A dedicated dimmer switch for the sconces, separate from the room’s main overhead lighting, allowing the corner tub’s specific ambiance to be adjusted independently.
The overall effect
A corner tub that reads as a deliberately composed, formally balanced feature within the room, the matched sconces reinforcing a sense of intentional design despite the tub’s inherently corner-based, asymmetrical position.
Cost breakdown: Wall sconces (2, matching): $150–350 Dimmer switch installation: $60–150 Total: $210–500
6. The Corner Tub With a Freestanding Screen
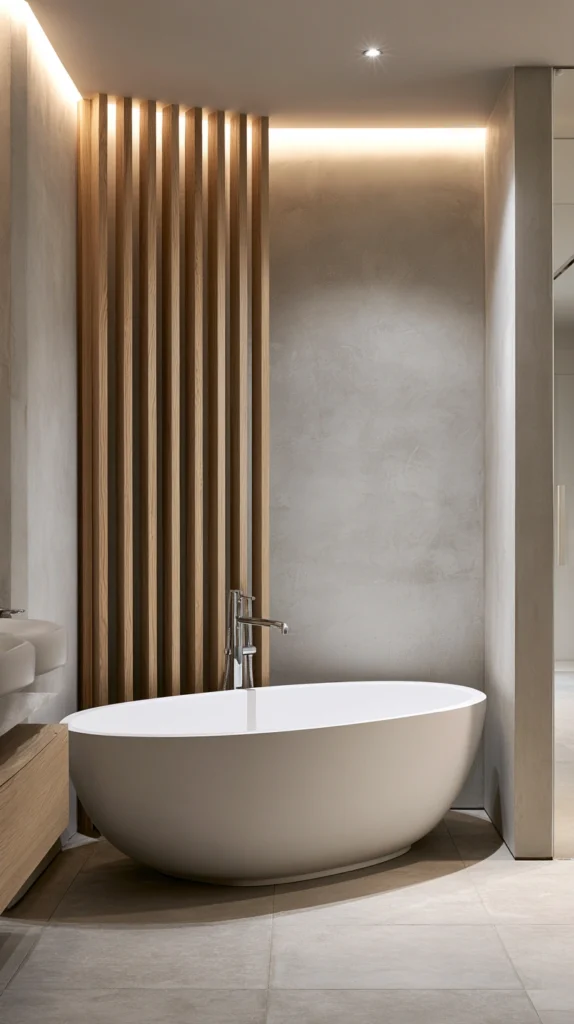
A decorative privacy or accent screen positioned to partially enclose the tub corner, adding a layer of visual interest and, where relevant, additional privacy from the rest of the bathroom.
Why a screen can enhance a corner tub even without a genuine privacy need
Beyond any functional privacy benefit, a screen positioned near the tub corner adds textural and visual interest, partially framing the tub and giving the eye a considered transition point between the tub area and the rest of the room.
The screen material
A woven rattan screen, a carved wood panel, or a simple frosted glass divider, chosen to complement the room’s broader material palette.
The placement
Positioned along the open side of the tub corner, partially rather than fully enclosing the space, maintaining the room’s overall openness while still providing the screen’s visual framing benefit.
The privacy function
In a shared or larger bathroom, the screen providing genuine visual privacy for the tub area from the rest of the room, useful if the bathroom serves multiple functions or users simultaneously.
The lighting interaction
A screen with some degree of openness or translucency allowing light to pass through, maintaining the room’s overall brightness rather than creating an unwantedly dim, fully enclosed corner.
The overall effect
A tub corner with an additional layer of intentional design, the screen adding texture and a sense of considered enclosure without requiring any actual wall construction.
Cost breakdown: Decorative privacy screen: $150–400 Total: $150–400
7. The Heated Towel Rail Corner Addition
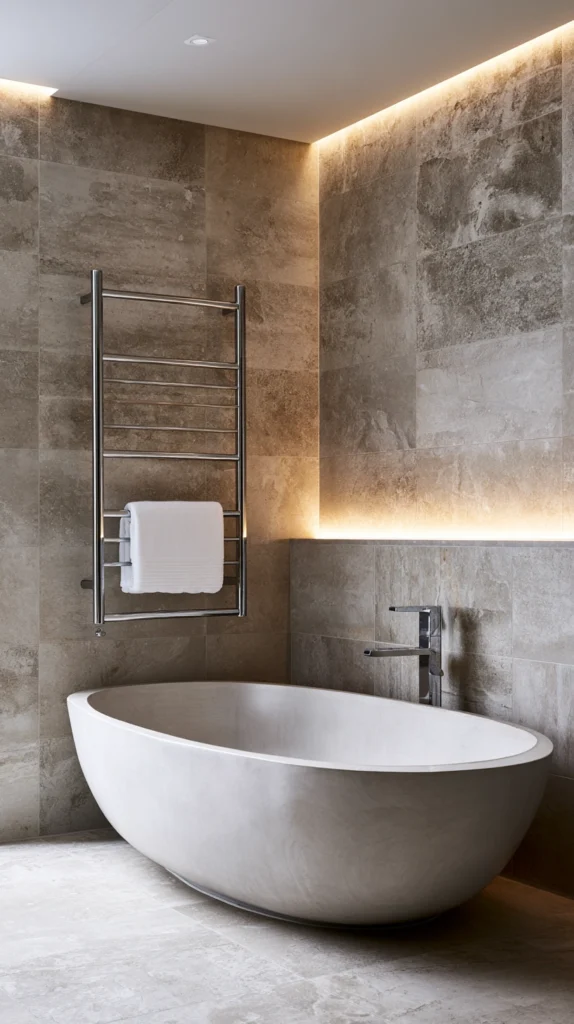
A wall-mounted heated towel rail positioned on one of the tub’s flanking walls, providing genuine warmth and comfort immediately upon stepping out of the bath.
Why a heated towel rail belongs specifically in the tub’s immediate corner
The moment immediately after a bath, stepping out into a cool bathroom, is precisely when a warm towel provides the most benefit — positioning the rail directly beside the tub, rather than elsewhere in the room, ensures that warmth is available exactly when and where it matters most.
The towel rail
A wall-mounted electric or hydronic heated towel rail, sized to hold one or two bath towels, mounted on whichever flanking wall offers the most convenient reach from the tub’s edge.
The placement height
Positioned at a height allowing a towel to be reached without needing to fully stand and cross the room, ideally within arm’s reach of the tub itself.
The electrical or plumbing requirement
Electric models requiring a nearby outlet, hydronic models requiring connection to the home’s heating system — worth confirming which option better suits the specific bathroom’s existing infrastructure before selecting a rail.
The dual function
Beyond warming towels for immediate post-bath use, the rail also helping to reduce ambient bathroom humidity by keeping towels dry between uses, a practical secondary benefit.
The overall comfort value
A relatively modest addition that meaningfully improves the tub corner’s actual daily comfort, addressing a genuine practical need rather than a purely decorative one.
Cost breakdown: Heated towel rail: $150–400 Installation (electrical or plumbing): $150–400 Total: $300–800
8. The Corner Tub With a Chandelier or Pendant Above
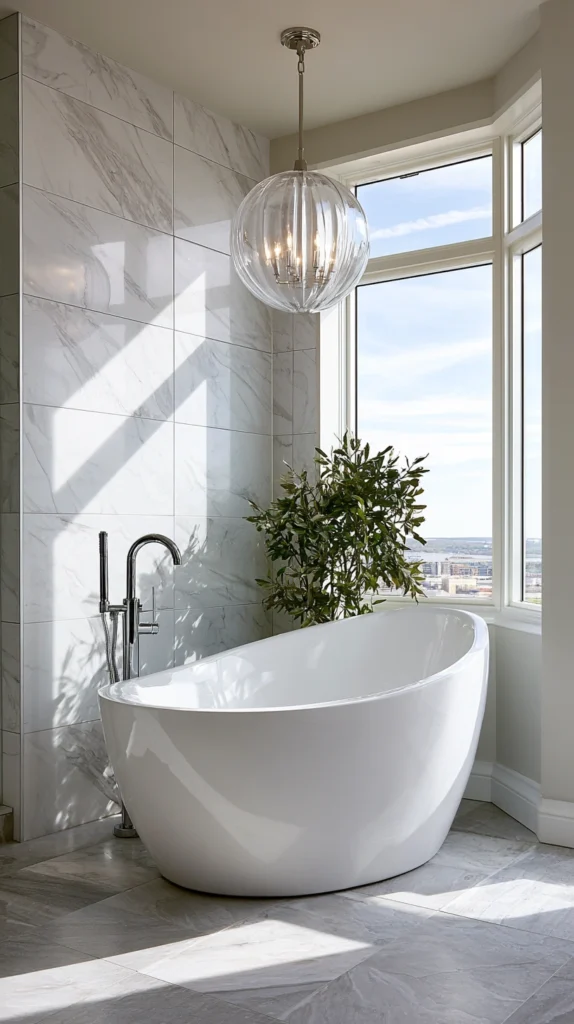
A small chandelier or decorative pendant light hung directly above the corner tub, providing a genuine design statement and elevated ambiance for the bathing experience.
Why an overhead statement fixture suits a corner tub particularly well
A corner tub’s fixed position, unlike a more open placement, allows a pendant or small chandelier to be hung with confidence at one specific, permanent point directly above it, without needing to accommodate a tub that might otherwise be repositioned.
The fixture style
A small crystal chandelier, a linen-shaded pendant, or a simple glass globe fixture, scaled appropriately to the corner space and the tub’s own dimensions.
The hanging height
Positioned high enough to avoid any risk of contact while bathing, but low enough to provide genuine visual presence and warm, direct light over the tub itself.
The electrical safety consideration
Any fixture positioned above a tub must meet specific electrical safety code requirements for its proximity to water — a detail requiring a licensed electrician’s confirmation before installation, given the genuine safety stakes involved.
The dimmer integration
A dimmer allowing the fixture’s brightness to shift from functional daytime light to a softer, more atmospheric glow for an evening soak.
The overall effect
A tub corner elevated into the room’s clear visual and functional centerpiece, the overhead fixture providing a genuine design statement precisely where the bather spends the most time looking up.
Cost breakdown: Small chandelier or pendant: $150–450 Licensed electrical installation: $200–500 Total: $350–950
9. The Corner Tub Backed by a Textured Accent Wall
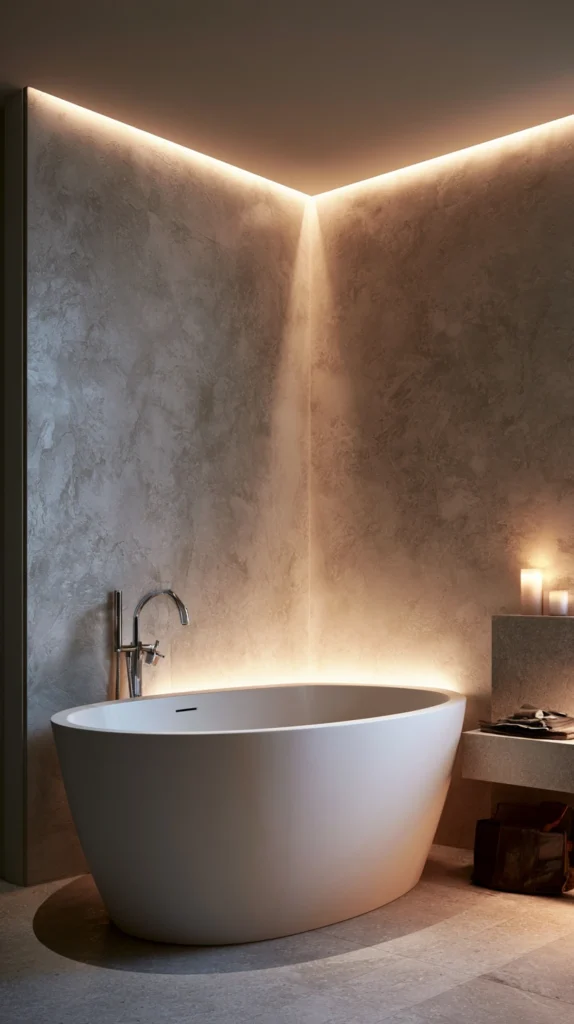
One or both flanking walls finished in a textured material — Venetian plaster, natural stone, or a dimensional tile — rather than standard flat paint, adding genuine tactile and visual depth to the tub’s backdrop.
Why texture specifically enhances a corner tub’s backdrop
A freestanding tub already has a distinctive sculptural form; a textured wall behind it provides a visually rich backdrop that complements rather than competes with the tub’s own shape, unlike a flat, uniform wall that offers no additional visual interest.
The texture selection
A Venetian plaster finish, natural stone cladding, or a dimensional textured tile, chosen based on the room’s broader material palette and the specific tactile and visual effect desired.
The lighting interaction
Warm, angled lighting specifically enhancing the textured wall’s shadow and highlight variation, similar to the lighting principle relevant to any textured wall treatment throughout a home.
The water exposure planning
Any textured material chosen and sealed appropriately for the bathroom’s humidity and the tub’s direct proximity, avoiding a material vulnerable to water damage in this specific high-moisture location.
The single-wall versus both-walls decision
One flanking wall treated with texture, the other left simpler, providing genuine visual interest without over-saturating the small corner space with two competing textured surfaces, or both walls treated consistently for a fully immersive effect.
The overall effect
A tub corner with real depth and material richness, the texture doing much of the same work a considered piece of art might in a different room, elevating the space beyond a simple tub-against-a-flat-wall arrangement.
Cost breakdown: Textured wall treatment (one or both walls): $400–1,200 Total: $400–1,200
10. The Corner Tub With a Freestanding Plant
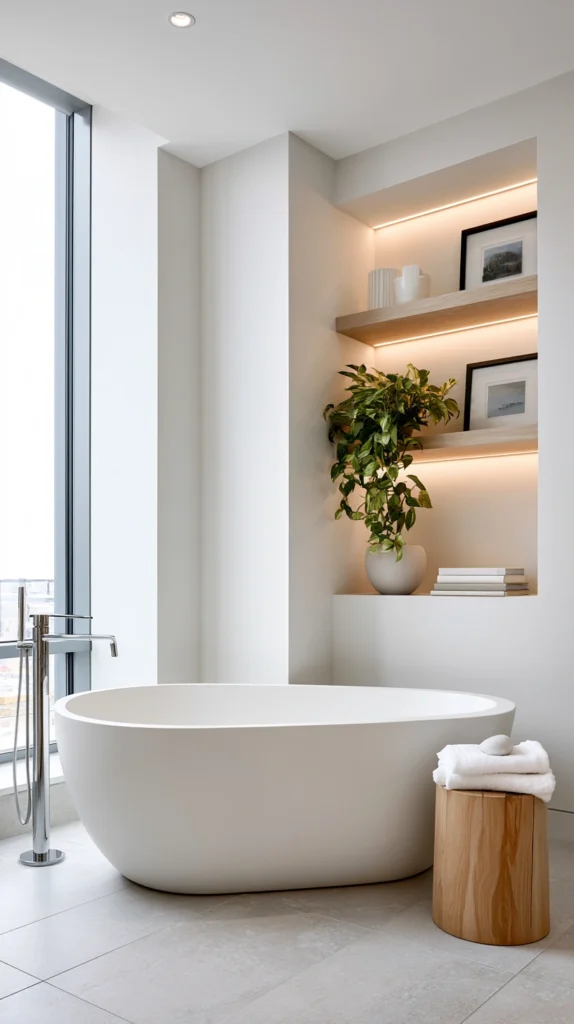
A single substantial plant positioned in the corner tub’s immediate vicinity, softening the room’s hard surfaces with genuine living greenery.
Why a single plant does meaningful work in a tub corner specifically
A bathroom, particularly one with a lot of tile and hard surfaces around the tub, benefits significantly from the organic, irregular shape a living plant provides, offering a counterpoint to the room’s otherwise uniformly hard, smooth materials.
The plant selection
A moisture-tolerant plant suited to a bathroom’s humidity — a peace lily, a Boston fern, or a snake plant — positioned where it will receive adequate light without direct water exposure from the tub itself.
The placement
In the corner’s remaining open floor space if any exists, or on a small stand or shelf positioned near, but not directly beside, the tub’s water source.
The planter choice
A ceramic, woven, or brass planter, chosen to complement the room’s material palette, avoiding a plain plastic nursery pot that would undercut the corner’s otherwise considered design.
The light requirement
Confirming the specific corner receives adequate natural or supplemental light for the chosen plant variety, since a bathroom corner without a nearby window may require a more shade-tolerant plant selection.
The overall effect
A softening, living element directly within view of the bathing experience, adding a genuine sense of calm and organic contrast to the tub corner’s harder surfaces.
Cost breakdown: Moisture-tolerant plant: $25–60 Planter: $20–60 Total: $45–120
11. The Corner Tub With a Built-In Bench Seat
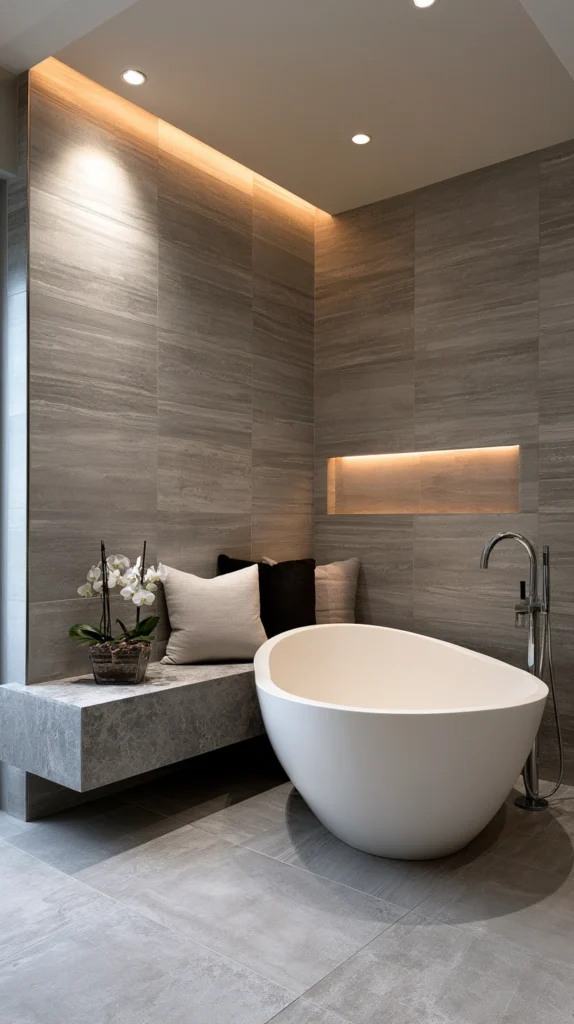
A small built-in bench or ledge positioned along one flanking wall, providing a place for a partner, a child, or simply a spot to sit while preparing a bath.
Why a bench seat adds genuine function to the corner arrangement
A corner tub’s two flanking walls create a natural opportunity for a built-in seat that a fully open, centrally placed tub does not offer in the same way, adding practical value beyond the tub itself.
The bench construction
A tiled or waterproofed built-in ledge, extending from one flanking wall, sized for comfortable seating while remaining low enough not to interfere with the tub’s own rim height.
The material
Tile matching the surrounding walls, or a sealed stone slab, chosen for full water resistance given the bench’s direct proximity to the tub.
The use cases
A spot for a partner to sit and talk during someone else’s bath, a place to set bath products within reach, or simply a practical seat while running the water and testing its temperature.
The height coordination
Built to a height that complements rather than competes with the tub’s own rim, ensuring the bench reads as an intentional part of the corner’s overall design rather than an awkward add-on.
The overall value
A functional addition that takes advantage of the corner placement’s available wall space, adding genuine daily usefulness beyond the tub’s primary bathing function alone.
Cost breakdown: Built-in tiled bench: $300–700 Total: $300–700
12. The Matching Wallpaper Corner Treatment
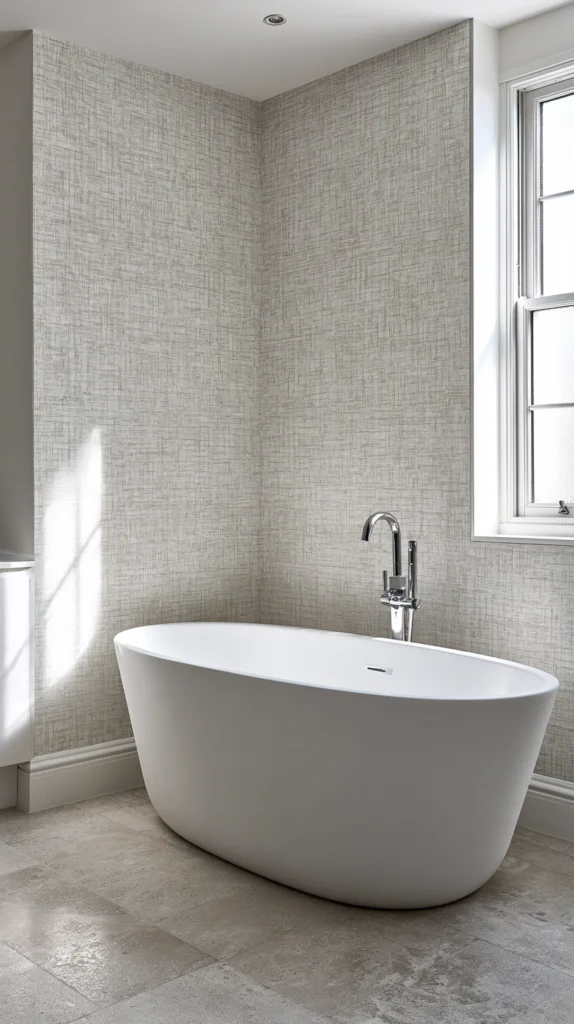
A bold or patterned wallpaper applied to both flanking walls of the tub corner, creating an immersive, enveloping backdrop distinct from the rest of the bathroom’s simpler wall treatment.
Why wallpaper suits a corner tub’s specific, contained backdrop
Because a corner tub’s backdrop consists of just two walls, rather than an entire room, even a genuinely bold or expensive wallpaper pattern remains an affordable, contained design commitment, similar to the same principle that makes a powder room a natural place for dramatic wallpaper.
The pattern selection
A water-resistant or vinyl-coated wallpaper, in a botanical, scenic, or bold pattern, chosen specifically for a bathroom’s higher humidity environment.
The moisture consideration
A wallpaper rated specifically for bathroom or high-humidity use essential in this application, given the tub’s direct proximity and the resulting moisture exposure the flanking walls will regularly experience.
The remaining walls
The bathroom’s other walls kept in a simpler, complementary paint color, allowing the tub corner’s wallpaper to remain the room’s clear singular statement.
The pattern scale
A larger-scale pattern generally reading more successfully within this specific contained application than a very small, busy print, similar to the scale principle relevant to any small-room mural application.
The overall effect
A tub corner that becomes the bathroom’s clear visual centerpiece, the wallpaper transforming what might otherwise be a plain tiled or painted corner into a genuinely memorable design feature.
Cost breakdown: Water-resistant wallpaper (two walls): $100–300 Professional installation: $200–500 Total: $300–800
13. The Corner Tub With Integrated Storage Steps
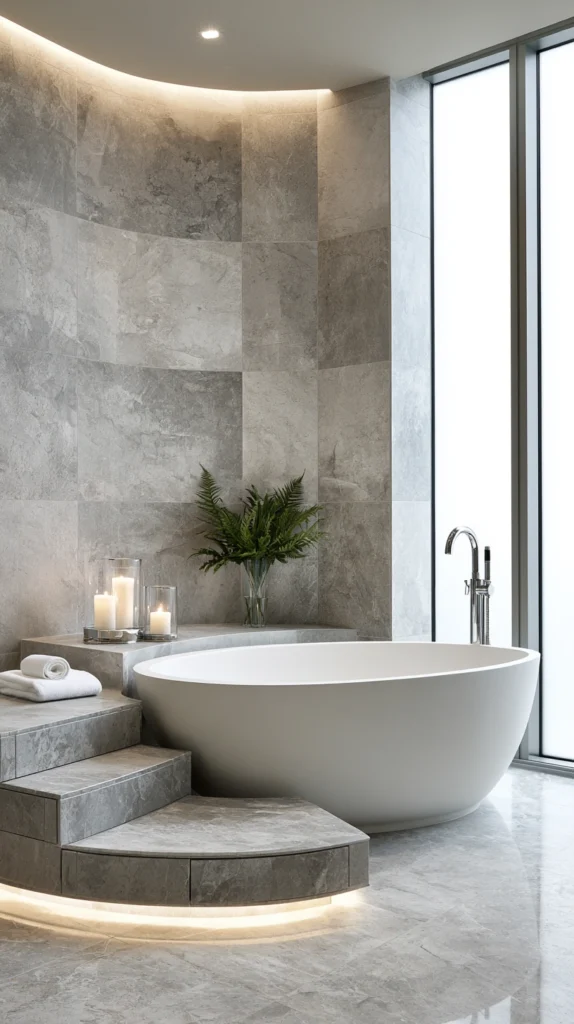
A small set of built-in steps leading up to the tub, incorporating storage drawers or shelving within the step structure itself, useful for a raised or deep soaking tub positioned in the corner.
Why integrated steps suit a deeper corner tub specifically
Many freestanding soaking tubs are deeper than a standard tub, and a corner placement provides a natural opportunity to build steps directly into the available wall space, rather than a freestanding step stool that would otherwise clutter the room’s floor.
The step construction
Built-in steps, tiled or finished to match the surrounding room, positioned against one flanking wall, providing a stable, comfortable way to enter a deeper soaking tub.
The storage integration
Drawers built into the step structure itself, providing genuine storage for bath towels, products, or robes, taking advantage of the step’s own structural depth rather than adding purely decorative stairs with no additional function.
The safety consideration
A non-slip surface on the step treads essential, given their direct proximity to a wet tub environment, worth prioritizing safety over purely aesthetic tile choices in this specific application.
The scale appropriateness
Best suited to a genuinely deep soaking tub where entry without steps would be difficult, rather than a standard-depth tub where steps would add unnecessary complexity without a genuine functional need.
The overall value
A practical solution to a deep tub’s genuine entry challenge, while adding storage capacity the corner placement’s available wall space allows for.
Cost breakdown: Built-in storage steps: $400–1,000 Total: $400–1,000
14. The Complete Corner Bathtub Retreat (The Fully Designed Corner)
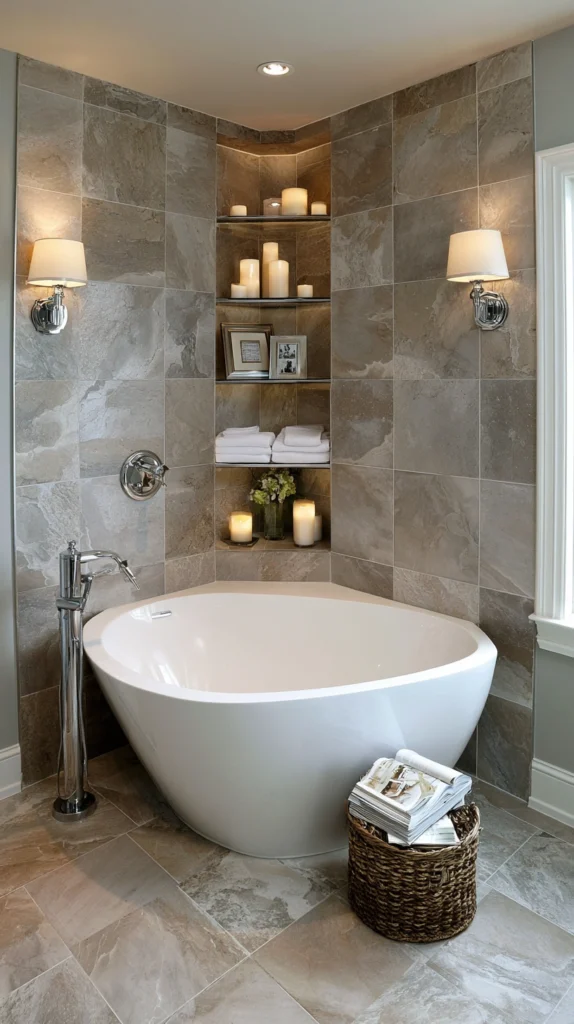
A complete corner tub design combining several of the approaches above — tiled walls, layered lighting, built-in storage, and a considered faucet placement — treating the corner as a fully realized small retreat within the larger bathroom rather than simply an efficient use of space.
What separates the complete corner retreat from a tub simply pushed into a corner
A tub positioned in a corner because the room’s layout required it: a practical solution. A complete corner bathtub retreat: every element — tile, lighting, storage, plumbing, and styling — specifically planned around the tub’s corner position, so the placement reads as a deliberate design choice rather than a spatial compromise.
The elements of the complete corner bathtub retreat
The backdrop
Both flanking walls fully tiled or finished with a considered textured or wallpapered treatment, providing a genuine, intentional backdrop.
The lighting
Matching sconces or a statement overhead fixture, paired with a dimmer, providing both function and evening ambiance.
The storage
Built-in shelving or a bench seat on at least one flanking wall, adding genuine practical value to the corner’s available space.
The plumbing
A faucet placement specifically planned for the corner layout, rather than assumed from a standard central-placement configuration.
The finishing layer
A single plant, a folded towel on the heated rail, and a few styled objects on the built-in shelving, completing the corner’s considered, lived-in quality.
The complete design in action
An evening soak:
Entering the bathroom: The tub corner immediately drawing the eye, tiled walls and warm sconce light setting a clearly different tone from the rest of the room’s more functional areas.
Running the water: The corner-specific faucet placement working naturally with the tub’s actual position, rather than feeling like an awkward retrofit.
Settling in: A candle from the built-in shelf lit, a towel warming on the nearby rail, the sconces dimmed low.
The complete corner bathtub retreat: not a tub placed in a corner out of spatial necessity, but a genuinely considered small retreat, built specifically around that corner’s unique opportunity.
Cost breakdown for the complete corner retreat: Assuming a starting point of a tub already positioned in an untreated corner: Tiled or textured backdrop: $400–1,800 Lighting (sconces and dimmer): $210–500 Built-in shelving or bench: $180–700 Faucet repositioning: $700–2,000 Heated towel rail: $300–800 Plant and styling: $45–120 Total: $1,835–5,920
Phased over two or three projects:
Project one: The tiled or textured backdrop and lighting, establishing the corner’s overall visual character
Project two: Built-in storage (shelving or a bench) and the faucet repositioning if needed
Project three: The heated towel rail and final styling details, completing the retreat’s daily comfort and finishing touches
The complete corner bathtub retreat: not an efficient use of an awkward space, but a fully considered small sanctuary built specifically around the tub’s corner position.
The Question Before Any Corner Tub Design
Before choosing a tile, a fixture, or a storage plan:
What is the primary reason the tub is positioned in this corner?
If the answer is: the room’s dimensions require it — start with the tiled niche and matching sconces, making the placement read as intentional rather than purely practical.
If the answer is: there’s a window nearby worth taking advantage of — the corner window bath, with appropriate privacy planning.
If the answer is: storage and function matter as much as the soak itself — the built-in shelving, bench seat, or storage steps.
If the answer is: wanting the corner to feel like the bathroom’s clear design statement — the wallpaper treatment or the statement overhead fixture.
The design follows the specific corner’s own architecture — its wall configuration, its proximity to a window, its available depth for built-ins — more than any single universal corner tub template. Every idea on this list takes advantage of a different aspect of what a corner specifically offers. The question is which specific opportunity this particular corner presents.
The simple addition of matching sconces to an already-positioned corner tub: still shifts the placement from practical to intentional. The complete corner retreat, designed with real attention to the space’s unique architecture: a small sanctuary within the larger bathroom, rather than a tub that happens to sit in a corner.
That sanctuary quality: the whole point of designing around the corner rather than simply filling it.
Getting Started This Weekend
The immediate corner tub solution:
Assess the corner’s actual two walls before choosing any finish.
Note whether either wall has a window, adequate depth for a built-in, or existing plumbing access, since these specifics shape which of the fourteen approaches actually fits.
Add one warm light source specifically at the corner, even before any renovation.
A plug-in sconce or a simple lamp, testing how warm, layered light changes the corner’s feeling before committing to a permanent fixture.
Bring in one plant to soften the corner’s hard surfaces.
A low-cost, immediate test of how organic texture changes the tub’s overall presence in the room.
Confirm the faucet’s actual position works with the tub’s specific corner placement before any tiling begins.
The rest of the design: the elaboration of this moment.
The corner: the beginning. The bathtub retreat: what gets built, and soaked in, around it.