
13 Halloween Pumpkin Display Ideas Beyond Basic Carving
The pumpkin display changed the moment I stopped assuming carving was the only real option. Not a bigger pumpkin. Not a sharper knife. Not a more elaborate stencil or another year of the same triangle-eyed jack-o’-lantern sitting on the same porch step.
An actual range of techniques, most of which involve no carving at all.
Because looking beyond the knife did something a decade of carved pumpkins never managed. Before it: the same basic jack-o’-lantern, every single year, technically festive but visually identical to the one before it and the one on every other porch on the block.

After it: painted metallics, drilled geometric patterns, stacked totems, and fully no-carve displays, an entire pumpkin display built with genuinely different techniques from the standard knife-and-triangle approach.
A pumpkin display does not need a knife to be effective. Carving is one technique among many, and often not even the most visually striking one, once paint, drilling, stacking, and no-carve decorating are given genuine consideration alongside it. The pumpkin: no longer defined by a single traditional method, but a blank material open to whatever technique actually suits the household’s taste and effort level.
Here are 13 Halloween pumpkin display ideas beyond basic carving — from the simplest paint treatment to the most fully realized multi-technique display — built on that understanding.
Why Looking Beyond Carving Opens Up Genuinely Different Results
The longevity advantage
A carved pumpkin begins visibly decaying within days, particularly in a warm climate, while a painted, drilled, or otherwise uncarved pumpkin can last the entire season, and sometimes well beyond it, without any of the mess or rapid decline carving introduces.
The skill accessibility case
Without alternative techniques:
Carving as the sole option, requiring genuine knife skill, a stencil, and considerable time investment for anything beyond the most basic jack-o’-lantern face.
The display: limited to whatever the household’s actual carving skill and patience allow.
With alternative techniques:
Paint, drilling, stacking, and no-carve decorating, each offering a genuinely different skill requirement and visual result, opening up options for households at every skill and time-investment level.
The display: no longer bottlenecked by carving ability alone, since several of the most visually striking techniques require no cutting at all.
The reusability principle
Painted, drilled, and decorated (rather than cut) pumpkins are often either genuinely reusable as faux pumpkins in subsequent years, or at minimum remain intact and displayable for the entire season without the rapid decay carving introduces.
The child-safety consideration
Several of these techniques — painting, drilling with supervision, no-carve decorating — are considerably safer for children to participate in directly than carving with a sharp knife, making them well suited to family decorating activities.
The Five Categories of Pumpkin Decorating Beyond Carving
Before choosing any specific technique:
Paint techniques
Acrylic paint, metallic finishes, or a full painted scene, applied directly to the pumpkin’s surface.
The most accessible and lowest-skill-barrier alternative to carving.
Offers genuine longevity since the pumpkin’s structural integrity remains fully intact.
Drilling and etching
A drill or a specialized etching tool, creating patterns through small holes or surface-level marks rather than deep cuts.
Provides a dramatic lit effect similar to carving with less structural damage to the pumpkin.
Requires some tool comfort but less knife skill than traditional carving.
No-carve decorating
Ribbon, fabric, sequins, or other applied materials, decorating the pumpkin’s exterior without any cutting or drilling at all.
The safest and most accessible technique for young children.
Fully reversible and often reusable across multiple seasons.
Stacking and sculptural arrangement
Multiple pumpkins and gourds combined into towers, figures, or sculptural forms.
Uses quantity and arrangement rather than any single pumpkin’s individual decoration.
Particularly effective for a larger, more dramatic display.
Mixed material combination
Pumpkins combined with fabric, metal, or other non-organic materials for a fully mixed-media display.
The most creatively open-ended category.
Allows genuine individual artistic expression beyond any single standard technique.
1. The Metallic Painted Pumpkin
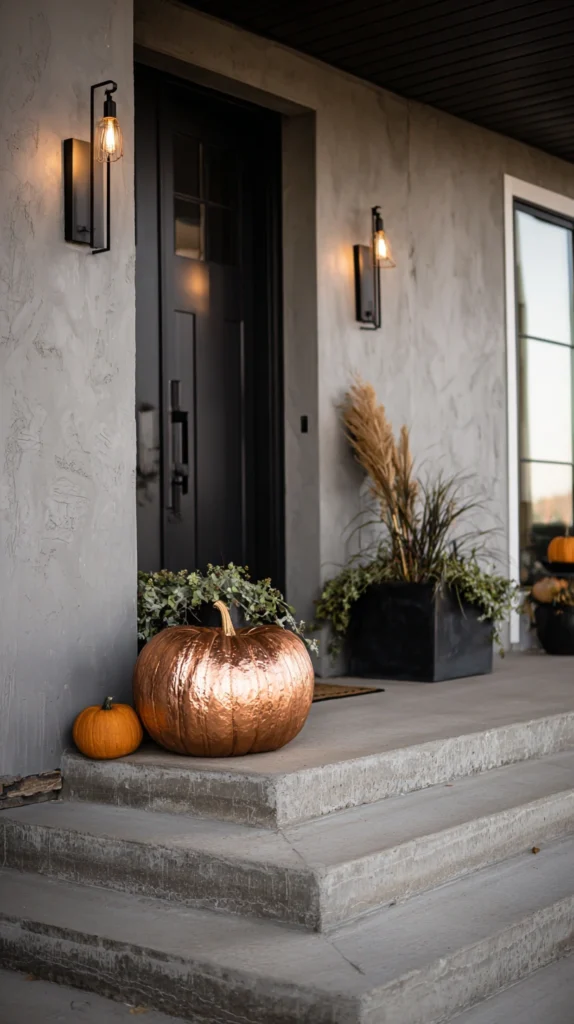
Pumpkins painted entirely in metallic gold, silver, or copper acrylic paint, providing a glamorous, reflective alternative to the traditional orange gourd.
Why metallic paint transforms a pumpkin more dramatically than almost any other single technique
A metallic finish fundamentally changes how the pumpkin reads visually, its reflective quality catching light in a way no traditional carved or natural pumpkin can replicate, immediately signaling a more elevated, considered display.
The paint application
Metallic acrylic craft paint, applied in two to three thin, even coats across the pumpkin’s full surface, allowing each layer to dry before the next application.
The color selection
Gold, silver, rose gold, or copper, chosen to complement the household’s broader seasonal color palette rather than defaulting to a single standard option.
The surface preparation
The pumpkin’s surface cleaned and dried thoroughly before painting, ensuring the paint adheres evenly without streaking or pooling in the natural ridges.
The finishing touch
A clear sealant spray, protecting the metallic finish from moisture and extending the display’s usable lifespan through the full season.
The overall effect
A display with genuine glamour and reflective visual interest, achievable with minimal skill beyond careful, even paint application.
Cost breakdown: Metallic acrylic paint: $8–15 Clear sealant: $6–12 Total: $14–27
2. The Drilled Constellation Pumpkin
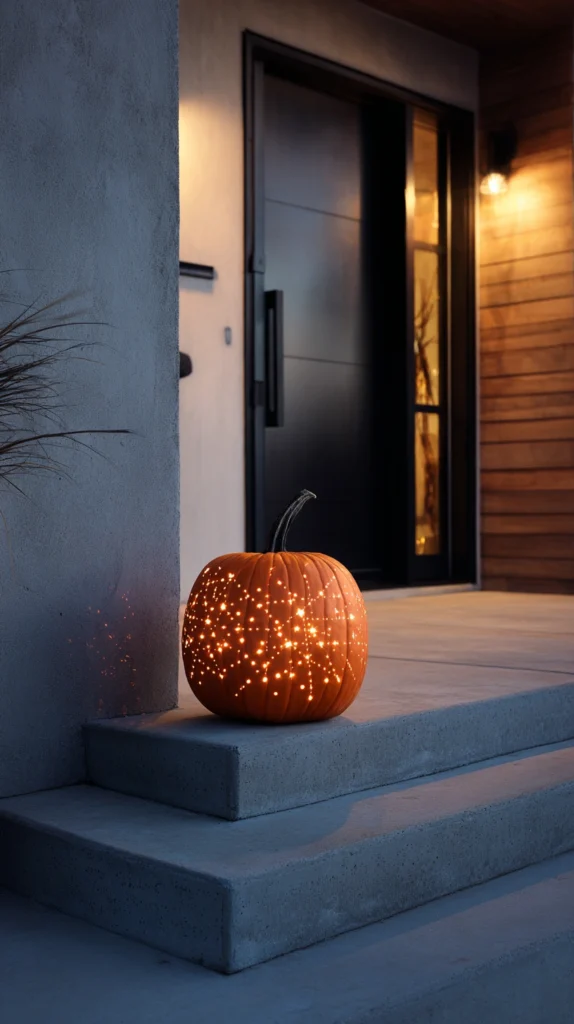
A pumpkin with a pattern of small holes drilled through its surface in the shape of a constellation or a simple star field, creating a dramatic lit effect once a candle or light is placed inside.
Why drilling offers a genuinely different lit effect than traditional carving
Small drilled holes create a scattered, twinkling point-of-light effect entirely different from a carved jack-o’-lantern’s larger cut-out features, and the technique causes considerably less structural damage to the pumpkin itself.
The drilling tool
A small handheld drill with a narrow bit, used to create a pattern of small holes across the pumpkin’s surface, rather than a knife making larger cuts.
The pattern planning
A specific constellation, a simple star pattern, or a random scattered field of holes, planned lightly in pencil on the pumpkin’s surface before drilling begins.
The hole size variation
Slightly varied hole sizes, creating visual interest in the resulting light pattern rather than a uniform, evenly sized dot grid.
The lighting
A flameless LED candle or light placed inside, providing the illumination that brings the drilled pattern to life once darkness falls.
The overall effect
A dramatically different lit pumpkin effect achieved through a technique requiring considerably less cutting skill than traditional detailed carving, while causing far less structural damage and decay.
Cost breakdown: Small handheld drill (if not already owned): $20–40 Flameless LED candle: $8–15 Total: $8–55 depending on tool ownership
3. The No-Carve Ribbon-Wrapped Pumpkin
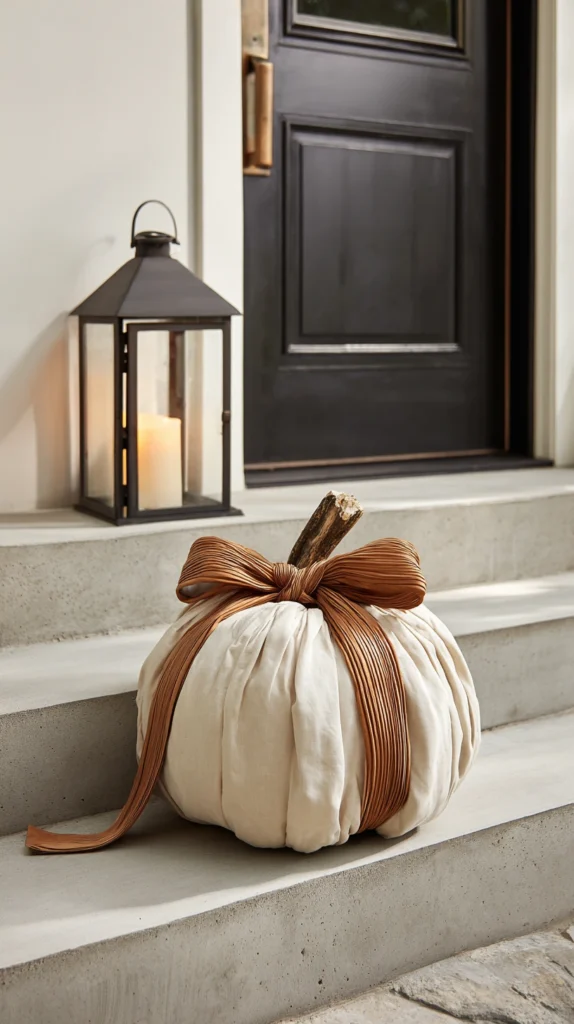
A pumpkin wrapped in strips of ribbon, ropes, or ribbon-like fabric, secured with pins rather than any cutting, creating a fully textile-covered decorative surface.
Why ribbon wrapping suits the most safety-conscious and reusable approach on this list
This technique requires no cutting, drilling, or sharp tools whatsoever, making it genuinely safe for young children to participate in directly, and the wrapped pumpkin remains fully intact and reusable for years since nothing is actually damaged.
The wrapping material
Wide ribbon, jute twine, or fabric strips, in colors and textures complementing the household’s broader seasonal palette rather than traditional Halloween orange and black exclusively.
The wrapping technique
Wrapped around the pumpkin’s full circumference, secured at the top and bottom with straight pins pushed into the pumpkin’s flesh, rather than any cutting or adhesive that would damage the surface.
The pattern variation
Alternating colors or widths of ribbon, creating a striped or patterned effect around the pumpkin’s circumference.
The reusability
A genuinely faux pumpkin — foam or plastic — wrapped using this same technique lasts indefinitely, reusable every subsequent Halloween without any need to replace the base material at all.
The overall effect
A fully safe, fully reversible decorating technique producing a genuinely different, textile-based visual result, well suited to family decorating activities involving young children.
Cost breakdown: Ribbon or fabric strips: $10–25 Pins: $3–8 Total: $13–33
4. The Painted Watercolor-Effect Pumpkin
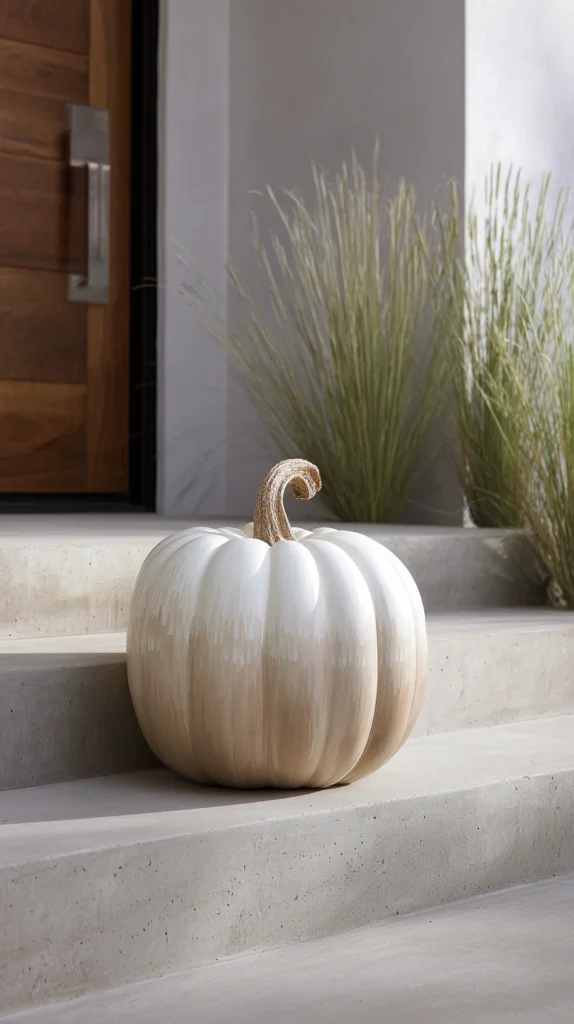
A pumpkin painted with a soft, blended watercolor-style effect, using diluted acrylic paint and a wet-on-wet blending technique for a subtle, artistic gradient.
Why a watercolor effect offers a softer, more artistic alternative to solid or metallic paint
Rather than a single flat color, a genuinely blended watercolor technique creates a soft gradient and subtle color variation across the pumpkin’s surface, offering a more artistic, painterly result than a uniform paint application.
The paint dilution
Acrylic paint diluted significantly with water, applied to the pumpkin’s surface while still slightly damp, allowing the colors to blend and bleed into each other similar to genuine watercolor technique.
The color palette
Two or three complementary colors — muted rust, soft gold, and cream, for example — blended together rather than a single solid tone.
The application technique
Applied with a wide, soft brush, working quickly while the surface remains damp to achieve genuine color blending rather than distinct, separate color blocks.
The sealing step
A matte clear sealant once the paint has fully dried, protecting the soft, blended finish from moisture without adding an unwanted glossy sheen.
The overall effect
A genuinely artistic, painterly pumpkin finish, offering a softer and more subtle alternative to the bolder metallic or solid-color paint approaches.
Cost breakdown: Acrylic paint (2–3 colors): $10–20 Matte sealant: $6–12 Total: $16–32
5. The Stacked Pumpkin Totem
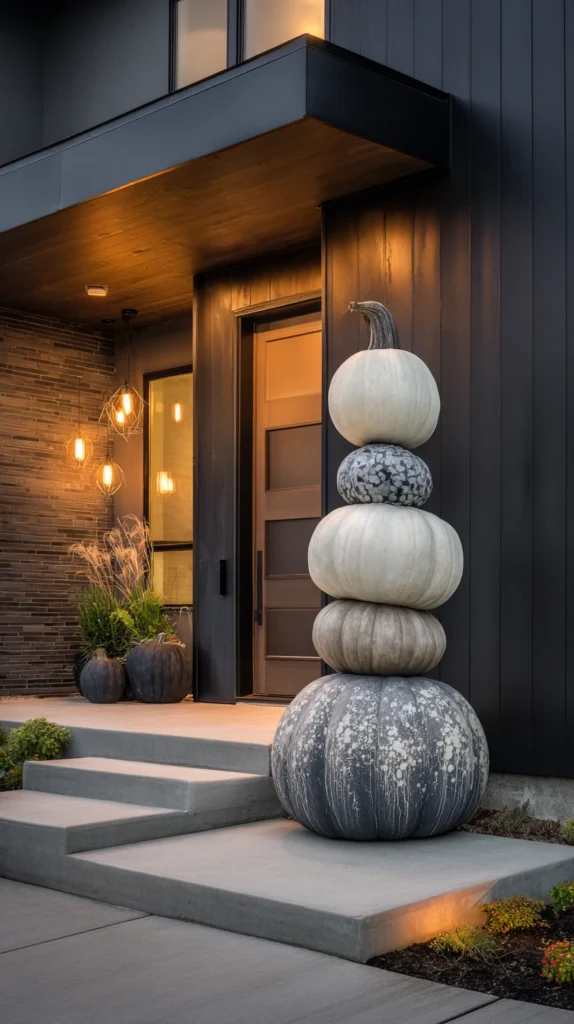
Multiple pumpkins of decreasing size stacked vertically, secured with dowels or skewers, creating a totem-style sculptural display.
Why stacking creates dramatic height and visual interest without any single pumpkin needing individual decoration
A stacked totem relies on scale and arrangement rather than any single pumpkin’s surface treatment, offering genuine sculptural drama through quantity and composition alone.
The pumpkin selection
Three to five pumpkins in decreasing size, from a large base pumpkin to a small top pumpkin, providing the totem’s basic tapering silhouette.
The securing method
A long wooden dowel or a series of skewers inserted through the center of each pumpkin, from base to top, providing structural stability for the stacked arrangement.
The decorative options
Each individual pumpkin left plain, or lightly decorated with a simple painted detail, ribbon, or a small drilled pattern, adding a modest additional layer of interest without requiring elaborate individual decoration.
The stability check
The base pumpkin chosen for genuine structural stability and flatness, ensuring the full stacked arrangement remains secure and does not topple, particularly important if children or pets are nearby.
The overall effect
A dramatic, tall sculptural display achieved through arrangement and scale rather than any single pumpkin’s individual decorative technique, well suited to a genuine focal-point display.
Cost breakdown: Pumpkins (3–5, varied sizes): $20–45 Dowel or skewers: $5–10 Total: $25–55
6. The Sequin and Pin Sparkle Pumpkin
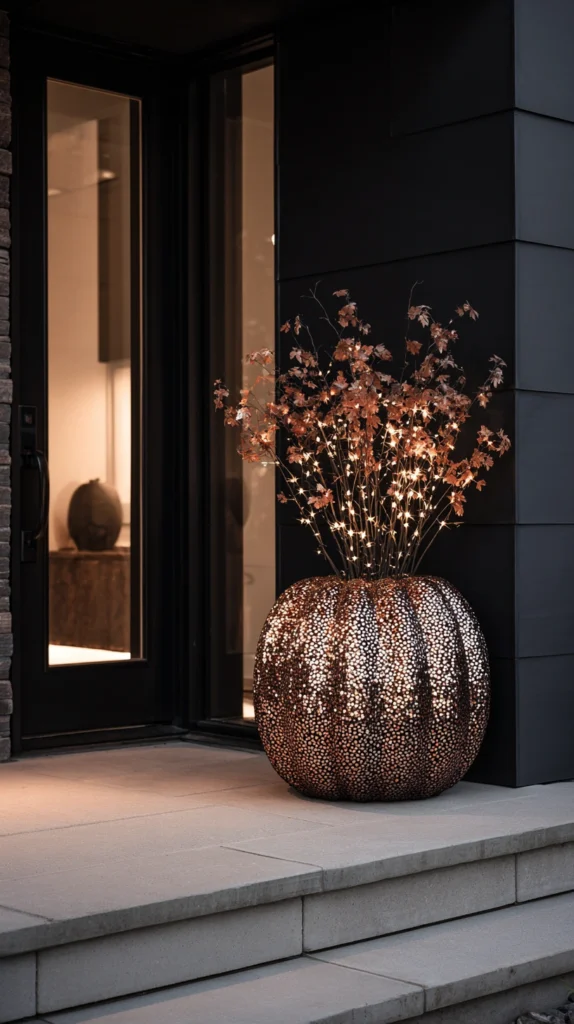
A pumpkin covered in sequins or small decorative pins, applied directly into the pumpkin’s flesh without any cutting, creating a fully sparkling, textured surface.
Why pins offer a genuinely low-skill, high-impact decorating method
Pushing pins or sequin-topped pins directly into a pumpkin requires no cutting skill or specialized tool at all, yet the resulting dense, sparkling surface provides considerable visual impact, particularly under evening lighting.
The pin selection
Sequin-topped straight pins, available in bulk from a craft supplier, in colors and finishes matching the household’s broader seasonal palette.
The application pattern
Pins pushed directly into the pumpkin’s surface in a deliberate pattern — a spiral, a simple geometric design, or a dense, fully covered surface — depending on the desired level of coverage and effort.
The density consideration
A more densely covered pumpkin providing a more dramatic, fully transformed appearance, though even a moderate, patterned application creates genuine visual interest without requiring complete surface coverage.
The child participation
A genuinely safe, low-effort activity well suited to children old enough to handle small pins carefully, offering a family decorating activity requiring no sharp tools at all.
The overall effect
A pumpkin transformed into a sparkling, textured object, the technique offering considerable visual reward for very modest skill and tool requirements.
Cost breakdown: Sequin pins (bulk quantity): $10–20 Total: $10–20
7. The Geometric Drilled Pattern Pumpkin
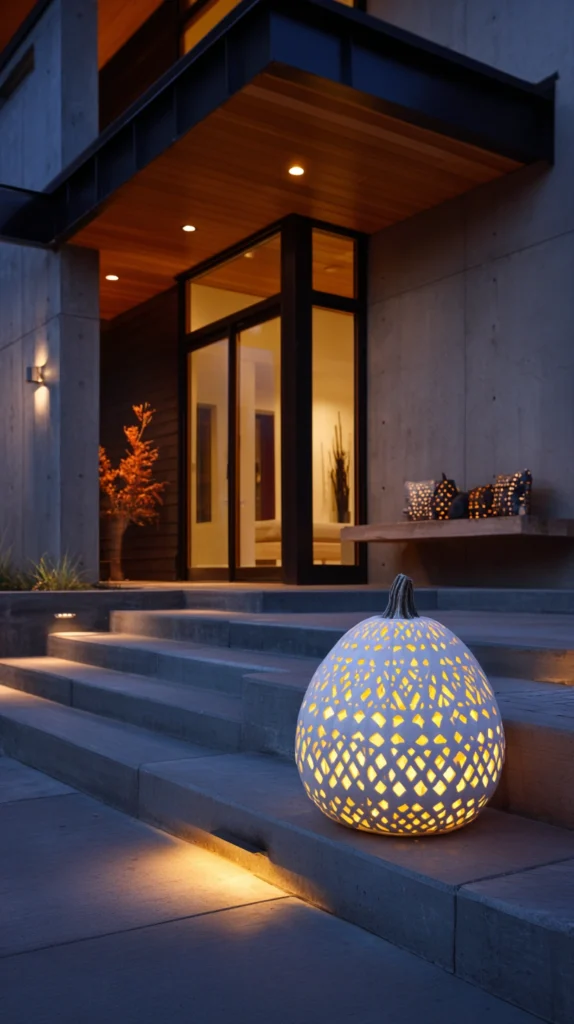
A pumpkin drilled with a deliberate geometric pattern — a honeycomb, a diamond grid, or a repeating triangle motif — rather than a random or representational design.
Why a geometric pattern suits a more contemporary, design-forward household
Where a constellation or representational drilled design leans decorative and whimsical, a precise geometric pattern reads as more architectural and contemporary, suited to a household with a cleaner, more modern overall aesthetic.
The pattern planning
A repeating geometric motif — hexagons, diamonds, or a simple grid — measured and marked lightly in pencil before drilling begins, ensuring genuine consistency across the pattern’s repeat.
The drilling precision
Consistent hole spacing and size throughout, since a geometric pattern’s visual impact depends specifically on that precision and regularity, unlike a more organic or random design where slight variation matters less.
The pumpkin selection
A smooth-skinned pumpkin variety, providing an even surface that supports a precise geometric pattern more successfully than a heavily ridged or bumpy variety.
The lighting
A single centered light source inside, allowing the geometric pattern’s full repeat to shine through evenly across the pumpkin’s surface.
The overall effect
A contemporary, architecturally patterned display achieved through careful planning and precise drilling rather than any freehand cutting skill.
Cost breakdown: Small handheld drill (if not already owned): $20–40 Smooth-skinned pumpkin: $8–15 Total: $8–55 depending on tool ownership
8. The Fabric-Covered No-Carve Pumpkin
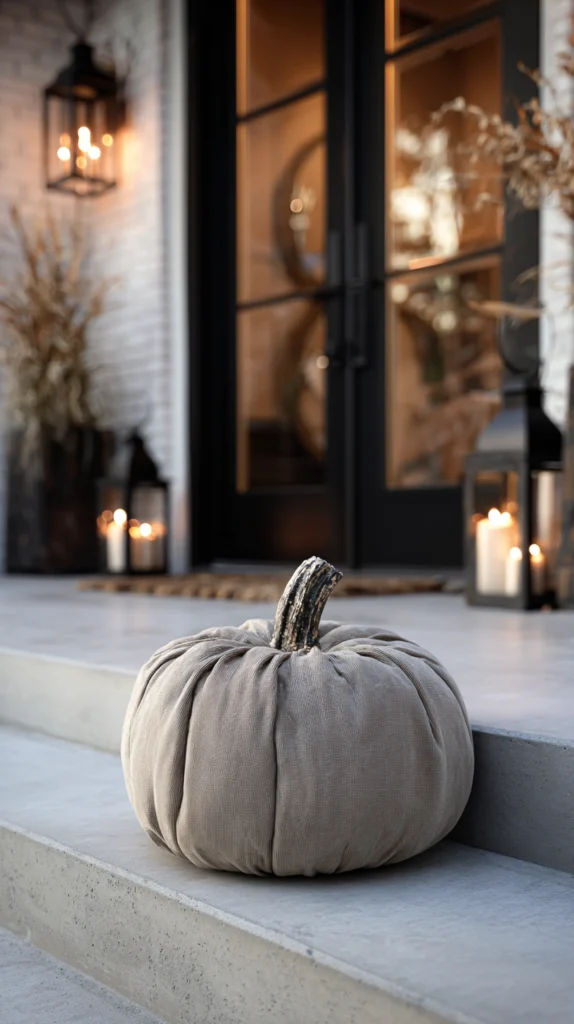
A pumpkin fully covered in fabric, secured with hot glue or pins, transforming its surface entirely through textile rather than any paint or cutting.
Why fabric covering offers the most complete surface transformation among no-carve techniques
Unlike ribbon wrapping, which creates a striped pattern around the pumpkin’s circumference, a full fabric covering entirely transforms the pumpkin’s surface and silhouette, creating a genuinely different object rather than a decorated version of the original gourd.
The fabric selection
A patterned or textured fabric — burlap, a plaid flannel, or a rich velvet — cut into panels sized to the pumpkin’s individual lobes or sections.
The application method
Fabric panels secured with hot glue along the pumpkin’s natural ridges, or pinned in place for a fully non-permanent, reversible application.
The stem treatment
The pumpkin’s stem left exposed and visible, or wrapped separately in a coordinating material, providing a natural finishing detail atop the fabric-covered body.
The reusable version
Using a genuine faux pumpkin as the base, this technique produces an entirely reusable decorative object, since the fabric can be removed and reapplied to a fresh faux pumpkin base indefinitely.
The overall effect
A pumpkin transformed into what reads almost as an entirely new decorative object, the fabric covering providing a far more complete transformation than any surface-level paint or drilling technique.
Cost breakdown: Fabric (sufficient yardage): $15–35 Hot glue or pins: $5–10 Total: $20–45
9. The Bleached or Whitewashed Pumpkin
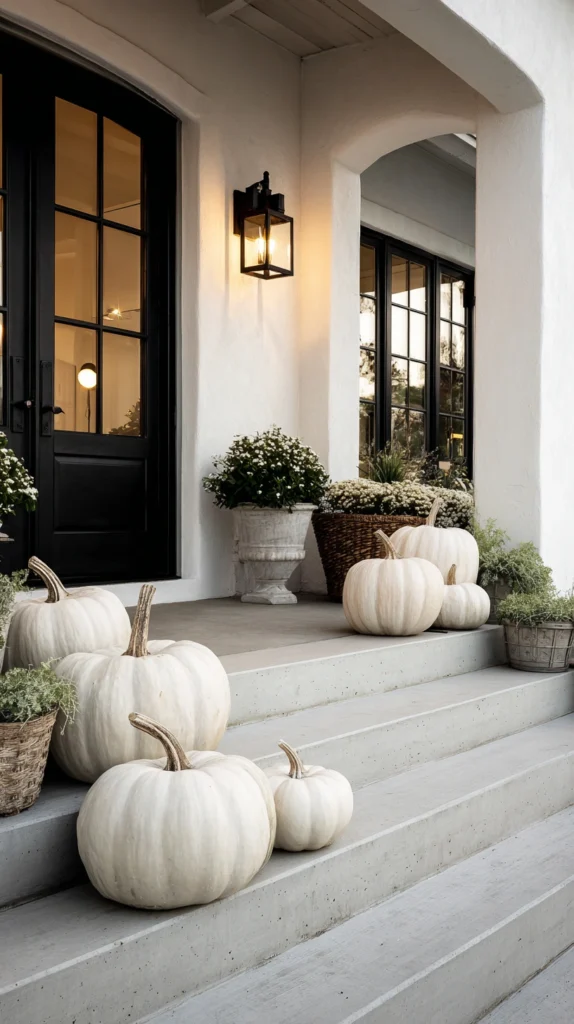
A traditional orange pumpkin lightened through a bleach wash or a whitewash paint technique, creating a pale, ghostly alternative to the natural orange color.
Why lightening a pumpkin’s natural color creates a genuinely different palette without full paint coverage
Rather than a solid paint application entirely covering the pumpkin’s natural texture, a bleach wash or thin whitewash lightens the existing color while still allowing some of the pumpkin’s natural ridges and texture to show through.
The bleach wash technique
A diluted bleach solution, applied with a sponge or brush, lightening the pumpkin’s natural orange tone toward a pale, almost white finish, worked in a well-ventilated area with appropriate care.
The whitewash paint alternative
A thinned white or cream acrylic paint, applied in a single light coat, allowing the pumpkin’s natural color and texture to show through partially rather than being fully obscured.
The natural texture preservation
The pumpkin’s ridges and natural surface variation remaining visible through the lightened finish, distinguishing this technique from a fully opaque solid paint application elsewhere on this list.
The seasonal pairing
Particularly effective when paired with other pale or white pumpkins and gourds, creating a cohesive, ghostly toned display distinct from the traditional bright orange arrangement.
The overall effect
A softer, more muted alternative to a traditional orange pumpkin, achieved through a lightening technique rather than full paint coverage, preserving some of the pumpkin’s natural texture in the process.
Cost breakdown: Bleach (diluted) or white acrylic paint: $5–15 Total: $5–15
10. The Botanical Pressed Flower Pumpkin
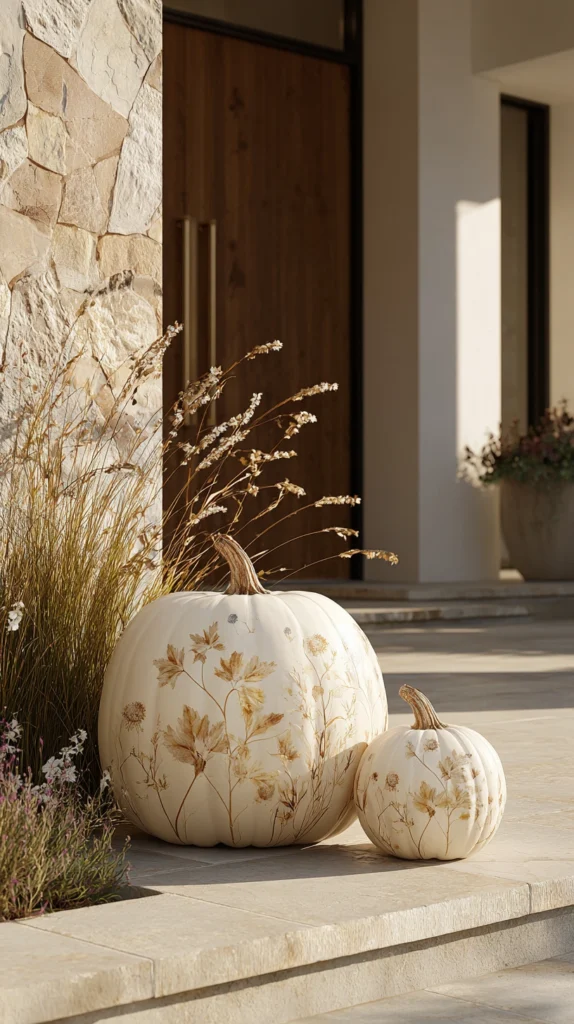
A pumpkin decorated with pressed flowers or leaves, adhered directly to its surface with a clear sealant, creating a delicate, nature-inspired decorative pattern.
Why pressed botanicals suit a household wanting a softer, more delicate display
Where paint and drilling offer bolder, more dramatic transformations, pressed flowers and leaves provide a gentler, more delicate decorative approach, well suited to a household preferring a softer overall seasonal aesthetic.
The pressing process
Flowers or leaves gathered and pressed for one to two weeks between heavy books before use, using material collected from a garden or a fall walk.
The adhesive application
A clear sealant or decoupage medium, brushed onto the pumpkin’s surface and used to adhere the pressed botanicals directly, then sealed over the top with an additional coat once the arrangement is complete.
The pattern arrangement
Botanicals arranged in a considered pattern — a wreath shape, a scattered natural arrangement, or a single dramatic branch — rather than randomly placed without any compositional thought.
The pumpkin color pairing
A cream or pale pumpkin base, allowing the pressed botanicals’ natural colors to stand out clearly, rather than a bright orange base that might visually compete with the delicate material.
The overall effect
A genuinely delicate, nature-inspired display, the pressed botanicals providing a softer alternative to the bolder paint, drilling, or fabric-based techniques elsewhere on this list.
Cost breakdown: Pressed flowers and leaves (gathered, largely free): $0–10 Clear sealant or decoupage medium: $8–15 Total: $8–25
11. The Gold Leaf Accent Pumpkin
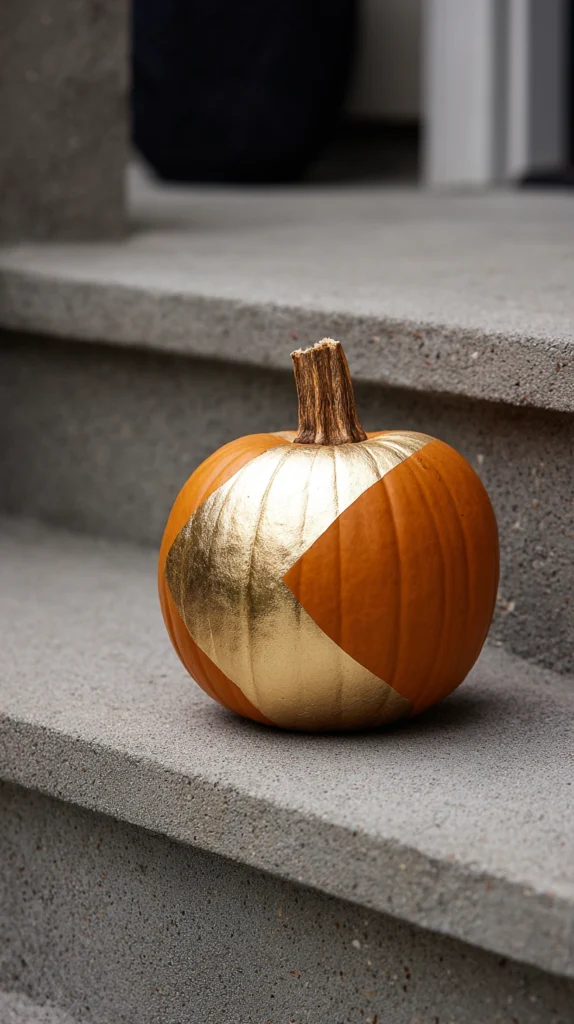
A pumpkin decorated with genuine gold leaf applied in a specific pattern or partial coverage, creating a luxurious, gilded accent rather than full metallic paint coverage.
Why gold leaf offers a more luxurious, textural result than metallic paint alone
Genuine gold leaf has a distinctive, slightly irregular texture and reflective quality that metallic paint cannot fully replicate, providing a considerably more luxurious and tactile finished result.
The leaf application
Adhesive size applied to the pumpkin’s surface in a specific pattern — a geometric shape, a simple line, or a partial dip-effect coverage — followed by genuine gold leaf sheets pressed onto the tacky adhesive.
The partial coverage approach
Applied to only a portion of the pumpkin’s surface, such as the top half or a specific geometric section, rather than full coverage, creating a striking contrast between the leafed and natural pumpkin surface.
The sealing step
A clear sealant brushed over the completed gold leaf application, protecting the delicate leaf material from flaking or lifting over the display’s full season.
The material investment
Genuine gold leaf costing somewhat more than paint alone, though the resulting texture and luxury feel often justify the modest additional expense for a household wanting a genuinely elevated result.
The overall effect
A pumpkin with real luxurious texture and reflective quality, the partial gold leaf application creating dramatic contrast against the pumpkin’s remaining natural surface.
Cost breakdown: Gold leaf sheets and adhesive size: $15–35 Clear sealant: $6–12 Total: $21–47
12. The Mixed Material Sculptural Pumpkin Figure
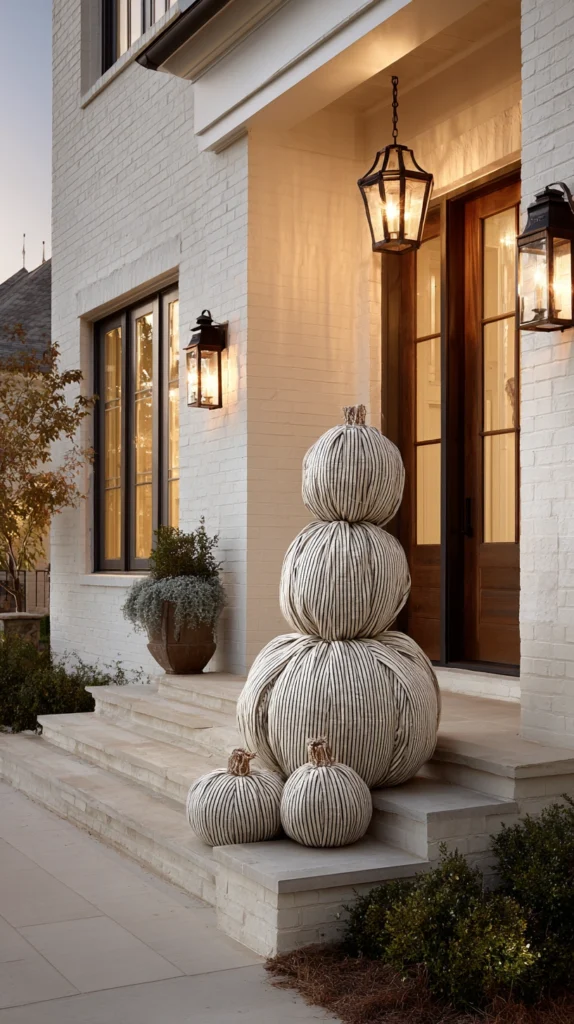
Pumpkins and gourds combined with fabric, buttons, and small accessories to create a specific character or figure — a witch, a ghost, or an animal — entirely through no-carve assembly.
Why building a figure from combined materials offers the most creative, open-ended technique on this list
Rather than decorating a single pumpkin’s surface, this approach uses the pumpkin as a base structural element within a larger assembled figure, opening up considerably more creative and personalized possibilities than any single surface-decoration technique alone.
The base structure
A pumpkin or a stack of pumpkins serving as the figure’s body or head, combined with additional gourds, fabric, and small accessories to build out the full character.
The character details
Fabric for clothing or a hat, buttons or small stones for facial features, and small sticks or additional gourds for limbs, assembled entirely without cutting into the pumpkin itself.
The securing method
Hot glue, wire, or simple balancing and stacking, connecting the various elements into one cohesive figure without any structural damage to the pumpkins themselves.
The character concept
A specific character — a witch, a scarecrow, a simple ghost figure — planned before assembly begins, providing a clear creative direction for how the various materials will combine.
The overall effect
A genuinely unique, personalized sculptural figure, this technique offering the most creative latitude of any approach on this list, limited only by the household’s own imagination and available materials.
Cost breakdown: Pumpkins and gourds (2–3): $15–35 Fabric and accessory materials: $15–35 Total: $30–70
13. The Complete Multi-Technique Pumpkin Display (The Fully Varied Porch Arrangement)
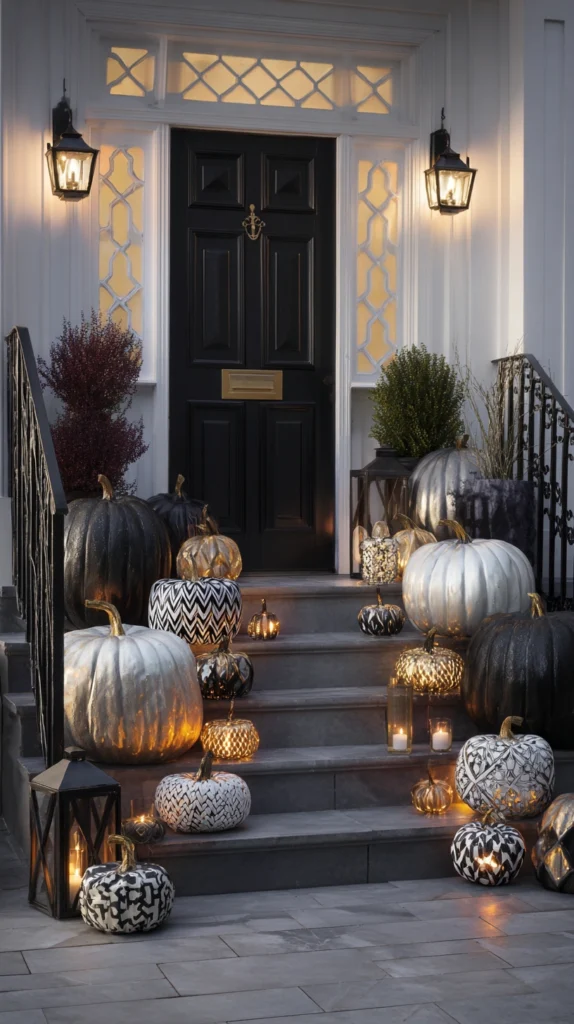
A complete pumpkin display combining several of the techniques above — painted, drilled, no-carve, and stacked pumpkins arranged together — treating the full display as one varied, considered composition rather than a single technique repeated across every pumpkin.
What separates the complete display from a single technique applied uniformly
A dozen pumpkins all painted the identical metallic gold: a good look, but visually uniform. A complete multi-technique display: genuine variety across paint, drilling, no-carve decorating, and stacked arrangement, creating a richer, more visually interesting composition than any single technique repeated alone.
The elements of the complete multi-technique display
The painted pumpkins
One or two metallic or watercolor-painted pumpkins, providing bold color and a smooth, transformed surface.
The drilled pumpkins
A constellation or geometric drilled pumpkin, providing dramatic evening lighting distinct from the painted pieces’ daytime appearance.
The no-carve pieces
A ribbon-wrapped or sequin-pinned pumpkin, adding texture and requiring no cutting tools at all.
The stacked totem
A stacked pumpkin arrangement providing height and sculptural drama within the broader display.
The natural accents
A few plain, undecorated pumpkins and gourds interspersed throughout, providing visual rest between the more elaborately decorated pieces.
The complete design in action
A porch display through the full season:
During the day: The metallic and watercolor-painted pumpkins catching sunlight, the stacked totem providing height and structure, plain pumpkins filling in around the more elaborate pieces.
In the evening: The drilled constellation pumpkin lighting up with its scattered star pattern, the metallic pieces catching the porch’s own lantern or string light glow.
Throughout the season: The no-carve and painted pieces remaining fully intact without any decay, unlike a traditional carved pumpkin’s rapid decline, extending the display’s usable life considerably longer.
The complete multi-technique display: not a dozen identical jack-o’-lanterns, but a genuinely varied composition using several different techniques, none of which requires the same traditional carving skill or introduces the same rapid decay.
Cost breakdown for the complete display: Assuming a starting point of a bare porch: Painted pumpkins (2, metallic and watercolor): $30–52 Drilled pumpkin: $8–55 No-carve pumpkin (ribbon or sequin): $10–33 Stacked totem: $25–55 Plain accent pumpkins and gourds: $15–30 Total: $88–225
Phased for planning purposes:
Two to three weeks before: Sourcing pumpkins and gathering materials for each planned technique
The week of: Painting and drilling completed, allowing time for paint to fully dry and cure
The weekend before Halloween: No-carve and stacked elements assembled, the full display arranged together for the first time
The multi-technique pumpkin display: not a single carved jack-o’-lantern repeated identically, but a genuinely varied, considered composition using several distinct techniques across the full display.
The Question Before Any Pumpkin Decorating Decision
Before choosing a single technique:
What is the primary goal for this year’s pumpkin display?
If the answer is: maximum visual drama with minimal skill required — the metallic paint technique or the sequin pin approach.
If the answer is: a dramatic evening lighting effect without traditional carving — the drilled constellation or geometric pattern pumpkin.
If the answer is: a genuinely safe activity for young children — the ribbon-wrapped or sequin pin no-carve techniques.
If the answer is: the longest possible display lifespan — any of the paint, drilling, or no-carve techniques, all of which avoid the rapid decay traditional carving introduces.
The design follows the household’s actual skill level, available time, and desired display lifespan, more than any single assumption that carving is the only real pumpkin decorating option. Every idea on this list offers a genuinely different combination of skill, time, and visual result. The question is which specific technique fits this household’s actual capacity and taste this particular year.
The single metallic-painted pumpkin, requiring nothing more than a craft store paint bottle: still creates a genuinely different, more elevated result than a traditional carved jack-o’-lantern. The complete multi-technique display, combining paint, drilling, no-carve decorating, and stacked arrangement: a porch display with real variety and considerably longer seasonal lifespan than carving alone could ever provide.
That variety and longevity: the whole point of looking beyond the knife when it comes to decorating pumpkins.
Getting Started This Weekend
The immediate pumpkin display solution:
Choose one technique genuinely new to the household, rather than defaulting to carving out of habit.
Paint, drilling, or a simple ribbon wrap — any of these offers a meaningfully different result with a lower skill barrier than traditional carving.
Test the chosen technique on one pumpkin before committing the whole display to it.
A single trial run, particularly for paint or drilling, confirms the approach works as expected before a larger investment of pumpkins and materials.
Mix at least two different techniques across the full display, rather than repeating one approach on every pumpkin.
Genuine variety, even across just two or three pumpkins, creates a considerably more interesting composition than uniform repetition.
Seal any painted pumpkin promptly to maximize its season-long durability.
The rest of the design: the elaboration of this moment.
The technique: the beginning. The pumpkin display: what gets painted, drilled, wrapped, and stacked to build it.