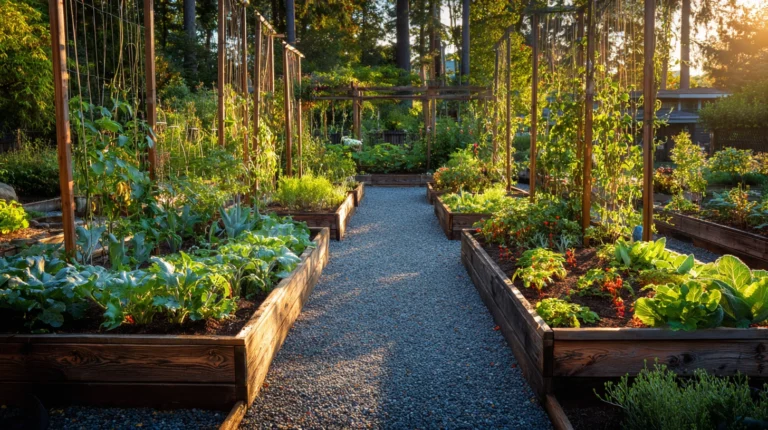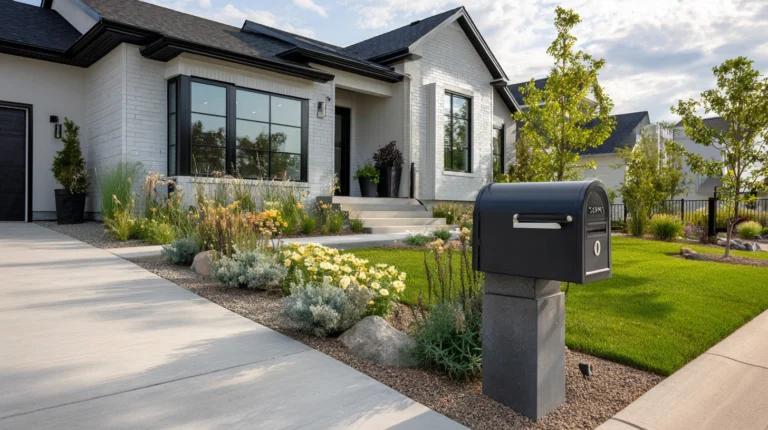

12 Raised Deck Planter Ideas for Small Patios
A small patio has one advantage a sprawling backyard doesn’t: every square foot has to earn its place, which forces better decisions than unlimited space ever does. There’s no room for a planter that just sits there taking up floor space without doing double duty as seating, screening, or a genuine growing structure. That constraint, uncomfortable as it sounds, is actually what makes small-patio planting some of the most creative and functional container gardening around.

Raised planters specifically solve problems a small patio has that ground-level garden beds don’t even need to think about. Deck boards can’t be dug into. Drainage has to go somewhere that won’t rot the structure underneath. And every planter is either helping the space feel bigger through smart placement, or making an already tight patio feel more crowded.
Here are 12 ways to bring raised planters onto a small deck or patio that solve real space, structural, and plant-care problems, with the construction details, weight and drainage considerations, and cost ranges for each.
What to Confirm Before Adding Any Raised Planter to a Deck
Weight capacity is the detail most often skipped, and the most important one:
- Wet soil is considerably heavier than it looks — a filled raised planter box can weigh several hundred pounds once soil, plants, and water are accounted for, and this weight is concentrated in a relatively small footprint
- Most residential decks are engineered for a general live load, but concentrated weight from multiple large planters in one area can exceed what a specific section of decking and its supporting joists were designed to handle, particularly on an older or smaller deck structure
- Consulting the deck’s original construction documentation, or having a contractor assess current load capacity, is worth doing before committing to multiple large planters, especially on a second-story or elevated deck
Drainage and protecting the deck surface underneath:
- Any raised planter sitting directly on deck boards needs some form of elevation or a drainage tray beneath it, since standing water trapped against wood decking accelerates rot and staining considerably
- Planter feet, small risers, or a dedicated drainage tray that catches and redirects excess water away from the deck surface are standard, inexpensive solutions worth including in every planter on this list
1. A Built-In Bench Planter Combination
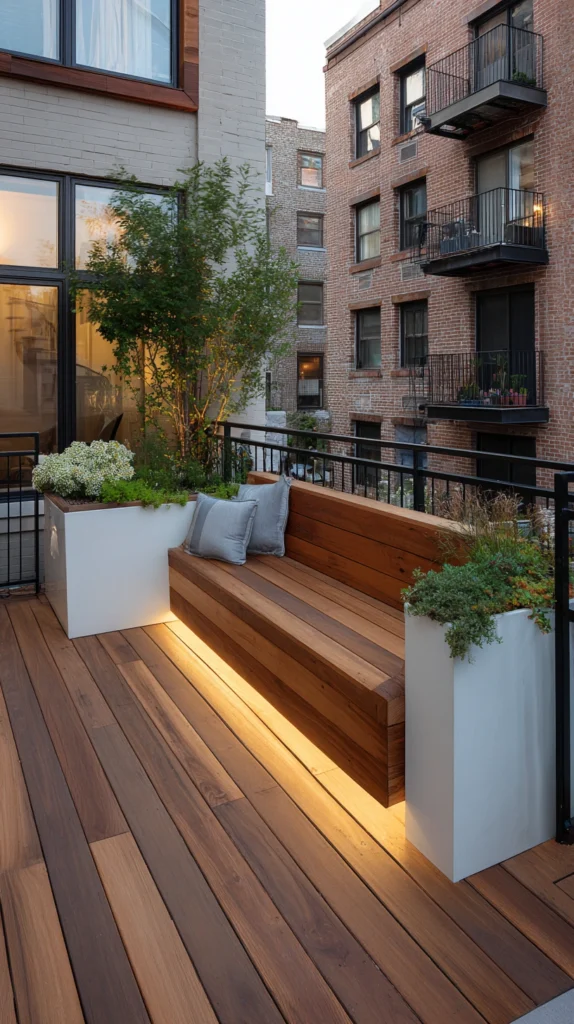
Integrating a raised planter directly into the build of a patio bench — with the planter forming one end or the full back of the seating structure — combines two functions in the single footprint a small patio can typically spare for either one alone.
How the combined structure works:
- The bench seat and the planter box share a common frame, generally built from the same wood or composite decking material used elsewhere on the patio, with the planter section lined and drained separately from the seating structure
- This shared build means the planter’s visual bulk reads as part of the furniture rather than as a separate object competing for floor space
Sizing considerations specific to a combined structure:
- Bench seat height (typically 17-19 inches) needs to be balanced against a comfortable planter box height, which is often somewhat taller for growing convenience — a stepped design, where the planter sits slightly higher than the seat, resolves this without compromising either function
- Planter width should leave adequate legroom and seat depth for comfortable sitting, generally meaning the planter occupies one end or the back of the bench run rather than its entire length
Waterproofing between the two functions:
- A fully separate liner and drainage system for the planter section, distinct from the bench’s seating structure, prevents soil moisture from migrating into and damaging the seating portion of the build
- A slight gap or a sealed divider between the planter’s interior and the bench’s seating frame adds an extra layer of protection against moisture transfer
Cost: $400-1,200 for a custom-built bench-planter combination, varying with size and material, generally comparable to building a quality bench and a separate planter individually, while saving the floor space either would require on its own.
Where this combination is worth prioritizing: Any small patio needing both seating and greenery, where floor space genuinely can’t accommodate both as fully separate pieces.
Bench Planter Tips
Build the planter section with its own complete drainage system, independent of the bench’s structural support. This separation is what keeps the seating portion structurally sound over years of exposure to the planter’s regular watering.
Choose a wood species or composite material rated for both structural seating use and prolonged soil moisture contact, since these two functions place different demands on the material even within the same combined structure.
2. Railing-Mounted Planter Boxes
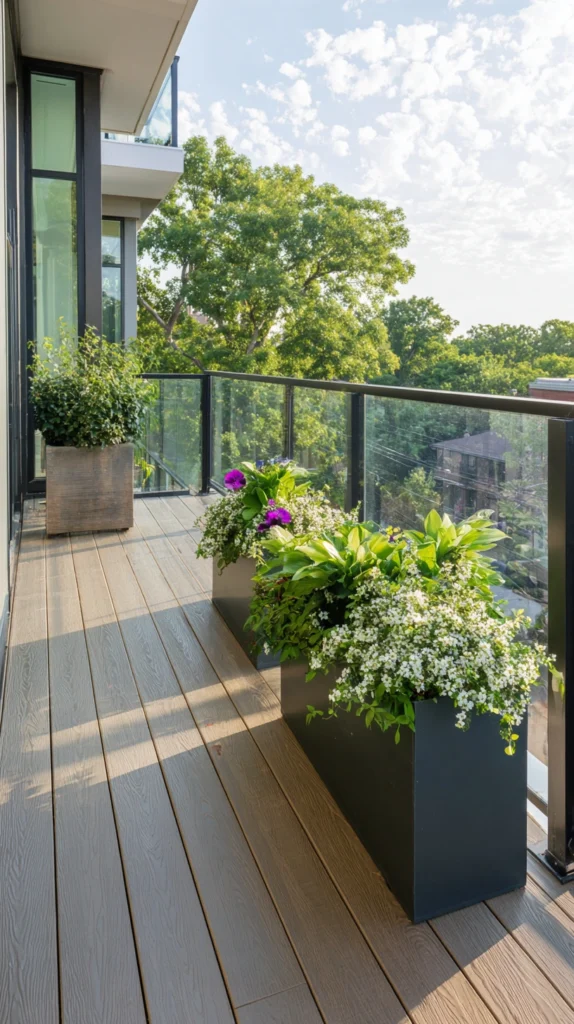
Hanging planter boxes directly on the deck or patio railing, rather than placing raised planters on the floor, keeps growing space entirely off the usable floor area — one of the most direct ways to add greenery to a genuinely tight patio without sacrificing any walking or seating room.
Mounting options and railing compatibility:
- Over-the-rail hanging boxes, which hook over the top of the railing and hang on the outside face, work with most standard railing types without requiring any permanent hardware or drilling
- Bracket-mounted boxes, secured with hardware directly to the railing’s face, offer a more secure, permanent installation but require confirming the railing material can accept the mounting hardware safely
Weight and railing strength considerations:
- Railings are generally engineered for a fall-protection load rather than a significant additional hanging weight, so confirming a specific railing’s capacity to safely support a fully watered, planted box is worth doing before installation, particularly for a longer run of multiple boxes
- Lightweight planter materials (resin, fiberglass, or a lightweight composite) reduce the overall load on the railing considerably compared to a solid wood or concrete planter box of the same size
Which side of the railing to mount on:
- Exterior-mounted boxes (hanging on the outside face of the railing) keep the interior patio floor completely clear, though this positions the plants where they may be more exposed to wind and require checking from outside the patio for maintenance
- Interior-mounted boxes, hanging on the inside face, keep plants within easier reach for daily care but do consume a small amount of the patio’s usable interior space near the railing line
Cost: $25-70 per railing planter box for a quality resin or lightweight composite option, or $60-150 for a more substantial wood or metal box, plus mounting hardware.
Where this approach is the smart choice: Any small patio or deck where floor space for planting is essentially nonexistent, but a railing perimeter offers an underused opportunity for growing space.
Railing Planter Tips
Confirm your railing’s specific hanging weight capacity before purchasing multiple boxes, particularly for an older deck railing that may not have been engineered with this specific additional load in mind.
Choose exterior mounting if wind exposure and appearance from outside the patio are less of a concern than maximizing interior floor space, and interior mounting if daily plant care convenience matters more than reclaiming every inch of floor area.
3. A Tiered Corner Planter
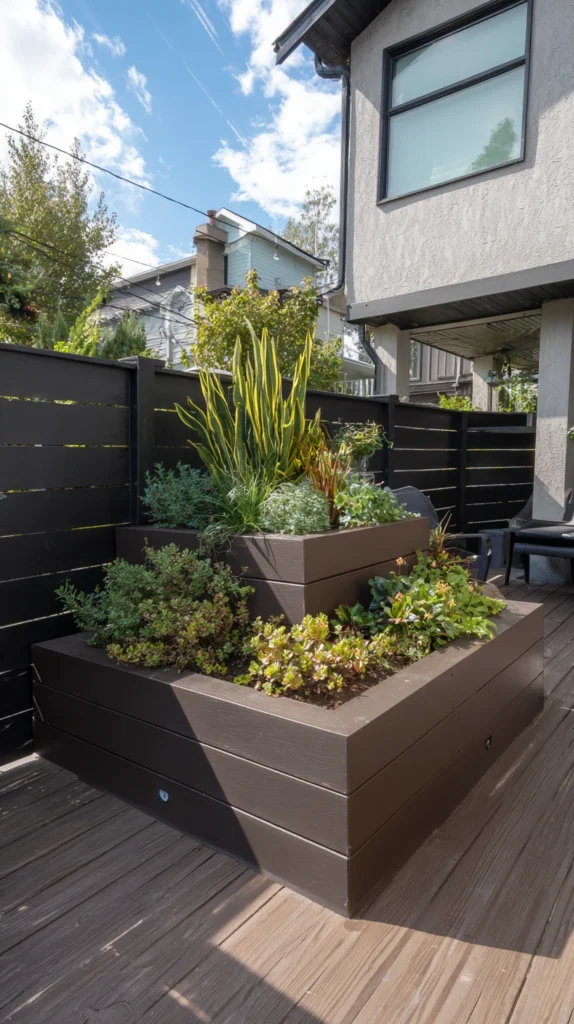
Building a stepped, tiered planter structure specifically for a patio’s corner takes advantage of a location that’s often underused for anything else, while adding meaningfully more growing surface than a single flat planter of the same footprint.
Why corners are a particularly good location for a tiered structure:
- A patio corner is frequently the least functional part of the floor plan for seating or walking, since furniture generally can’t be positioned to use a tight corner efficiently anyway
- A tiered planter’s vertical structure makes productive use of that otherwise wasted corner space, adding growing capacity without displacing any genuinely useful floor area
Construction approach for a stepped tier:
- Each tier is generally built as its own smaller box, set back and elevated slightly from the tier below it, either as a fully integrated single structure or as a series of separate boxes on graduated risers or a simple angled frame
- Three tiers is a common, manageable configuration for a small patio corner, though this can scale up or down based on the specific corner’s available height and depth
Plant selection suited to a tiered structure:
- Trailing or cascading plants (certain ivies, trailing petunias, some herbs) suit the lower and middle tiers particularly well, since their growth habit drapes down and softens the transition between tiers
- Taller, more upright plants suit the top tier, where they have room to grow upward without a tier above blocking light or physical space
Cost: $150-450 for a custom-built tiered corner planter, varying with the number of tiers and material choice, generally more cost-effective per square foot of growing surface than several separate flat planters covering the same total footprint.
Where this structure has the most impact: Any small patio with an underused corner, where a tiered structure converts genuinely wasted space into some of the patio’s most productive growing area.
Tiered Corner Planter Tips
Position the tallest tier at the back of the corner and the shortest at the front, ensuring every tier receives adequate sunlight rather than being shaded by the tier positioned above or in front of it.
Choose a consistent drainage and liner system across all tiers, since water runoff from an upper tier can drip onto the tier below if drainage isn’t properly directed away from the structure entirely.
4. A Self-Watering Raised Planter Box
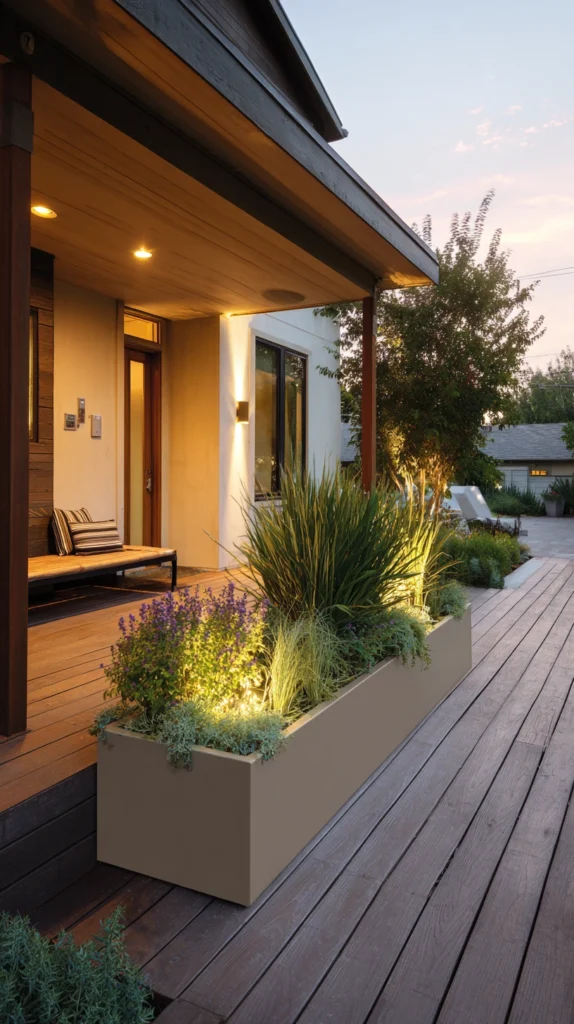
Incorporating a water reservoir into the base of a raised planter, with a wicking system drawing moisture up to the soil as needed, reduces watering frequency considerably and helps protect plants during hot stretches when a small patio’s containers can dry out quickly.
How the self-watering mechanism functions:
- A water reservoir sits in the planter’s base, separated from the soil above by a screen or false bottom, with a wicking material (rope, fabric, or a specialized wicking basket) drawing water upward into the soil as it dries
- A fill tube or opening, accessible from the planter’s exterior, allows the reservoir to be topped off without needing to disturb the soil or plants above
Why raised deck planters benefit from this system more than in-ground beds:
- Raised containers on a deck are more exposed to wind and heat from below (reflected off deck boards) than an in-ground bed, causing soil to dry out considerably faster, particularly in a smaller container with less total soil volume to buffer against moisture loss
- A self-watering reservoir directly addresses this faster drying tendency, reducing the frequency of manual watering needed to keep plants healthy through hot weather
Building or retrofitting a self-watering system:
- Purpose-built self-watering planter boxes are commercially available in a range of sizes, offering the most straightforward way to add this feature without custom construction
- A custom-built raised planter can incorporate a similar reservoir system using a false bottom and a length of PVC pipe as a fill tube, generally requiring more DIY construction knowledge than a purpose-built commercial option
Cost: $80-250 for a quality commercial self-watering planter box, or $50-150 in materials for a custom-built reservoir system added to an existing planter frame.
Where this feature is worth the added complexity: A small patio in a hot or sun-exposed climate, or any household finding that manual watering frequency for deck containers has become a genuine daily maintenance burden.
Self-Watering Planter Tips
Check the reservoir level regularly during the hottest stretches of summer, since a self-watering system still needs periodic refilling and isn’t a substitute for any attention entirely, just a reduction in how often that attention is needed.
Choose a wicking material rated for long-term use without breaking down, since some improvised wicking materials degrade over a season or two and need periodic replacement to keep the system functioning effectively.
5. Wheeled, Mobile Raised Planters
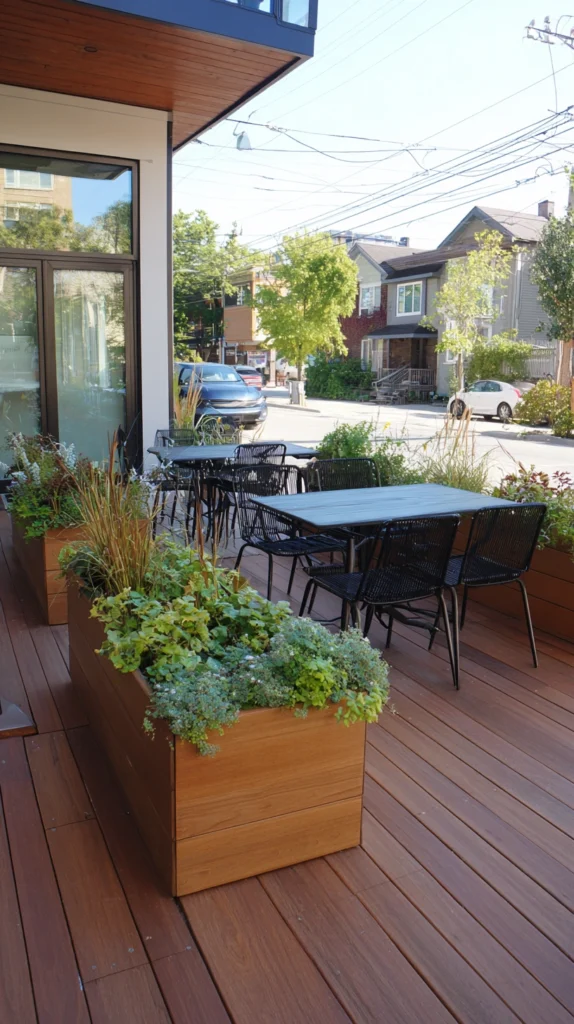
Adding locking caster wheels to the base of a raised planter allows it to be repositioned easily — rotated for even sun exposure, moved out of the way for a gathering, or brought closer to shelter during severe weather — rather than committing to one fixed location.
Why mobility solves a real problem on a small patio:
- A small patio often needs to serve multiple functions at different times — everyday relaxing, occasional larger gatherings — and fixed, immovable planters can restrict how flexibly the limited floor space gets used for those different purposes
- Mobile planters can be temporarily relocated to open up floor space for a specific occasion, then returned to their usual spot afterward, offering a flexibility fixed planters simply can’t provide
Wheel and caster selection:
- Locking casters, which can be secured in place once the planter reaches its desired position, prevent unwanted movement from wind or accidental bumping once the planter is positioned where it’s meant to stay
- Casters rated for the planter’s full loaded weight (soil, plants, and water included, not just the empty container) are essential, since an undersized caster can fail or become difficult to roll under the container’s actual working weight
Practical considerations for wheeled planters:
- A slightly smaller planter size, compared to a fixed raised bed, is generally more practical for a mobile design, since a very large, heavy planter becomes difficult to move regardless of caster quality
- Deck surface protection remains just as important for a wheeled planter as a stationary one — casters don’t eliminate the need for adequate drainage management beneath the planter
Cost: $30-80 in caster hardware added to an otherwise standard raised planter build, making this one of the more affordable functional upgrades on this list relative to the flexibility it adds.
Where mobility is worth prioritizing: Any small patio that regularly needs to shift between everyday use and occasional larger gatherings, where the ability to temporarily relocate planters adds genuine functional flexibility.
Wheeled Planter Tips
Confirm caster weight ratings against the planter’s fully loaded weight, not its empty weight. This is the single most common oversizing mistake with mobile planters, leading to casters that struggle or fail under actual use.
Choose locking casters specifically, rather than standard non-locking wheels, to prevent unwanted rolling once the planter has been positioned in its intended spot.
6. A Modular Vertical Planting Wall
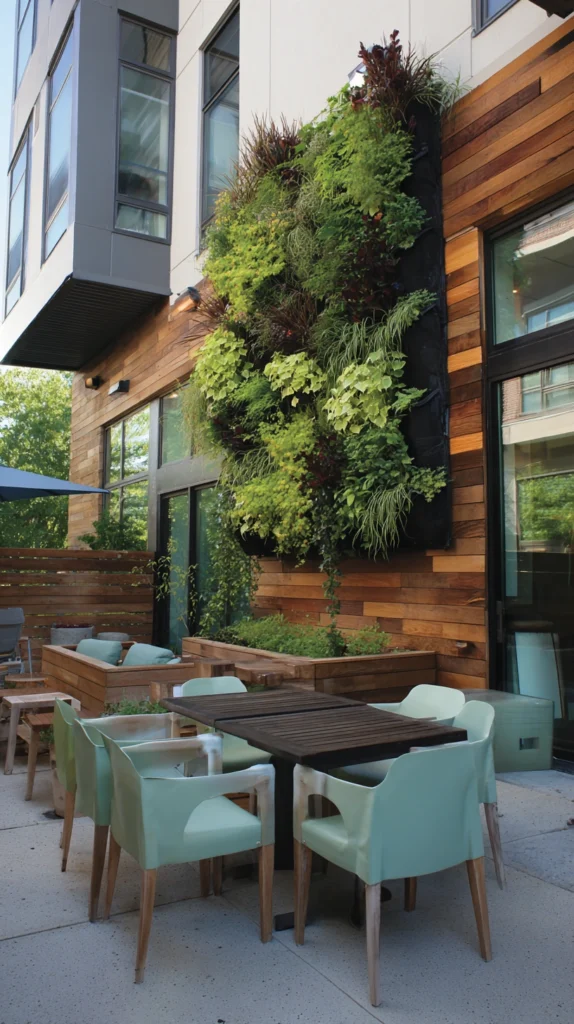
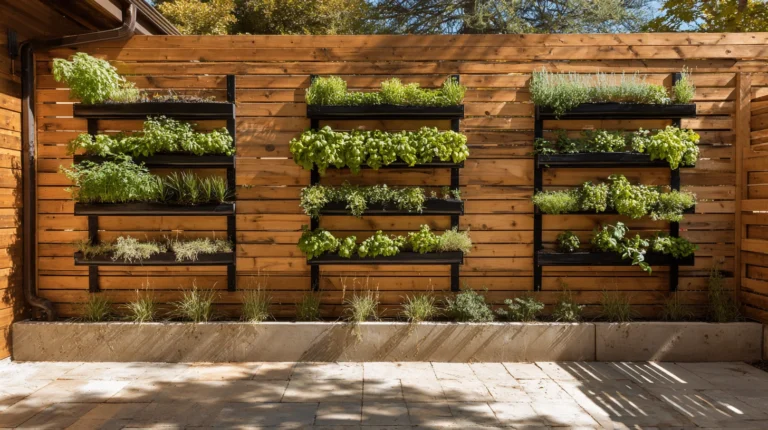
Building or mounting a vertical planting system — a grid of small modular planting pockets or boxes covering a wall or fence section — turns an entirely vertical surface into significant growing space without using any additional floor area at all.
How modular vertical systems typically work:
- Individual pocket planters or small modular boxes attach to a mounting grid or panel, which is then secured to a wall, fence, or a freestanding frame, with each pocket independently plantable and often removable for individual maintenance
- This modularity allows sections to be rearranged, added to, or removed over time as growing needs or the specific plants being grown change
Structural and moisture considerations for wall-mounted systems:
- The mounting surface (whether an exterior wall, a fence, or a dedicated frame) needs to be confirmed capable of supporting the system’s fully loaded weight, similar to the general weight considerations that apply to any raised planter
- A moisture barrier between the planting system and the wall surface behind it protects the wall material from prolonged water exposure, particularly important if mounting directly to a home’s exterior siding rather than a dedicated freestanding frame
Plant selection for vertical modular systems:
- Shallow-rooted plants (many herbs, lettuces, and smaller flowering annuals) generally suit the limited soil volume each small modular pocket provides better than deep-rooted vegetables or larger perennials
- Trailing or cascading plants at the system’s lower sections can visually soften the modular grid’s structure, similar to the tiered planter’s trailing plant strategy in idea 3
Cost: $15-40 per modular pocket unit for a commercial system, with a full wall typically requiring a dozen or more units, or $200-500 for a complete pre-assembled vertical garden panel system.
Where this approach delivers the most growing capacity per square foot of patio space: Any small patio with an underused vertical wall or fence surface and genuinely minimal floor space available for traditional raised planters.
Vertical Wall Tips
Install a moisture barrier behind the system before mounting, regardless of the wall material. This single step prevents the most common long-term problem with vertical planting walls — water damage to the surface behind the system.
Start with a smaller test section before committing to a full wall installation, confirming the specific plants chosen thrive in the vertical, shallow-soil format before investing in covering the entire available surface.
7. A Planter Built as a Privacy Screen Divider
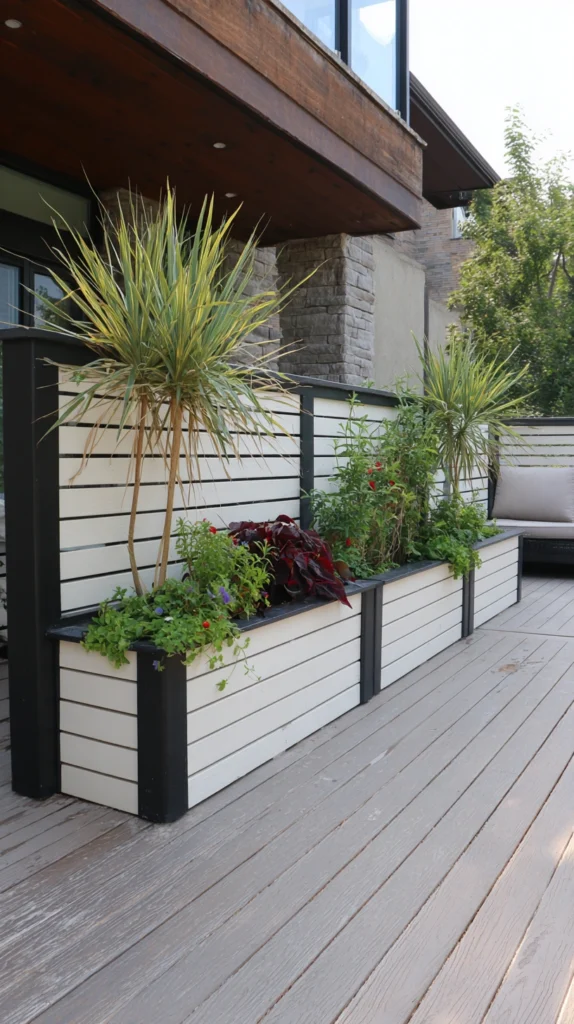
Building a raised planter with an integrated trellis or slatted screen structure rising above the planting box creates privacy or visual separation on a patio, while the growing plants themselves eventually soften and green the screen’s surface.
Why this combination suits a small patio particularly well:
- A small patio often needs some privacy or visual separation from a neighboring property or a shared outdoor space, and a purely decorative privacy screen uses floor space without offering any additional function
- Combining the screen structure with a planter beneath it means the same footprint that would be needed for privacy screening alone also provides growing space, maximizing the function extracted from that dedicated area
Screen and trellis construction:
- A simple slatted wood or metal lattice, similar in principle to the slat wall techniques used in interior design, rises from the back of the planter box, providing both an immediate visual screen and a structure for climbing plants to eventually grow across
- Spacing between slats affects both the immediate privacy level (tighter spacing blocks more sightline) and how much light reaches climbing plants growing on the structure, worth balancing based on which priority matters more for the specific location
Plant selection for climbing screen coverage:
- Fast-growing annual vines (certain morning glories, black-eyed Susan vine) provide quicker screen coverage within a single growing season, suited to a household wanting privacy relatively quickly
- Perennial climbing plants (certain clematis varieties, climbing hydrangea where climate allows) take longer to establish full coverage but return and continue growing each year without needing to be replanted annually
Cost: $300-800 for a combined planter-and-screen structure, varying with overall height and the screen material chosen, generally more cost-effective than building a planter and a separate privacy screen as two distinct structures.
Where this combination is worth the investment: Any small patio needing genuine privacy or visual separation from an adjacent space, where a purely decorative screen would otherwise use valuable floor space without any additional growing function.
Privacy Screen Planter Tips
Choose plant species matched to your specific climate’s growing season length, since a vine that needs a longer season than your local climate provides may never achieve full screen coverage before the growing season ends.
Build the screen structure tall and sturdy enough to support the mature weight of the specific climbing plant chosen, since a lightweight trellis can sag or fail under a fully grown, heavier vine over time.
8. A Planter With an Integrated Trellis for Climbing Vegetables
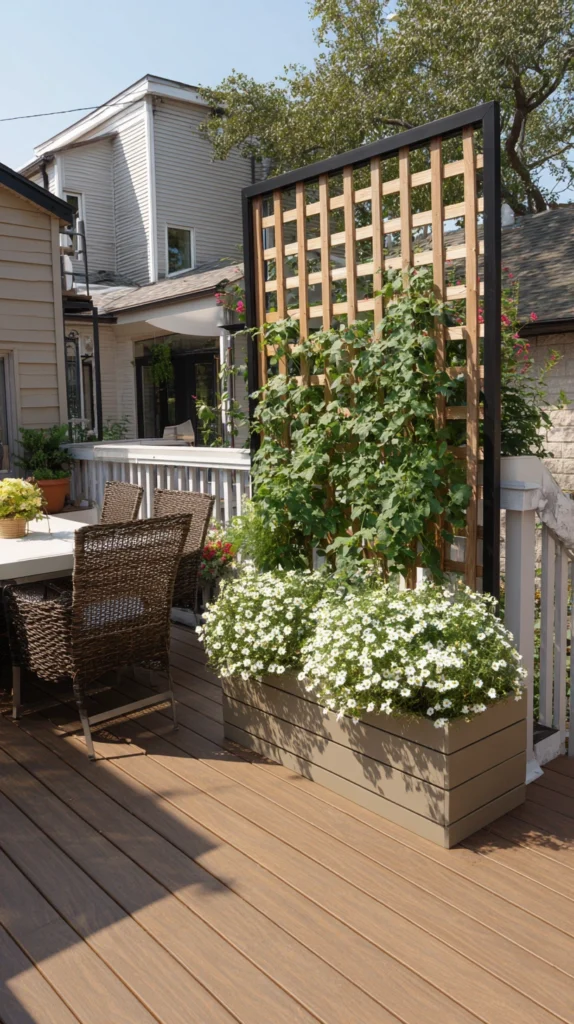
Similar in construction to the privacy screen planter but oriented specifically around vegetable gardening, a planter with a built-in trellis supports climbing food crops — tomatoes, cucumbers, beans, peas — in a vertical growing format that uses minimal floor space for a genuinely productive harvest.
Why vertical growing suits vegetable production on a small patio:
- Climbing vegetable varieties, grown vertically rather than allowed to sprawl across the ground, produce a comparable or sometimes greater yield in a considerably smaller floor footprint than the same plants grown without vertical support
- This makes vegetable gardening genuinely viable on a small patio in a way that sprawling, ground-covering varieties generally aren’t, given the space constraints involved
Trellis design considerations for food crops specifically:
- A sturdier trellis structure than one built purely for ornamental vines is generally necessary, since fruit-bearing vegetable plants like tomatoes and cucumbers carry considerably more weight than typical ornamental climbing vines
- Removable or foldable trellis sections make off-season storage and bed preparation easier between growing seasons, worth considering for a household actively rotating crops or overwintering the planter box itself
Soil depth and planter sizing for vegetable roots:
- Vegetable crops generally need a deeper soil volume than typical ornamental container plants, so a planter intended for food production should be built to a minimum depth appropriate to the specific vegetables planned — tomatoes and cucumbers in particular benefit from at least 12-18 inches of soil depth
- A planter this size represents a meaningfully greater weight than a shallower ornamental planter once filled, reinforcing the importance of confirming deck load capacity discussed at the start of this list
Cost: $250-700 for a vegetable-appropriate raised planter with an integrated sturdy trellis, reflecting both the deeper soil capacity and the more robust trellis construction this application requires.
Where this approach makes genuine food production possible on a small patio: Any household wanting to grow at least some of their own food but lacking the ground-level garden space a traditional vegetable garden would require.
Vegetable Trellis Tips
Build or purchase a trellis rated for the mature weight of fruit-bearing vines, not just young seedlings. A trellis that seems adequate early in the season can be overwhelmed by the actual weight of a fully loaded tomato or cucumber vine later in the growing season.
Confirm adequate sun exposure at the planter’s specific patio location before committing to fruiting vegetables, since most vegetable crops require considerably more direct sunlight than many ornamental plants tolerate.
9. A Raised Planter Combined With a Coffee Table or Side Table
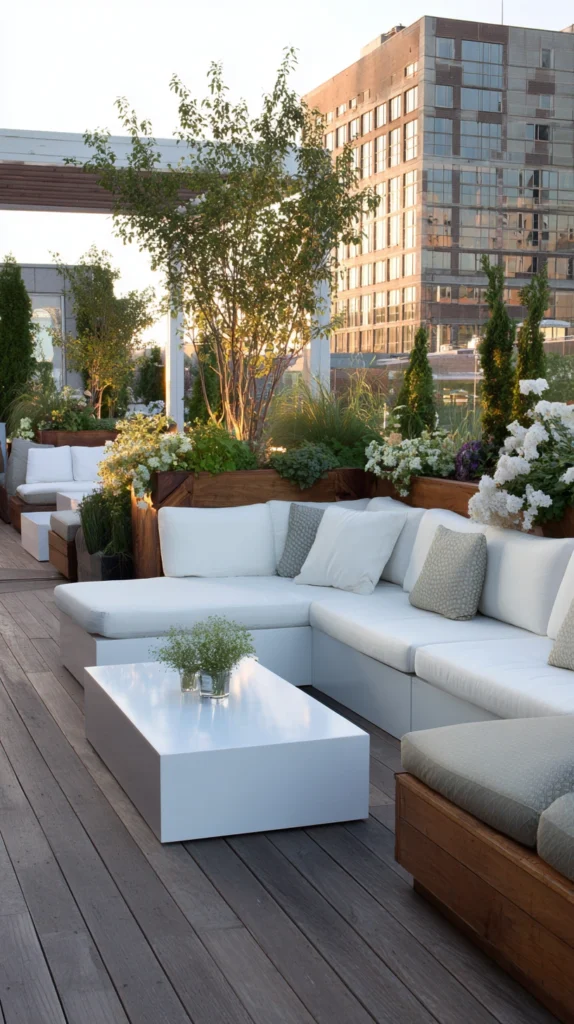
Building a raised planter with a flat, usable surface integrated into its design — either as a full tabletop spanning the planter’s width or a narrow ledge along one edge — adds functional furniture surface to a small patio without requiring a separate table to occupy additional floor space.
How the combined structure typically works:
- A raised planter box, built to a coffee-table or side-table height (typically 16-18 inches for a coffee table height, higher for a side table), incorporates a flat surface either spanning the top of a portion of the box or cantilevered out from one side
- This shared structure means the same footprint serving as growing space also provides a place to set a drink, a book, or a small plate, functions a small patio often needs but can’t always spare separate furniture for
Material and waterproofing considerations:
- The tabletop surface needs to be constructed and finished separately from the planting section, using a material suited to holding drinks and outdoor use (a sealed wood surface, a weather-rated composite, or a small stone or tile inset) rather than simply extending the planter’s own construction material
- A clear separation between the planting soil and the tabletop surface, similar to the separation needed in the bench-planter combination in idea 1, prevents moisture and soil from affecting the usable table surface
Proportioning the planter and table sections:
- The planter section generally needs to remain the dominant visual element, with the table surface reading as an added function rather than the planter appearing to be an afterthought attached to a primarily furniture-focused piece
- A narrow table ledge along one edge, rather than a full tabletop spanning the entire planter, often achieves a better visual balance between the two functions while still providing genuinely useful surface area
Cost: $300-900 for a custom-built planter and table combination, varying with size and the specific tabletop material chosen.
Where this combination earns its place: A small patio without adequate floor space for both a full planter and a separate side table, where combining the two functions makes better use of genuinely limited square footage.
Planter Table Tips
Choose a tabletop material specifically rated for direct weather exposure, since this surface will be used and left outdoors continuously rather than brought inside between uses.
Keep the planting soil’s moisture and drainage system fully separated from the tabletop structure, confirming no water pathway exists between the two sections that could damage the usable surface over time.
10. A Cedar or Wood Raised Bed Sized Specifically for Deck Weight Limits
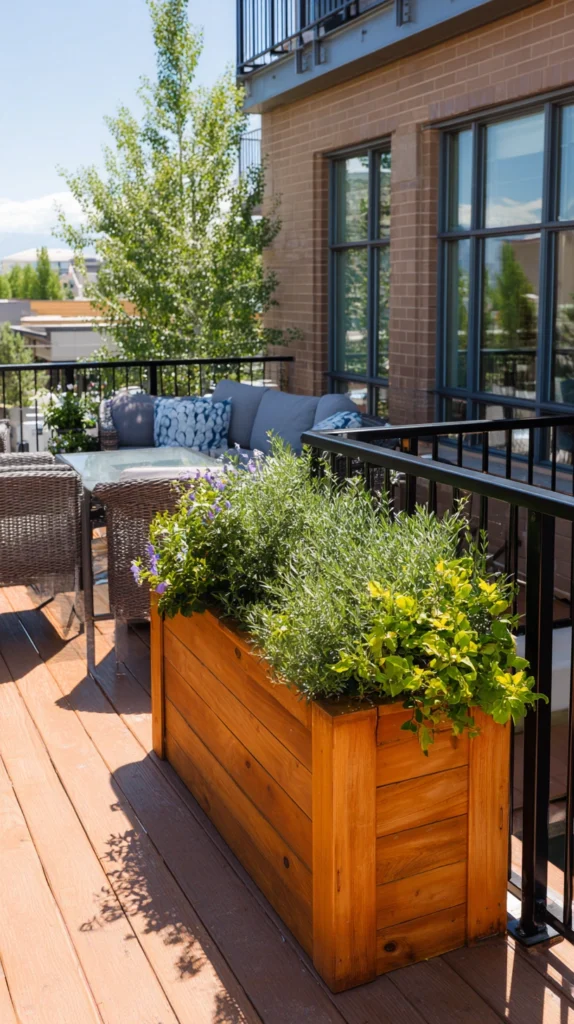
Rather than defaulting to a standard large raised bed size, deliberately calculating and building a wood planter to a size that respects a specific deck’s actual load capacity keeps growing ambitions realistic relative to the structure actually supporting them.
Why this approach matters more than it might initially seem:
- It’s easy to plan a raised bed’s size based purely on desired growing capacity or available floor footprint, without considering whether the deck beneath can actually support that bed once it’s filled with wet soil and mature plants
- Calculating an appropriate size based on confirmed weight capacity first, then designing the growing space within that constraint, avoids a genuinely serious structural problem down the line rather than just an aesthetic compromise
Estimating actual planter weight before building:
- Filled soil generally weighs in a range that can be estimated per cubic foot depending on the specific soil mix and moisture level, and multiplying that estimate by the planned box’s total volume gives a reasonable approximation of the fully loaded weight before construction begins
- This estimated weight, plus the structure’s own material weight and the mature plants it will eventually hold, should be compared against the deck’s confirmed load capacity for that specific area, ideally with input from a contractor or structural professional for anything beyond a single modest-sized planter
Wood species and construction for outdoor durability:
- Cedar and redwood are commonly chosen for raised bed construction given their natural rot resistance, an important consideration since the wood is in prolonged direct contact with moist soil
- A liner between the soil and the wood’s interior surface, even with a naturally rot-resistant species, extends the structure’s lifespan considerably compared to soil sitting in direct contact with the wood
Cost: $150-500 for a properly sized cedar raised bed appropriate to a small deck’s weight capacity, varying with the specific dimensions calculated as safe for the deck in question.
Where this careful sizing approach is essential: Any raised bed project on an elevated deck, particularly an older deck or one without readily available structural documentation, where confirming safe weight capacity should come before any specific size or growing ambition is finalized.
Weight-Appropriate Bed Tips
When in doubt about a deck’s load capacity, build smaller and add a second planter later if the deck can accommodate it, rather than building one large bed based on an optimistic weight assumption that hasn’t been properly confirmed.
Line the interior of any wood raised bed with a durable liner material, even when using a naturally rot-resistant wood species, to maximize the structure’s usable lifespan given its constant exposure to moist soil.
11. A Metal or Corten Steel Raised Planter
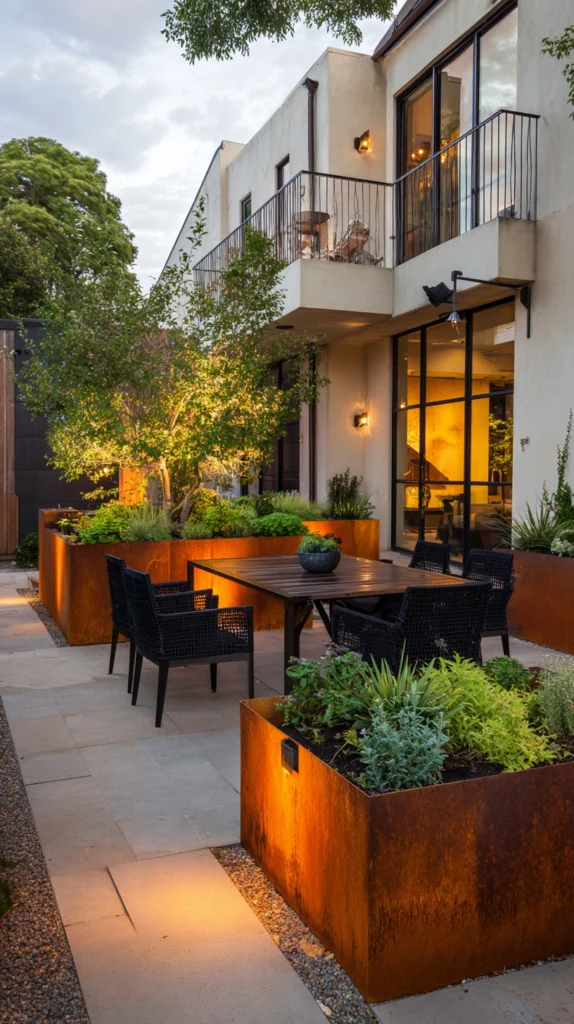
Choosing raised planters in metal — particularly weathering Corten steel, which develops a distinctive rust-toned patina over time — brings a considerably more modern, architectural material choice to a small patio compared to the more traditional wood raised bed.
Why Corten steel specifically has become a popular choice:
- Corten steel’s surface rust layer is a stable, protective patina rather than ongoing structural corrosion, meaning the material develops its distinctive warm rust-orange appearance naturally over time without needing paint or a protective coating
- This creates a raised planter that actually improves in appearance with age and weather exposure, unlike most other materials that show wear as a negative rather than a desirable characteristic
Structural and weight considerations specific to metal planters:
- Steel planters, particularly at any significant size, are generally heavier than an equivalent wood planter even before soil is added, meaning the deck weight capacity considerations discussed throughout this list apply with even more importance to a metal planter choice
- Drainage holes need to be properly incorporated during the metal fabrication process, since retrofitting drainage into finished steel is considerably more difficult than into wood
Where metal planters suit a small patio’s design particularly well:
- A modern or industrial-leaning patio design benefits from metal planters’ clean geometric lines and the material’s inherent contemporary character, generally more successfully than a traditional or cottage-style outdoor space
- The material’s durability against weather exposure, once the initial patina has stabilized, generally exceeds that of an untreated or minimally treated wood planter over the long term
Cost: $200-600 for a quality Corten steel planter of a size suited to a small patio, generally somewhat more expensive than an equivalent wood planter given the material and fabrication cost, though offset by the material’s long-term durability.
Where this material choice is worth its added cost: A modern or architecturally considered small patio design, where the planter itself is meant to function as a genuine design statement rather than simply a growing container.
Corten Steel Tips
Confirm drainage holes are adequately sized and positioned before purchasing or fabricating a metal planter, since this detail is essentially permanent once the metal structure is complete.
Position Corten steel planters away from direct contact with lighter-colored deck materials during the initial patina development period, since rust runoff during this early weathering phase can stain lighter surfaces before the patina fully stabilizes.
12. A Multi-Level Planter Staircase Against a Wall
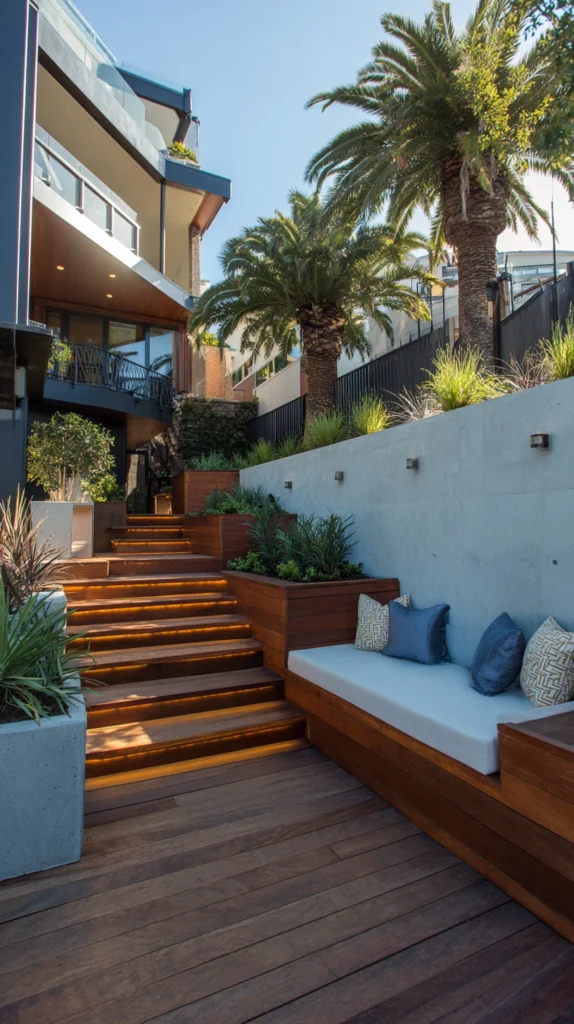
Building a series of ascending steps, each holding its own small planter, against a vertical wall section creates a compact, cascading garden display that uses minimal floor footprint while displaying considerably more plants than a single flat planter of the same base size.
How this differs from the tiered corner planter in idea 3:
- Where the tiered corner planter is generally built as one integrated structure specifically for a corner location, a planter staircase is typically a series of individual steps or shelves that can be positioned against any flat wall section, not exclusively a corner
- This staircase format also tends to display individual pots rather than one continuous soil bed across all levels, offering more flexibility to swap or rearrange individual plants without disturbing the entire structure
Construction and stability considerations:
- Each step needs to be sized to comfortably hold its intended pot or planter with some margin, and the overall structure needs adequate depth and a stable base to prevent tipping, particularly important for a taller staircase design holding several levels of planted pots
- Securing the structure to the adjacent wall, rather than relying purely on the staircase’s own freestanding stability, adds an important safety margin, particularly on a patio where the structure might be bumped or where wind exposure is a consideration
Arranging plants across the staircase levels:
- Similar to the tiered corner planter, positioning taller plants toward the back and top, with shorter or trailing plants toward the front and bottom, ensures every level receives adequate light without being shaded by the plants above
- Using individual pots rather than one continuous planting bed makes it easy to rotate specific pots for even light exposure, or to swap out individual plants that aren’t thriving without disturbing the rest of the display
Cost: $100-350 for a commercial multi-tier plant stand of this style, or $150-400 in materials for a custom-built version sized specifically to a particular wall section and pot collection.
Where this approach delivers strong visual impact for minimal floor space: Any small patio wall section currently unused, where a cascading, multi-level plant display adds considerably more greenery and visual interest than the narrow floor footprint the structure actually requires.
Planter Staircase Tips
Secure the structure to the adjacent wall for stability, rather than relying solely on the staircase’s own base. This is a meaningful safety consideration, particularly for a taller structure holding multiple levels of heavy, watered pots.
Choose individual pots in a coordinated but not identical style, giving the staircase a cohesive appearance while still allowing enough variation to keep the display visually interesting across its several levels.
Choosing Your Raised Planter Priorities
By budget level:
Under $150: Railing-mounted planter boxes (idea 2), wheeled caster upgrade to an existing planter (idea 5)
$150-400: Tiered corner planter (idea 3), self-watering planter box (idea 4), planter staircase (idea 12), weight-appropriate cedar bed (idea 10)
$400-800: Bench-planter combination (idea 1), privacy screen planter (idea 7), vegetable trellis planter (idea 8), planter-table combination (idea 9)
$800+: Modular vertical planting wall covering a full surface (idea 6), Corten steel planters at larger scale (idea 11)
By primary goal:
Maximizing floor space efficiency: Railing planters (idea 2), vertical planting wall (idea 6), planter staircase (idea 12)
Growing food: Vegetable trellis planter (idea 8), a properly sized deep cedar bed (idea 10)
Privacy and screening: Privacy screen planter (idea 7)
Multi-functional furniture: Bench-planter combination (idea 1), planter-table combination (idea 9)
By deck or patio type:
Elevated or older decks with uncertain load capacity: Weight-appropriate sizing (idea 10), railing planters (idea 2), lightweight vertical wall system (idea 6)
Ground-level patios without weight restrictions: Larger tiered structures (idea 3), heavier Corten steel planters (idea 11)
Living With Raised Deck Planters Long-Term
Ongoing maintenance:
- Check drainage trays and planter feet periodically for buildup of debris or standing water, since blocked drainage undermines the deck protection these features are meant to provide
- Inspect wood planter liners annually, replacing as needed, since prolonged soil moisture contact gradually degrades even a well-installed liner over several seasons
- Reassess deck weight distribution if adding additional planters over time, rather than assuming the original load assessment automatically accounts for later additions
When to consult a professional:
- Any concern about a deck’s structural capacity, particularly before adding multiple large or heavy planters, warrants a contractor’s assessment rather than a guess based on how the deck currently feels underfoot
- Visible deck board sagging, staining, or soft spots beneath or near existing planters should be addressed promptly, since these can indicate a moisture or structural issue developing beneath the surface
Getting Started This Weekend
Start by confirming your deck’s actual capacity and your patio’s actual underused spaces before choosing a specific planter style.
Step 1 — Assess your deck’s structure and any weight limitations: Review original construction documentation if available, or consult a contractor for an assessment, before committing to any of the larger or heavier options on this list.
Step 2 — Identify your patio’s genuinely underused spaces: Corners, railings, and vertical wall sections are frequently overlooked for planting despite offering real growing capacity without consuming valuable floor space.
Step 3 — Choose one or two ideas that solve a specific need — privacy, food growing, seating, or pure floor-space efficiency: A small patio benefits more from a few well-chosen, multi-functional additions than from filling every available inch with planters that don’t serve a clear purpose.
My recommendation: Confirm the structural basics — weight capacity and proper drainage — before falling in love with a specific planter style, since these unglamorous details determine whether any of the ideas on this list remain safe and functional for years rather than becoming a costly problem later.
Quick Summary
Maximizing limited floor space:
- Railing-mounted planters (idea 2): growing space that uses zero floor area
- Modular vertical planting wall (idea 6): a full wall’s worth of growing capacity
- Multi-level planter staircase (idea 12): cascading display in a narrow footprint
Multi-functional combinations:
- Bench-planter combination (idea 1): seating and growing space, one footprint
- Planter-table combination (idea 9): furniture surface built into the planter
Structure and screening:
- Privacy screen planter (idea 7): growing space and visual separation together
- Vegetable trellis planter (idea 8): genuine food production in a small footprint
Practical growing solutions:
- Tiered corner planter (idea 3): reclaiming an underused corner
- Self-watering planter box (idea 4): reduced watering frequency
- Wheeled mobile planters (idea 5): flexibility between everyday use and gatherings
Material and structural considerations:
- Weight-appropriate cedar bed (idea 10): sizing to your deck’s actual capacity
- Corten steel planters (idea 11): a modern, long-lasting material choice
The core principle: A raised planter earns its place on a small patio when it makes deliberate use of underused space — a corner, a railing, a vertical wall — or does double duty as furniture, screening, or food production, all while respecting the deck’s actual structural capacity and properly managing drainage to protect the surface beneath it.