
14 Backyard Chicken Coop Ideas That Look Charming
Our first coop was a plywood box, gray and functional, tucked behind the shed where nobody had to look at it.
It kept the hens safe. It also looked like something we were hiding, not something we were proud of.
I rebuilt it the following spring with actual design in mind, and now it sits in full view by the garden path.
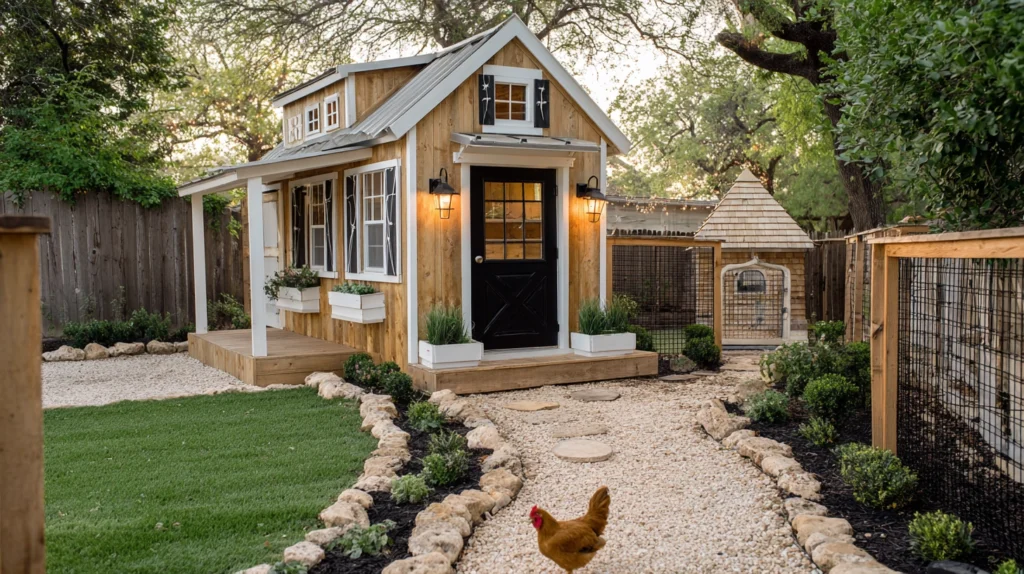
Guests ask about the coop before they ask about the chickens, which tells you everything about how much the look matters.
Here are 14 ways to build a coop that pulls its weight visually, not just structurally.
Why coop design deserves real attention, not an afterthought
A coop sits in the yard permanently, in full view, through every season.
- It’s one of the largest structures in most backyards after the house itself
- A charming coop becomes a design feature, while a purely utilitarian one becomes something to screen with landscaping instead
- Good design doesn’t have to sacrifice function, since ventilation, predator-proofing, and easy cleaning all fit within a beautiful build
Once the coop is treated as architecture rather than storage, it earns its spot in the yard.
1. Miniature Farmhouse Coop
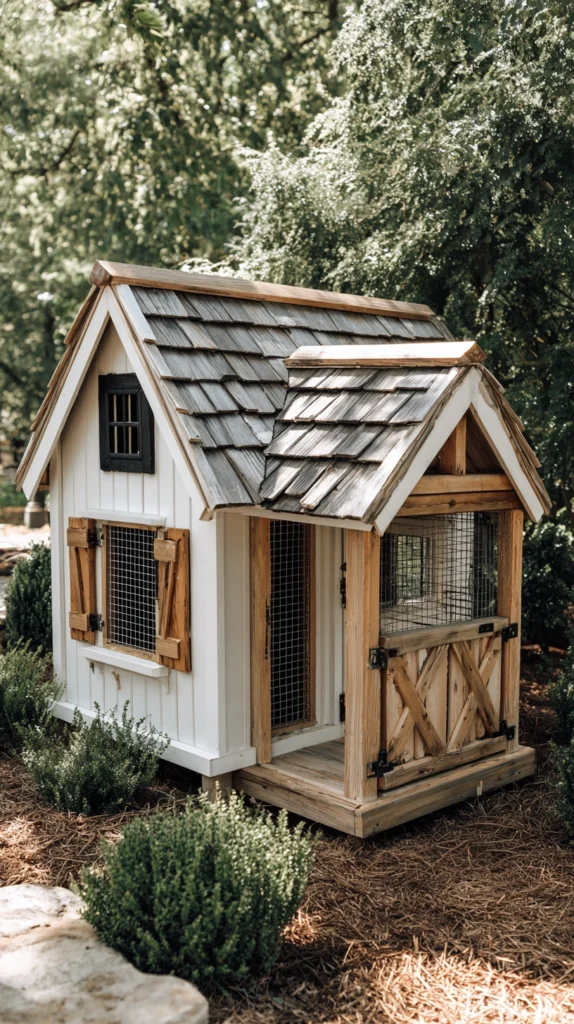
A scaled-down version of classic farmhouse architecture.
Build it:
- A steep gable roof with real shingles rather than a flat corrugated panel
- White painted board-and-batten siding, echoing traditional farmhouse exteriors
- Black-trimmed windows with working shutters for both charm and actual ventilation control
Why farmhouse styling suits a coop so naturally:
- The style is historically accurate, since chickens and farmhouses have always shared a yard
- White exteriors reflect heat in summer, keeping the coop’s interior cooler
- It coordinates easily with an existing farmhouse-style house or garden shed nearby
Cost breakdown: A farmhouse-style coop kit runs $400 to $900 depending on size, or build from scratch for $250 to $500 in materials.
2. Vintage Caravan or Trailer Conversion
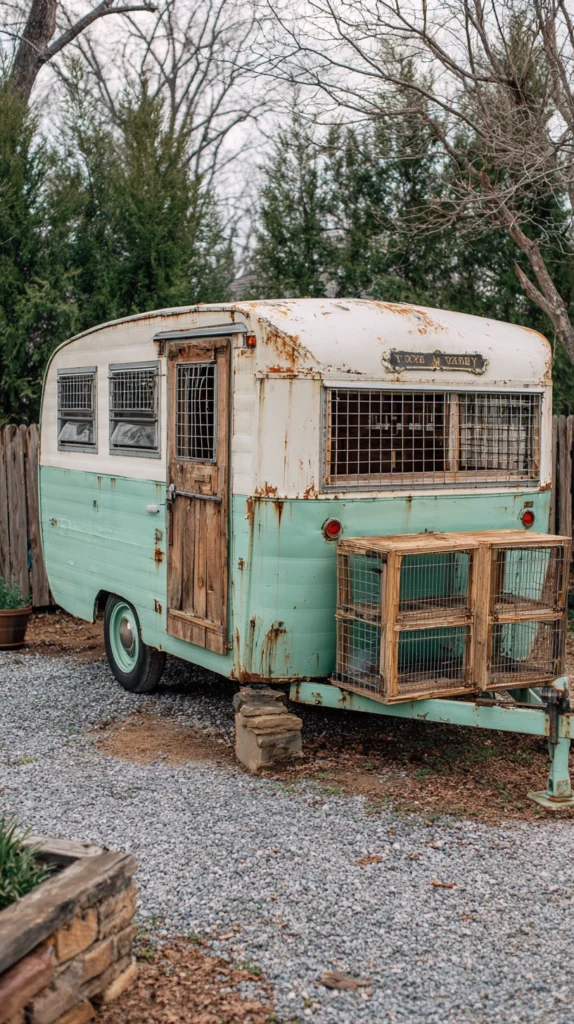
An old camper or trailer shell repurposed entirely into a coop.
Build it:
- A small vintage trailer, gutted and reframed with hardware cloth replacing any glass windows
- Nesting boxes built into the trailer’s existing cabinetry footprint
- The trailer’s original exterior paint and details kept intact for authentic vintage character
Why a trailer conversion stands out from typical coop builds:
- The rounded, retro silhouette is unlike anything available in a standard coop kit
- Reusing an existing structure keeps a genuinely large object out of the landfill
- The trailer’s wheels can keep it technically mobile, useful for rotating chickens across different yard sections
Cost breakdown: A secondhand vintage trailer suited for conversion runs $200 to $800 depending on condition, plus $150 to $300 in conversion materials.
3. Cottage-Style Coop With a Dutch Door
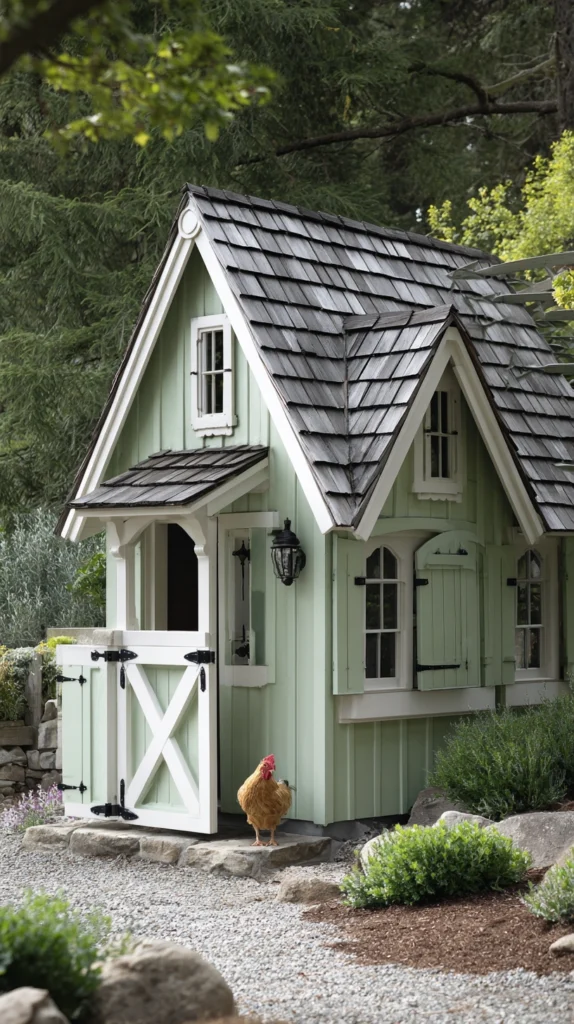
Borrowing a classic architectural detail from real cottages.
Build it:
- A Dutch door split horizontally, letting the top half open independently for ventilation and viewing
- A small window box beneath one window, planted with real or artificial flowers
- Board-and-batten or shiplap siding painted in a soft, muted cottage color like sage or dusty blue
Why a Dutch door earns its place on a coop specifically:
- The top half can stay open for airflow while the bottom half keeps chickens contained
- It gives the structure genuine architectural detail beyond a standard single door
- The split-door style photographs beautifully and instantly reads as intentional design
Cost breakdown: A Dutch door kit or custom build adds $60 to $120 over a standard single door.
4. Modern A-Frame Coop
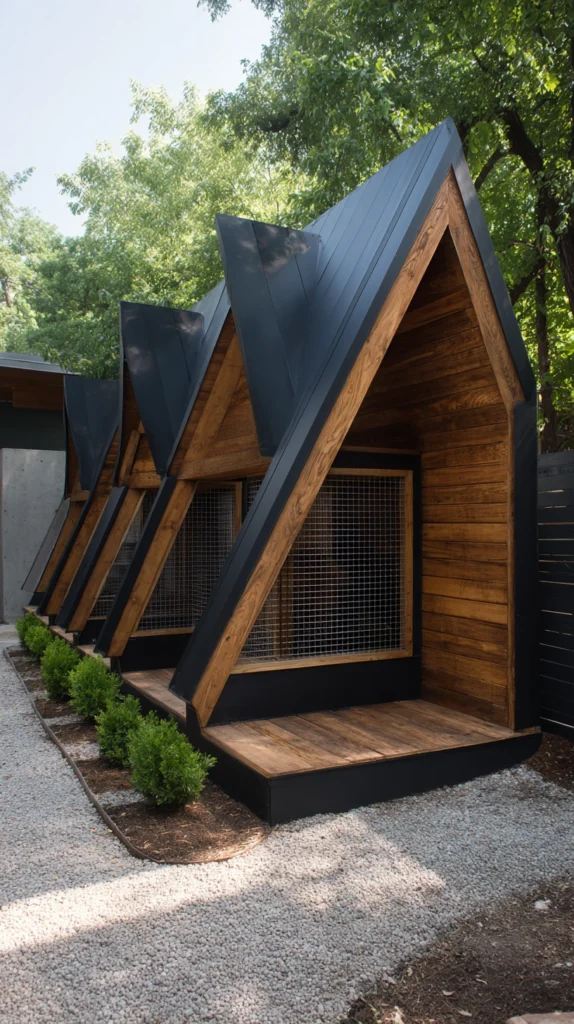
A clean, minimalist silhouette suited to a contemporary yard.
Build it:
- A simple A-frame structure with the roofline extending nearly to the ground on both sides
- Black or dark stained wood exterior for a modern, architectural look
- A single large hardware-cloth panel on one side for ventilation and natural light
Why the A-frame shape suits a modern aesthetic so well:
- The geometric simplicity contrasts nicely against a yard with clean, contemporary landscaping
- The steep roofline naturally sheds rain and snow without added engineering
- It’s one of the simpler shapes to build accurately without advanced carpentry experience
Cost breakdown: An A-frame coop kit runs $300 to $600, or build from scratch for $200 to $400 in lumber and hardware cloth.
5. Coop With an Attached Greenhouse Run
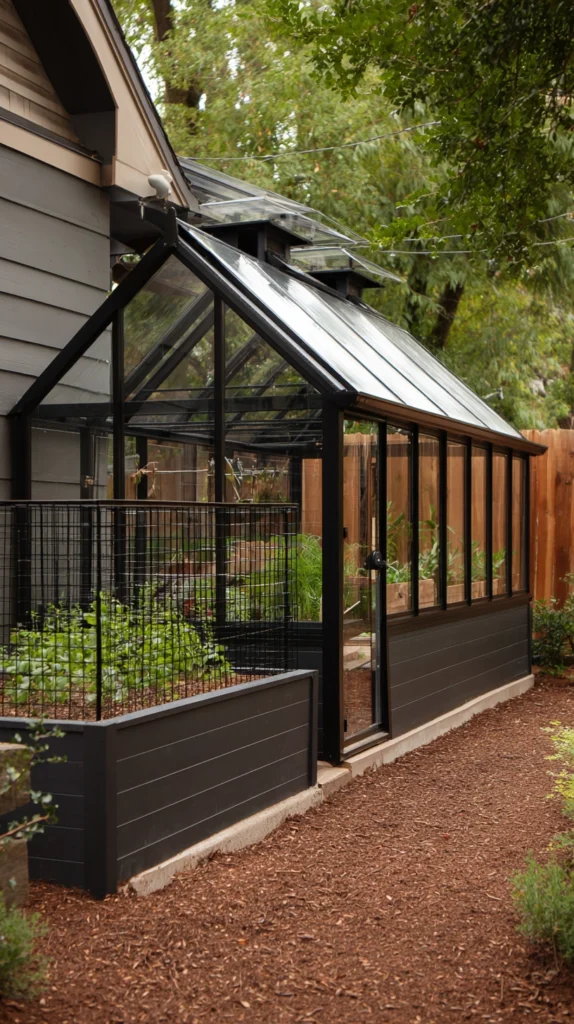
Combining poultry housing with a small growing space.
Build it:
- A polycarbonate or glass-paneled run attached directly to one side of the coop
- Raised planting beds along the run’s perimeter, protected from the chickens by a low wire barrier
- Ventilation vents built into the greenhouse portion to prevent overheating in summer
Why this combination benefits both the chickens and the garden:
- Chicken manure composted separately can feed the adjacent growing beds directly
- The greenhouse structure extends the growing season for herbs or greens right next to the coop
- It maximizes a small yard’s function, combining two structures into one footprint
Cost breakdown: Adding a greenhouse run typically costs $150 to $400 beyond the coop itself, depending on paneling material.
6. Coop Painted to Match the Main House
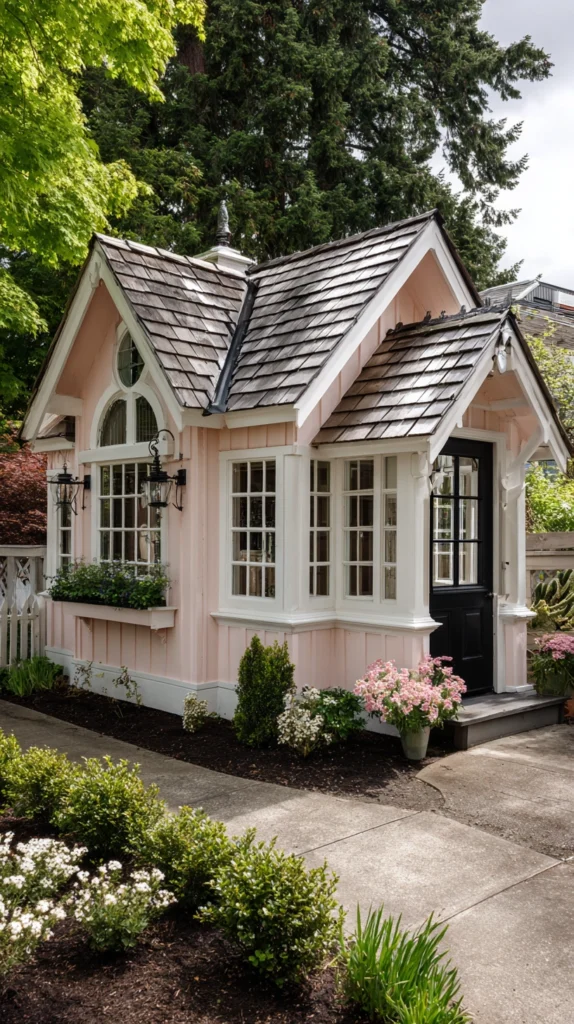
Treating the coop as a genuine architectural companion to the home.
Build it:
- The coop’s exterior paint color matched exactly to the house’s siding or trim
- Matching roof shingle color or material, even at a smaller scale
- Coordinating window trim and door hardware finishes between the two structures
Why matching the house elevates the whole property:
- It signals the coop was planned intentionally, not added as an afterthought
- It ties the whole backyard together visually, rather than looking like two unrelated structures
- It’s one of the lowest-cost upgrades on this list, since it only affects paint choice
Cost breakdown: Exterior paint matched to the house runs $30 to $60 for a coop-sized structure.
7. Elevated Coop on Decorative Legs
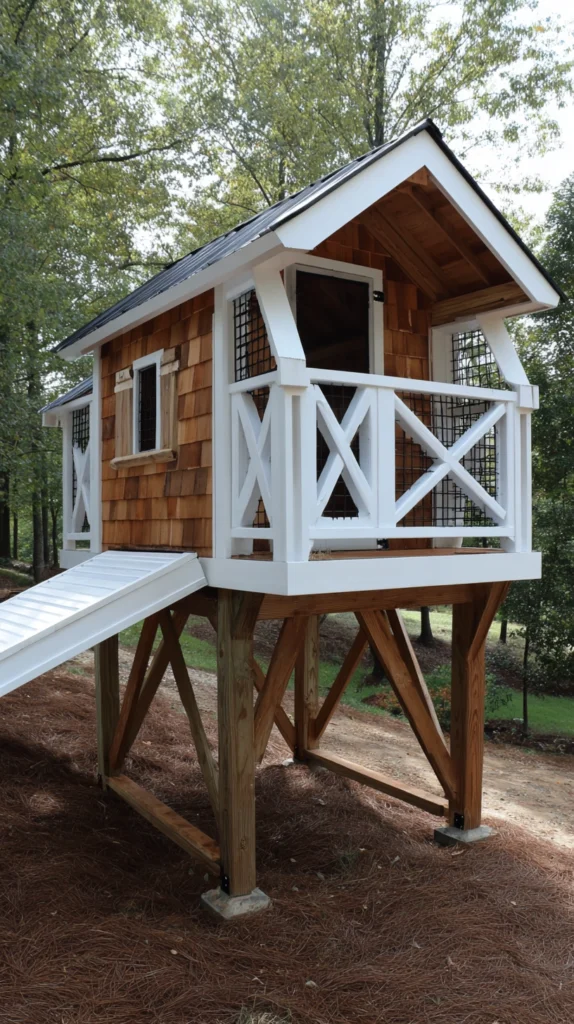
Raising the whole structure off the ground on a stylish base.
Build it:
- Sturdy wood or metal legs raising the coop floor 18 to 24 inches above ground level
- A ramp with traction strips leading up to the entrance
- The open space beneath used as a shaded dust-bathing or shelter area for the flock
Why elevation adds both charm and function:
- It creates natural predator protection, since many ground-based threats can’t easily reach the elevated coop
- The shaded underside gives chickens a cool retreat during hot afternoons
- The raised silhouette reads as more architecturally interesting than a coop sitting flush on the ground
Cost breakdown: Adding elevated legs to a standard coop build adds $50 to $120 in additional lumber and hardware.
8. Coop With a Living or Green Roof
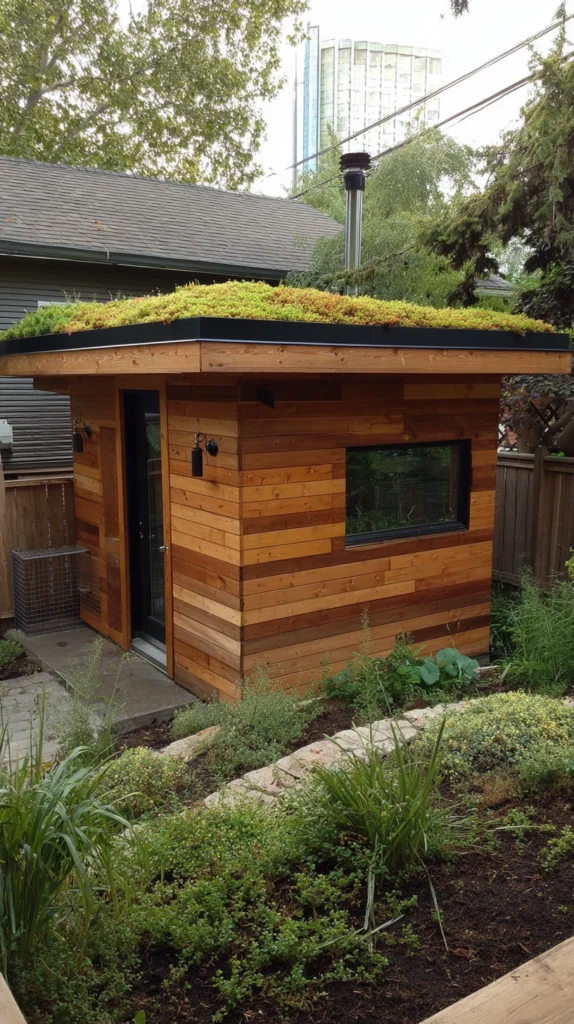
A planted roof instead of standard shingles.
Build it:
- A shallow-pitched roof structure reinforced to handle the additional weight of soil and plants
- A waterproof membrane layer beneath a thin soil bed, planted with drought-tolerant sedum
- Drainage channels built into the roof’s edge to prevent water pooling
Why a living roof suits a coop especially well:
- It naturally insulates the interior, keeping it cooler in summer and warmer in winter
- It blends the structure into a garden setting far more than any shingle option could
- Sedum and similar plants require minimal maintenance once established
Cost breakdown: A living roof system adds $150 to $350 over a standard shingled roof, depending on size.
9. Repurposed Garden Shed Coop Conversion
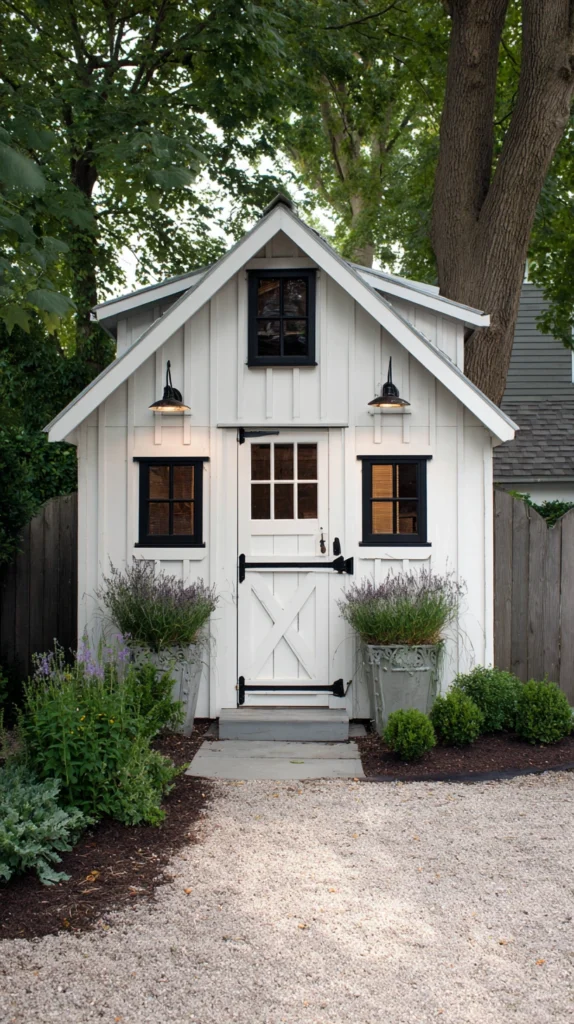
Turning an existing outbuilding into a full coop.
Build it:
- An existing wood shed retrofitted with proper ventilation openings covered in hardware cloth
- Nesting boxes and roosting bars built into the shed’s interior
- The exterior repainted or updated with charm-focused details like shutters or a flower box
Why converting an existing structure saves both money and effort:
- It skips the need for an entirely new foundation and framing
- Sheds are often already sized appropriately for a small to medium flock
- Updating an existing structure’s exterior details is far less work than a full ground-up build
Cost breakdown: Shed-to-coop conversions typically run $150 to $400 in retrofitting materials, assuming the shed itself is already owned.
10. Coop With a Covered Wraparound Run
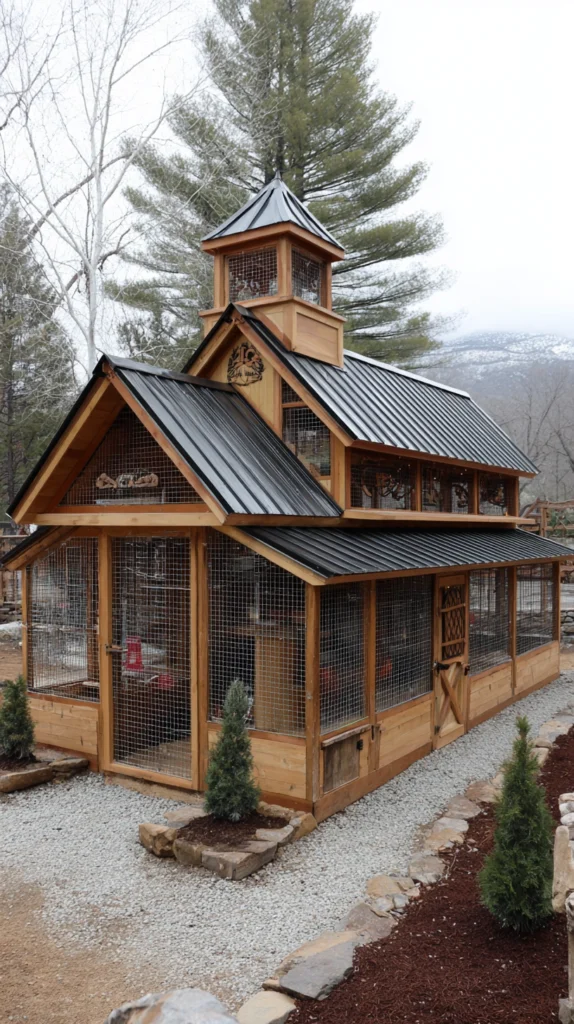
Extending the charm beyond just the coop structure itself.
Build it:
- A covered run wrapping around two or three sides of the coop, framed to match its architectural style
- Hardware cloth rather than standard chicken wire, which better resists predator access
- A gate designed to match the coop’s door detailing, rather than a plain utilitarian latch
Why a matching run matters as much as the coop itself:
- Chickens spend far more daylight hours in the run than inside the coop structure
- An unstyled wire run can undercut even the most charming coop design sitting behind it
- Matching materials and detailing between coop and run reads as one cohesive structure rather than two mismatched pieces
Cost breakdown: A wraparound covered run adds $200 to $500 depending on size and hardware cloth coverage.
11. Coop With Decorative Cupola and Weathervane
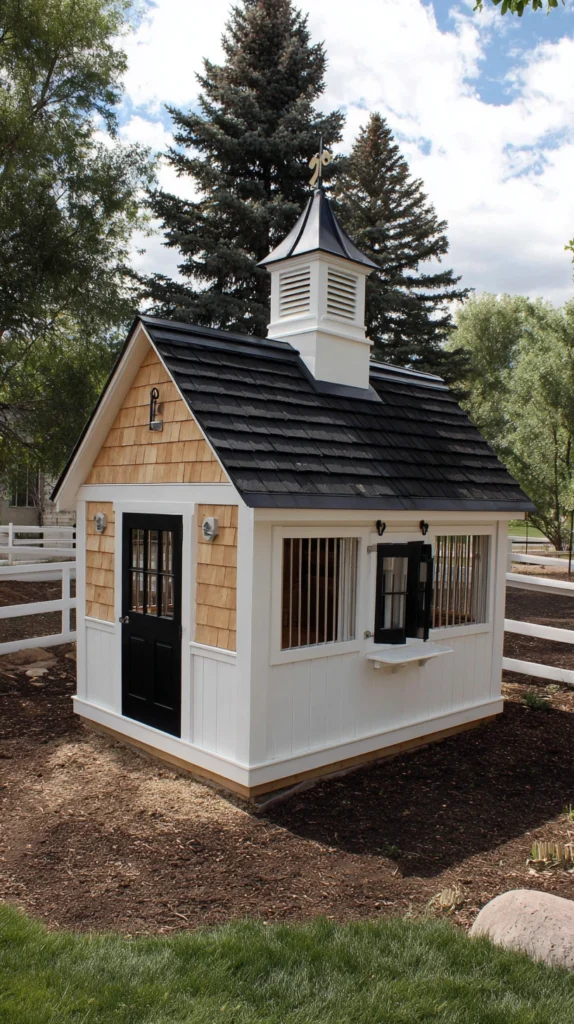
Small architectural flourishes borrowed from classic barn design.
Build it:
- A small cupola installed at the roof’s peak, functioning as both a design detail and additional ventilation
- A simple weathervane mounted atop the cupola for a classic finishing touch
- Louvered vents built into the cupola’s sides to encourage airflow without letting in rain
Why these small details make an outsized visual difference:
- A cupola instantly reads as intentional, high-end coop design rather than a basic box
- The added ventilation genuinely improves interior air quality, especially in warmer climates
- It’s a relatively small addition that transforms the coop’s entire roofline silhouette
Cost breakdown: A prefabricated cupola and weathervane combination runs $60 to $150.
12. Coop With Chalkboard Signage and Named Nesting Boxes
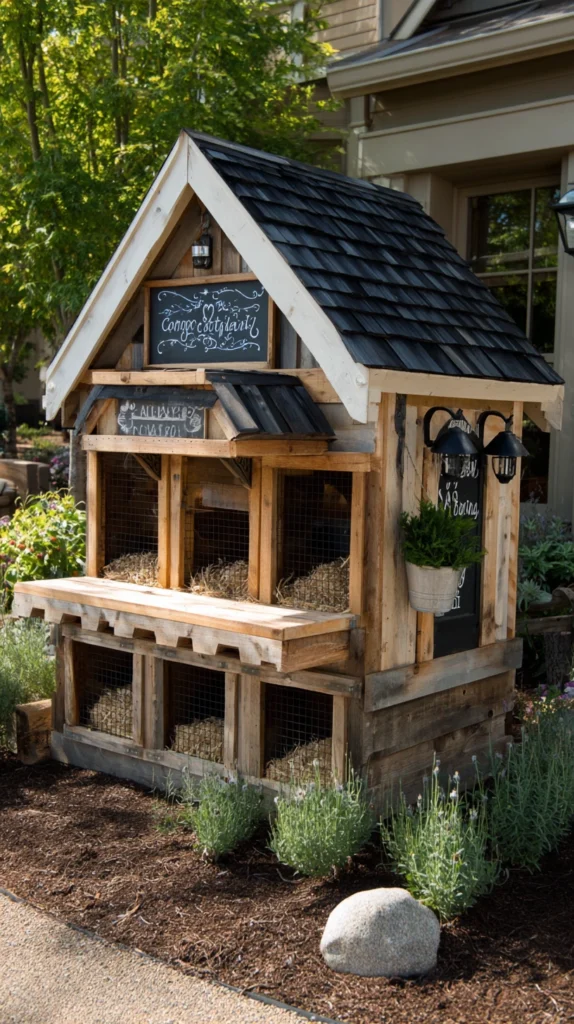
Small personal touches that make the coop feel like part of the family.
Build it:
- A small chalkboard sign mounted near the entrance, updated with the flock’s egg count or the hens’ names
- Individual nesting boxes labeled with each hen’s name in simple painted lettering
- A small welcome sign or address marker styled to match the coop’s overall design
Why personal touches matter beyond pure decoration:
- Named nesting boxes help track which hens are laying consistently and which aren’t
- A chalkboard sign gives visiting kids or guests something fun to interact with
- These details cost almost nothing but add real personality to an otherwise standard structure
Cost breakdown: Chalkboard signage and hand-lettered labels run $15 to $30 total in materials.
13. Coop Integrated Into a Garden Fence Line
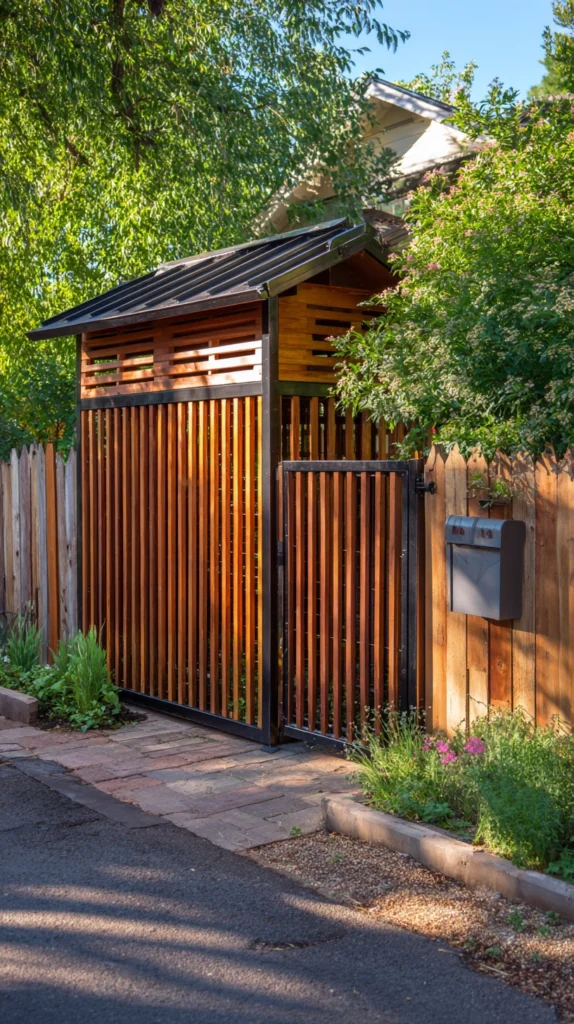
Building the coop directly into an existing fence rather than as a standalone structure.
Build it:
- The coop’s back wall doubling as a section of the yard’s perimeter fence
- Matching fence picket style and paint color carried across both the fence and the coop’s visible sides
- A small gate built directly into the shared fence line for easy access from the garden side
Why integrating into the fence line saves space and looks intentional:
- It reduces the coop’s overall footprint by using an already-existing structure as one full wall
- Matching materials make the coop disappear visually into the yard’s existing design rather than standing apart
- It works especially well in smaller yards where a standalone structure would otherwise crowd the space
Cost breakdown: Integrating a coop into an existing fence typically saves $100 to $200 in materials compared to a fully standalone build.
14. Coop With String Lights and a Seating Nook Nearby
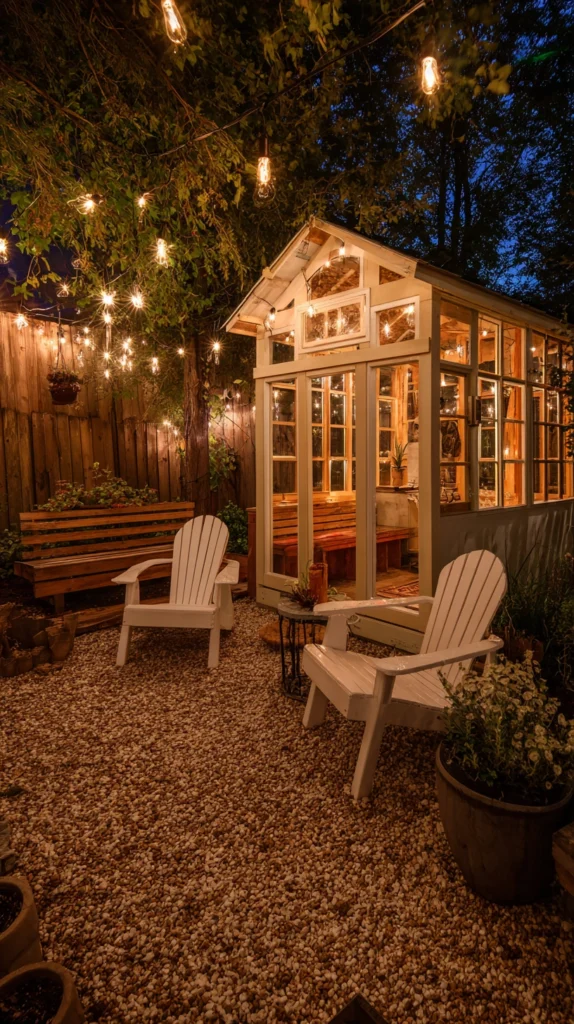
Treating the coop area as a genuine part of the yard’s living space, not a separate utility zone.
Build it:
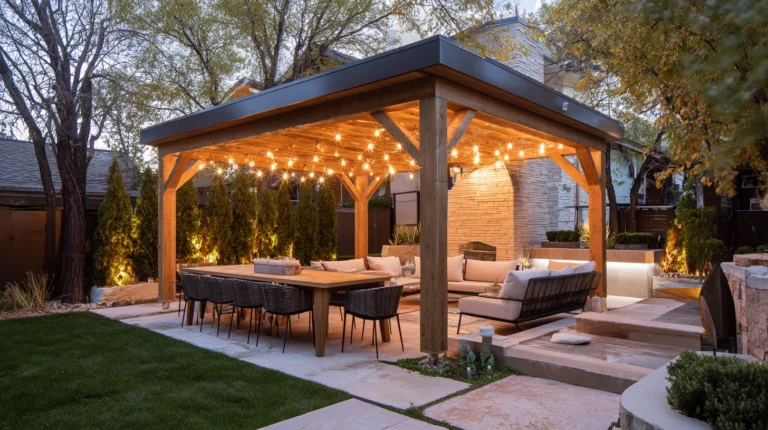
- Outdoor-rated string lights run along the coop’s roofline or an adjacent pergola beam
- A small bench or two chairs placed a few feet from the run, positioned for watching the flock in the evening
- A small side table for coffee or a book, turning the spot into an actual destination
Why this final touch changes how the whole coop area gets used:
- It invites people to actually spend time near the coop rather than only visiting for chores
- String lights extend the coop area’s usability into the evening hours
- It reframes “chicken keeping” as a genuine hobby space rather than a separate, hidden task
Cost breakdown: String lights and basic seating add $60 to $150 depending on furniture chosen.
Getting started this weekend
You don’t need to build the most elaborate coop on this list to see real charm right away.
- Start with a paint color matched to your house and basic architectural trim like shutters or a window box
- Add elevation or a Dutch door once the basic structure and paint are settled
- Save larger features like a living roof or greenhouse run for a dedicated second build
My own coop went from a hidden plywood box to the first thing guests notice in the yard, one weekend project at a time.
Budget reality
Charming coop design scales from a simple paint job to a full custom build.
- Under $75: Matching paint color, chalkboard signage, cupola addition
- $75-250: Dutch door, elevated legs, string lights and seating nook
- $250-500: Farmhouse-style build, A-frame coop, shed conversion
- $500+: Vintage trailer conversion, greenhouse run addition, living roof system
Most of the visual charm comes from paint, trim, and small architectural details, not the size of the overall structure.
What actually makes a coop charming
It was never really about building the biggest or most elaborate structure possible.
It’s the paint color pulled straight from the house, the Dutch door that actually gets used, the small chalkboard sign that turns chores into something people stop to read.
Start with the details that cost the least, and let the coop earn its place in the yard from there.