
15 Vegetable Garden Layout Ideas for Beginners
My first vegetable garden was a single long row, planted too close, watered on no real schedule.
Half of it bolted before I could harvest anything, and the other half got shaded out entirely.
The problem was never my gardening skill. It was the layout I started with.
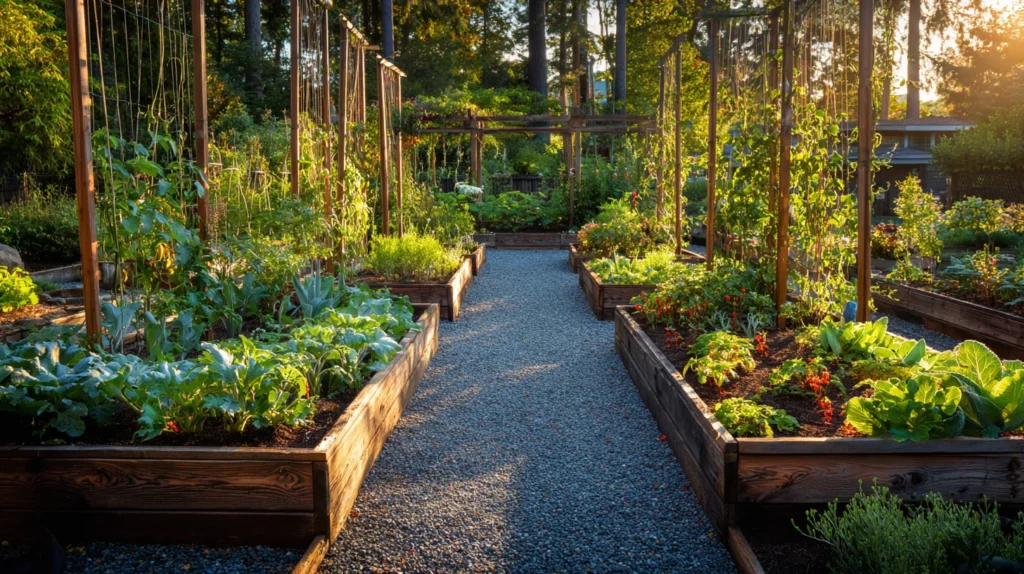
Once I redesigned around actual sunlight, spacing, and access, the same yard produced more food with less effort.
Here are 15 layout ideas that give beginners a real shot at a productive first garden.
Why layout matters more than plant choice for beginners
Most new gardeners spend their energy picking seeds and none on planning the ground itself.
- A poorly planned layout wastes water on paths and empty soil instead of growing plants
- Overcrowded rows block airflow and invite disease before pests even show up
- The right layout makes daily watering and harvesting quick instead of a chore you start avoiding
Get the shape of the garden right first, and the plant choices become far more forgiving.
1. Simple Rectangular Row Garden
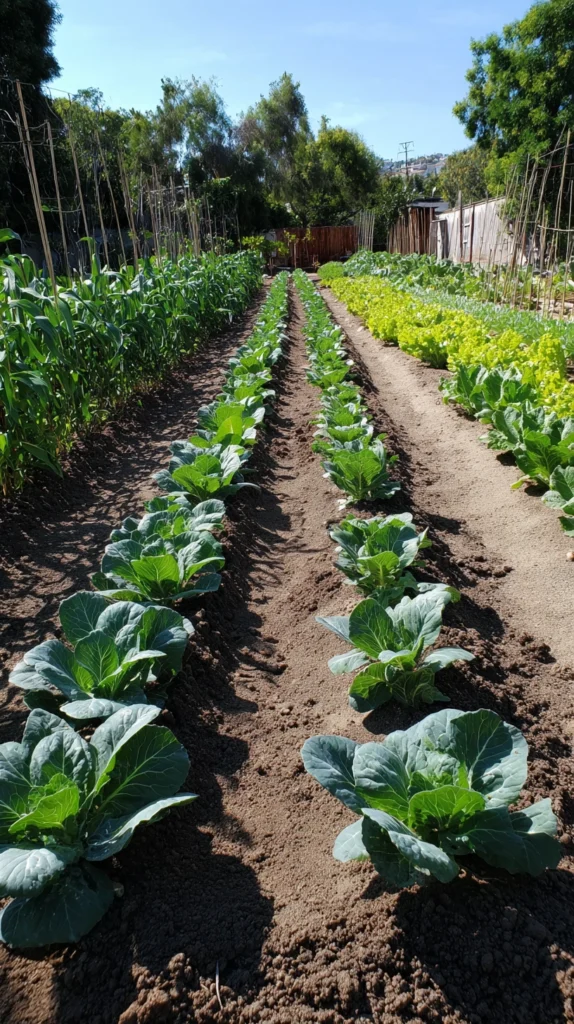
The most traditional layout, and still the easiest to understand.
Build it:
- Rows running north to south so every plant gets even sun exposure through the day
- 18 to 24 inches between rows, wide enough for a kneeling pad or small cart to pass through
- Taller crops like corn or trellised beans placed in the northernmost rows so they don’t shade shorter plants
Why rows suit a true first-time garden:
- The straight-line structure makes it obvious where to weed and where to walk
- It’s the easiest layout to expand incrementally, just add another row next season
- Nearly every seed packet’s spacing instructions are written with this layout in mind
Cost breakdown: A basic row garden needs no special materials beyond seeds and tools already on hand, typically $20 to $40 in seed costs for a first season.
2. Raised Bed Grid Layout
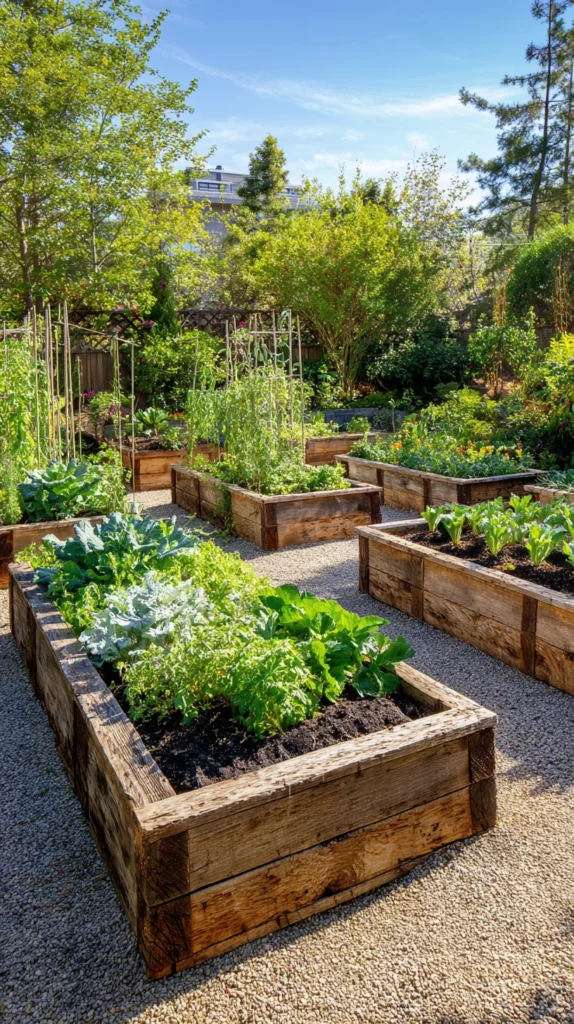
Multiple contained beds instead of open ground rows.
Build it:
- Beds sized 4 feet wide maximum, so the center is reachable from either side without stepping in
- Beds 8 feet long as a manageable standard size, spaced with 2 to 3 foot paths between
- Filled with a mix of topsoil, compost, and aged manure rather than relying on existing yard soil
Why raised beds are especially forgiving for beginners:
- Contained soil means you control drainage and quality directly, sidestepping poor native soil
- Weeds are far easier to manage in a defined bed than in an open row garden
- The defined paths keep foot traffic from compacting the growing soil itself
Cost breakdown: Basic untreated lumber raised beds run $40 to $80 each in materials, plus $30 to $60 in soil and compost per bed.
3. Square Foot Gardening Grid
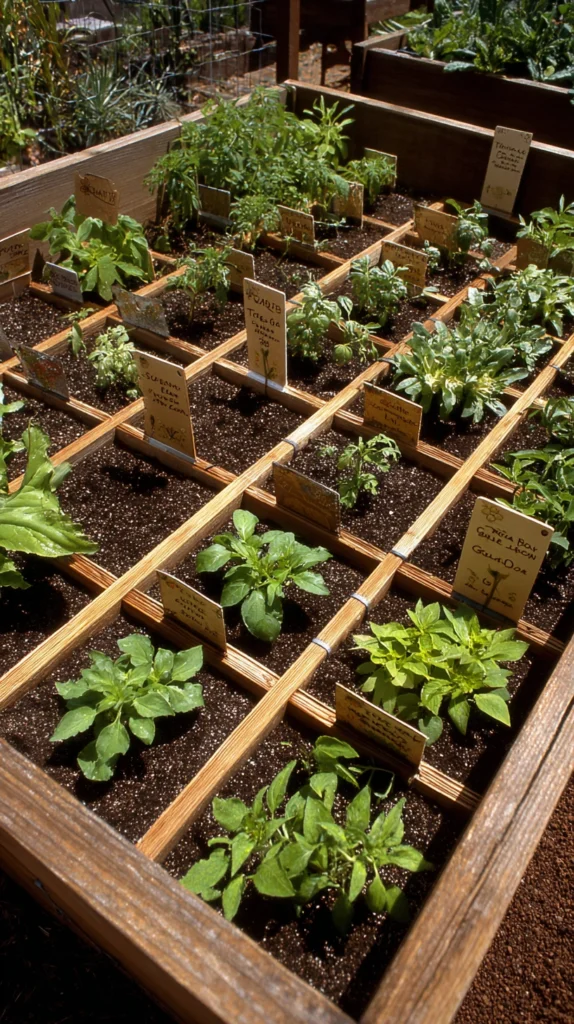
A method built specifically around small spaces and beginner simplicity.
Build it:
- A single 4×4 foot bed divided into sixteen individual one-foot squares using string or thin wood strips
- Each square planted with a single crop, spaced according to that plant’s specific square-foot planting count
- A simple planting chart kept nearby listing how many of each vegetable fit per square
Why this method removes most beginner guesswork:
- The grid does the spacing math for you, removing the most common beginner mistake of overcrowding
- It’s easy to succession plant, since one square can be replanted without disturbing its neighbors
- The small footprint makes it approachable even for a first-time gardener without much yard space
Cost breakdown: A single 4×4 square foot garden bed runs $50 to $90 including lumber, soil, and dividing materials.
4. Keyhole Garden Bed
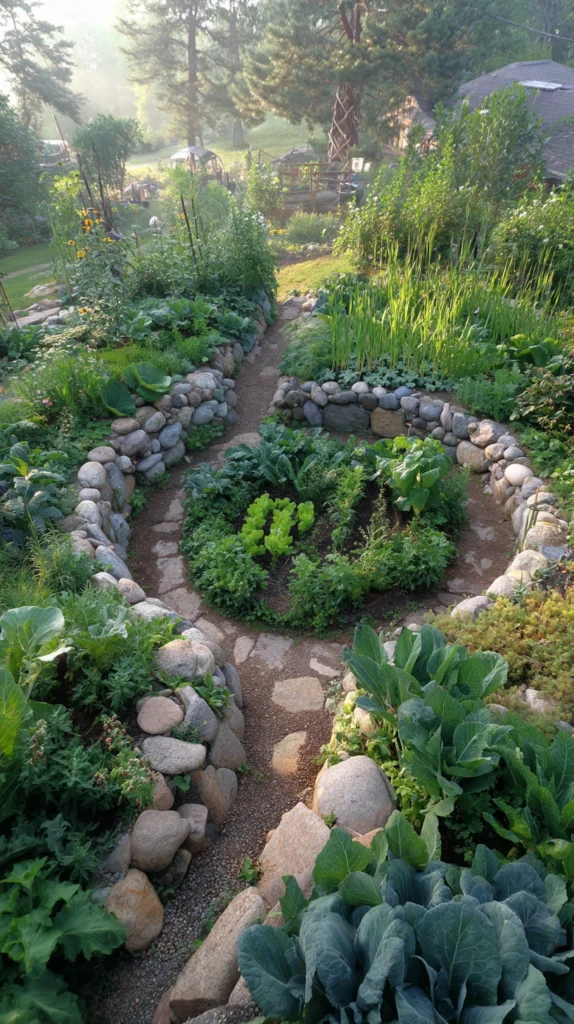
A circular bed with a built-in access path to the center.
Build it:
- A round bed roughly 6 feet in diameter with a notch cut in, like a keyhole, leading to a small central basket
- The center basket filled with compostable kitchen scraps, which slowly feeds the surrounding soil
- Crops planted in concentric rings radiating outward from the central access point
Why this layout suits a beginner who also wants to compost:
- The central compost basket feeds the whole bed passively, reducing the need for separate fertilizing
- Every plant in the bed is reachable from the central path, eliminating wasted stepping-stone space
- The circular shape uses significantly less total path space than a rectangular grid of the same growing area
Cost breakdown: A basic keyhole bed built from stone or repurposed brick runs $60 to $150 depending on materials sourced.
5. Three Sisters Companion Planting Mounds
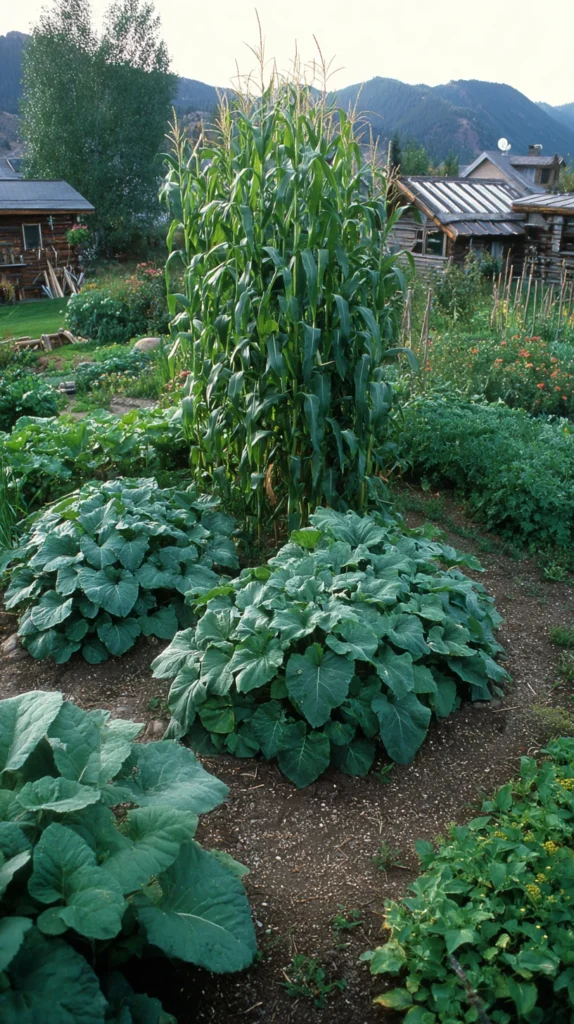
A traditional Indigenous method pairing corn, beans, and squash together.
Build it:
- Mounds spaced 3 feet apart, each about a foot high and 2 feet across
- Four corn seeds planted per mound, providing a natural pole for the beans to climb later
- Beans added two weeks after the corn sprouts, with squash planted at the mound’s base
Why this specific combination works so well for beginners:
- The corn provides free structural support, eliminating the need to build a trellis
- The beans fix nitrogen in the soil, feeding the corn and squash without added fertilizer
- The squash’s broad leaves shade the soil, suppressing weeds without any extra mulching effort
Cost breakdown: Seeds for a modest three sisters planting of four to six mounds run $15 to $25 total.
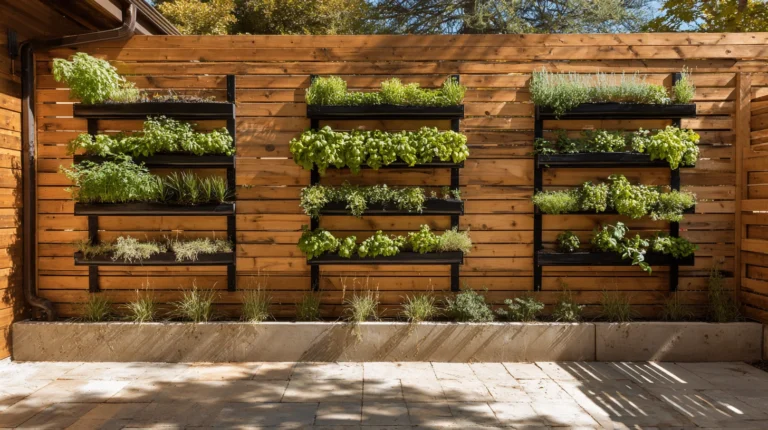
6. Vertical Trellis Garden Along a Fence
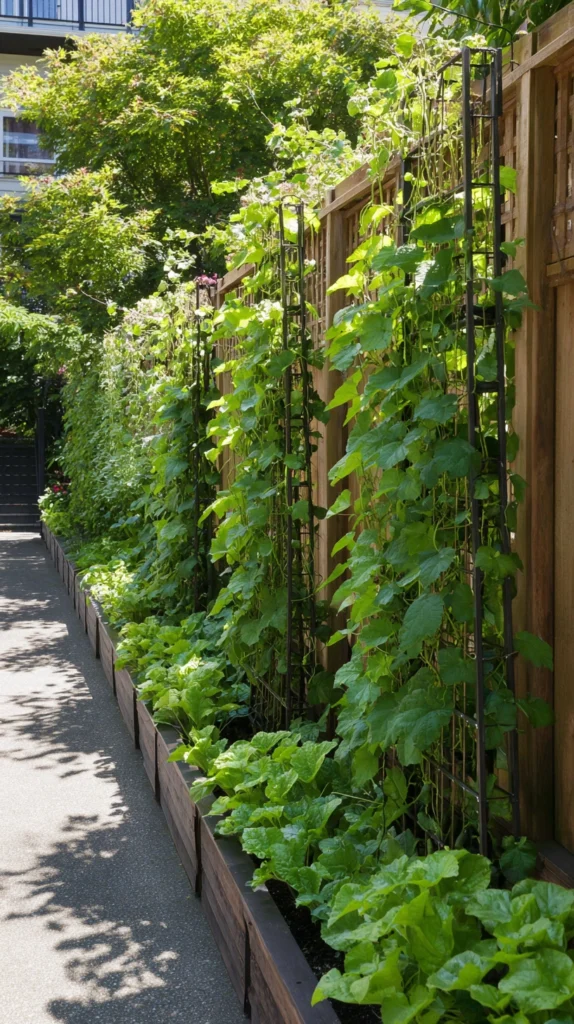
Growing upward instead of outward to maximize a small footprint.
Build it:
- A trellis, cattle panel, or simple string grid mounted against an existing fence line
- Vining crops like cucumbers, pole beans, and small winter squash trained to climb rather than sprawl
- A narrow bed, often just 12 to 18 inches deep, planted at the trellis base
Why vertical growing suits limited yard space:
- It multiplies growing area without needing any additional ground footprint
- Vertical crops get better airflow, which reduces common fungal diseases beginners often struggle with
- Harvesting is genuinely easier at eye level than bending over sprawling ground vines
Cost breakdown: A cattle panel trellis runs $25 to $40, or build a simpler string trellis for under $10.
7. Herb Spiral Near the Kitchen Door
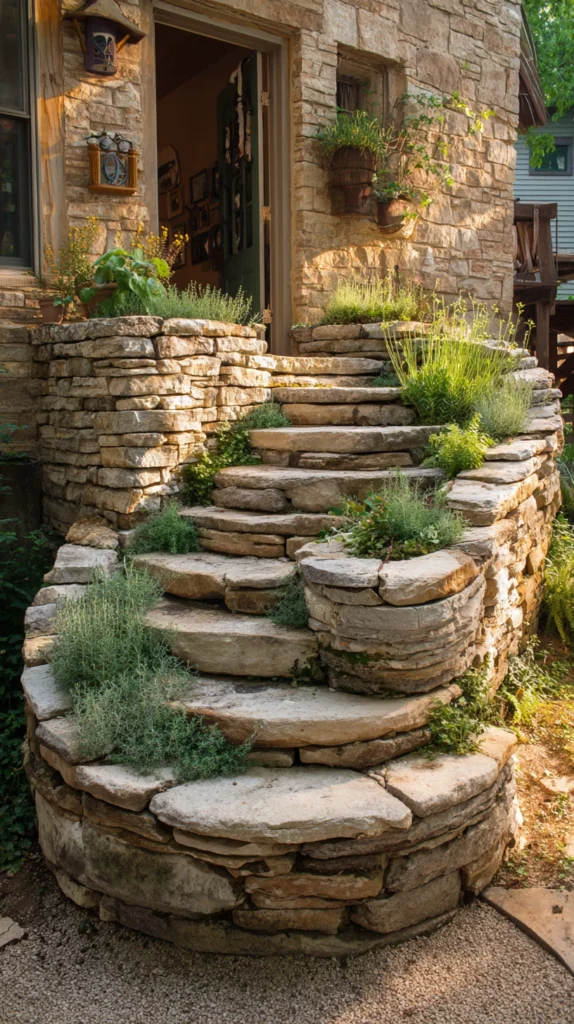
A compact, raised spiral for herbs planted close to where they’re actually used.
Build it:
- A raised spiral of stacked stone or brick, rising from ground level to about 3 feet at the center
- Sun-loving Mediterranean herbs like rosemary and thyme planted at the drier, elevated top
- Moisture-loving herbs like mint and parsley planted at the shadier, damper base
Why a spiral suits herbs specifically, more than vegetables:
- The elevation change creates several distinct microclimates in a very small footprint
- Placing it near the kitchen door means herbs actually get harvested regularly instead of forgotten in a back bed
- The compact vertical shape uses a fraction of the space a flat herb row would require
Cost breakdown: A basic stone herb spiral runs $50 to $100 in stone or brick materials.
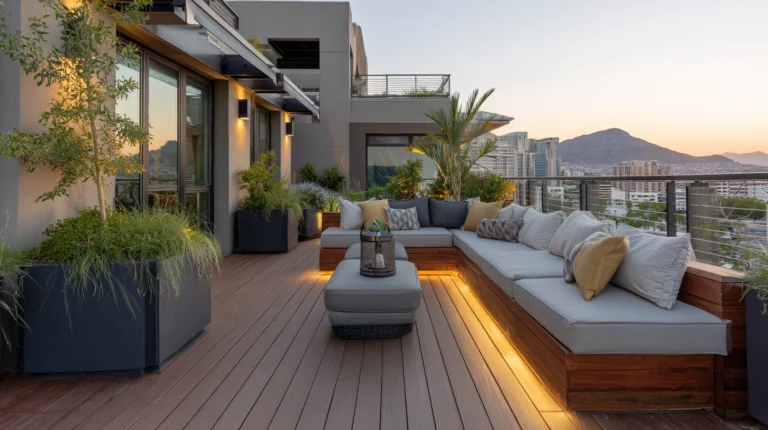
8. Container Garden on a Patio or Balcony
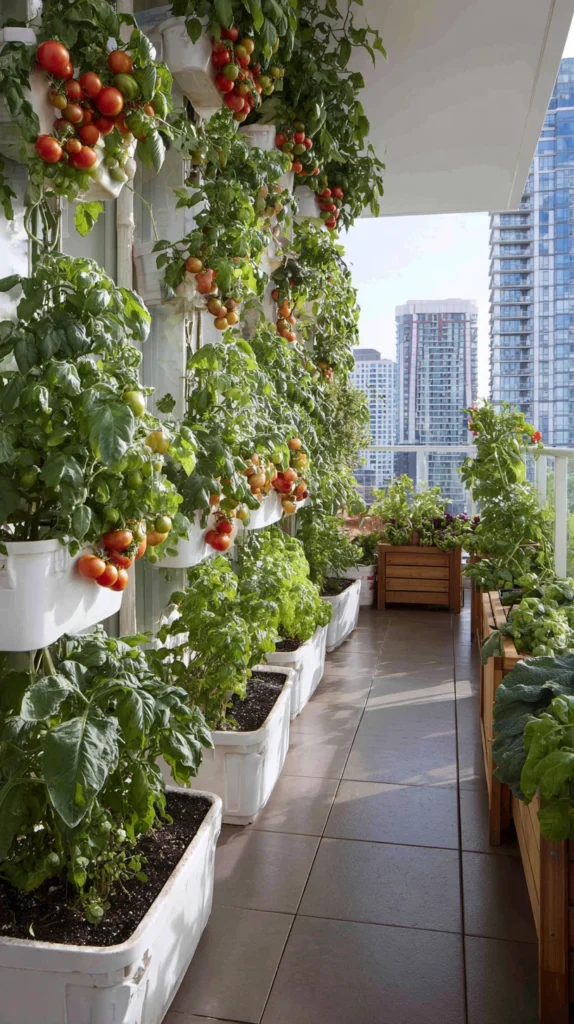
For beginners without any yard space at all.
Build it:
- Large containers, at least 12 inches deep, one per plant or grouped by root depth
- Drainage holes drilled into the base of every container before filling with soil
- Grouped by watering needs, keeping thirstier crops like tomatoes separate from drought-tolerant herbs
Why containers are a genuinely legitimate first garden, not a compromise:
- Container gardens are easier to protect from pests, since they’re elevated off the ground
- Poor native soil is a non-issue, since every container starts with fresh potting mix
- The whole garden can be rearranged for sun exposure as the season changes
Cost breakdown: Basic large containers run $10 to $25 each, plus $10 to $15 in potting soil per container.
9. Mixed Bed With Flowers and Vegetables Together
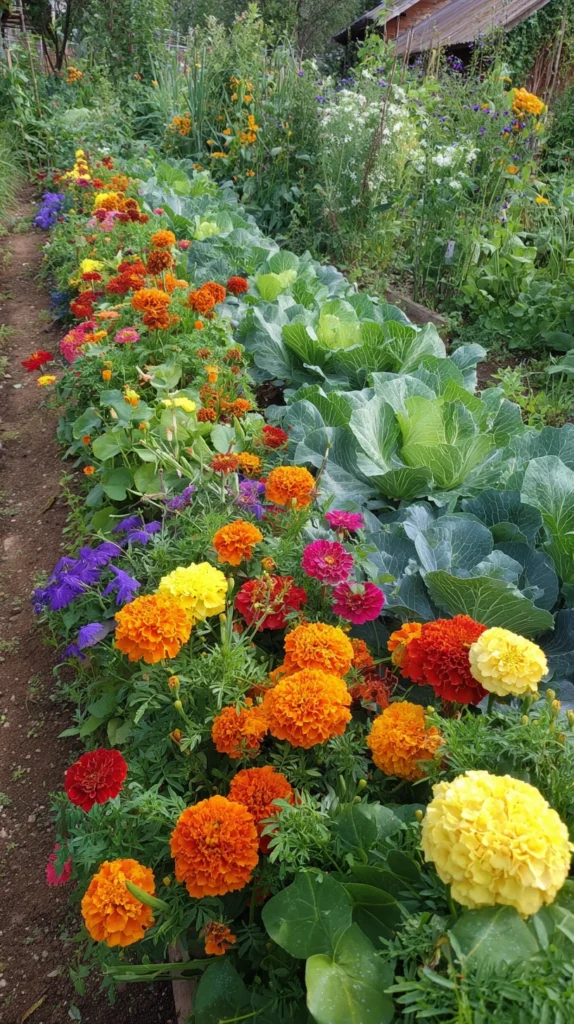
Blending ornamental and edible plantings in the same space.
Build it:
- Marigolds and nasturtiums planted along the bed’s border, both known for repelling common garden pests
- Vegetables planted in the interior, with flowering companions tucked between rows rather than segregated
- Zinnias or cosmos added purely for cut-flower harvest alongside the edible crops
Why mixing beds benefits beginners more than a pure vegetable plot:
- Companion flowers draw in pollinators and beneficial insects that vegetables alone often don’t attract as reliably
- A mixed bed looks intentional and attractive even during the awkward early growth stages
- It reduces the visual monotony that can make a beginner lose motivation partway through the season
Cost breakdown: Companion flower seeds run $3 to $6 per packet, adding minimal cost to an existing vegetable bed plan.
10. Succession Planting Layout With Staggered Sections
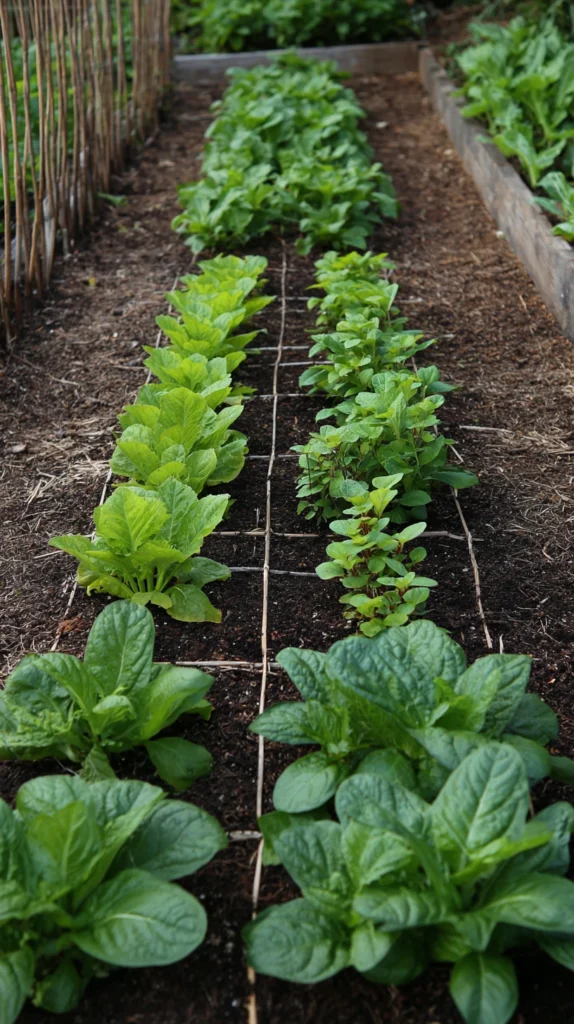
Dividing the garden into timed sections instead of planting everything at once.
Build it:
- The bed divided into three or four sections, each planted two to three weeks apart
- Fast-maturing crops like lettuce and radishes used in the staggered sections for quicker turnover
- A simple planting calendar kept nearby noting when each section was sown and its expected harvest window
Why staggering solves the most common beginner mistake:
- Planting an entire bed at once means an overwhelming harvest all in the same week, followed by nothing
- Staggered sections spread the harvest out over a much longer window, matching what a household can realistically use
- It also spreads out the workload of planting and prepping soil, rather than doing it all in one exhausting day
Cost breakdown: No additional cost beyond the seeds themselves, since this is a planning approach rather than a material one.
11. Raised Bed With a Built-In Trellis Arch
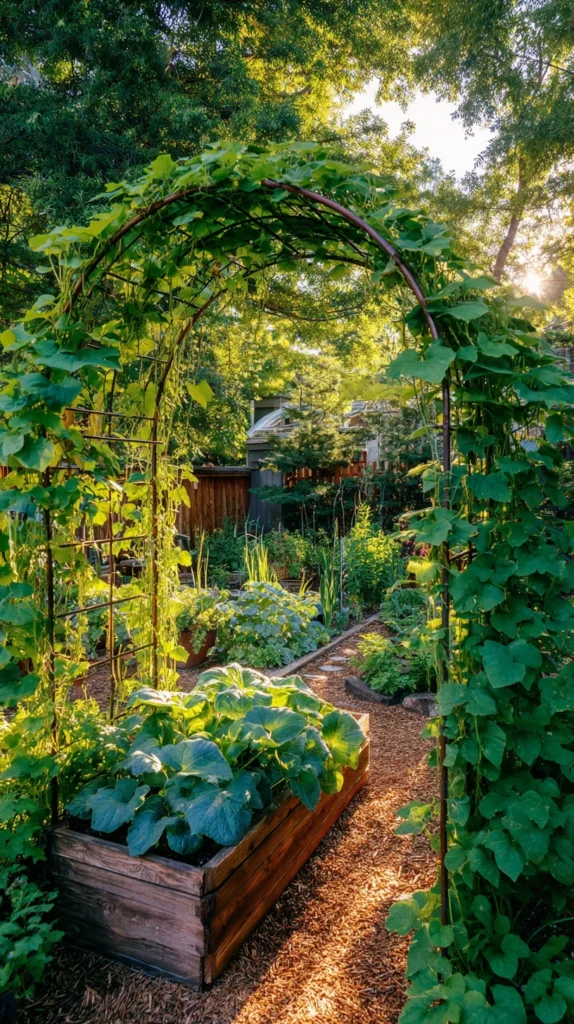
Combining vertical growing directly into the bed’s structure.
Build it:
- An arched cattle panel or PVC frame installed across the width of a raised bed
- Climbing crops like cucumbers or pole beans planted at the base of each side of the arch
- Shade-tolerant crops like lettuce planted directly beneath the arch, benefiting from the dappled shade above
Why an integrated arch outperforms a separate trellis:
- It uses the bed’s existing structure rather than requiring additional ground space nearby
- The shaded area beneath extends the growing window for cool-season crops further into summer
- It adds a genuine visual focal point to what might otherwise be a purely utilitarian bed
Cost breakdown: A cattle panel arch runs $30 to $50 depending on panel size and mounting hardware.
12. Small Kitchen Garden Near the Back Door
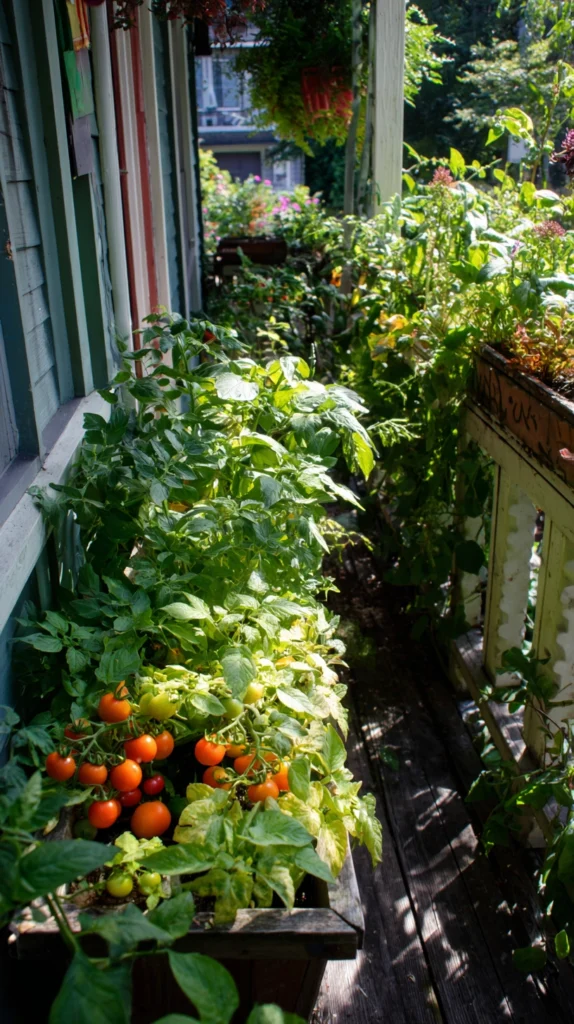
A compact bed specifically for daily-use crops.
Build it:
- A small 4×4 or 4×6 foot bed positioned within a few steps of the kitchen entrance
- Planted with high-frequency-use crops like cherry tomatoes, herbs, and salad greens
- Kept intentionally small, prioritizing convenience over total yield
Why proximity changes what actually gets used:
- A garden tucked in the back corner of the yard gets checked and harvested far less often than one by the door
- Daily visibility means problems like pests or wilting get caught and addressed immediately
- It works well as a starter bed before committing to a larger, farther garden the following season
Cost breakdown: A small starter kitchen bed runs $60 to $100 including basic raised bed materials and soil.
13. Raised Bed With Wide Paths for Accessibility
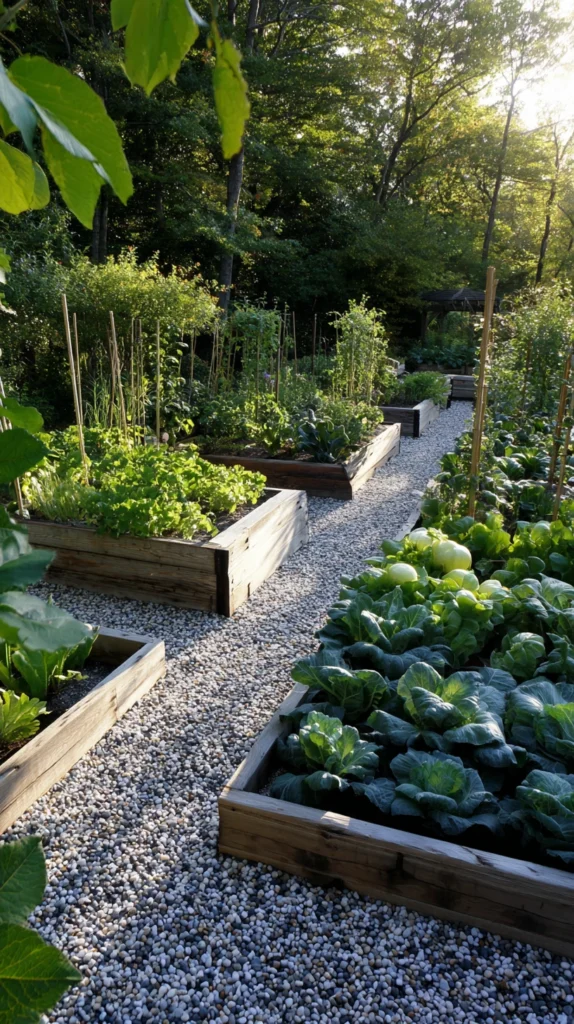
A layout designed around ease of movement, not just planting density.
Build it:
- Beds raised to at least 24 inches high for those who prefer not to kneel or bend
- Paths widened to at least 36 inches, enough for a wheelbarrow or mobility aid to pass through comfortably
- A hard-surfaced path material like gravel or pavers rather than bare dirt, which stays muddy after rain
Why accessibility-focused layouts benefit every beginner, not just some:
- Wider paths and taller beds reduce the physical strain that causes many first-time gardeners to give up early
- Hard-surfaced paths mean the garden stays usable immediately after rain instead of waiting for mud to dry
- The taller bed height also naturally deters some ground-level pests like slugs
Cost breakdown: Taller raised beds and gravel path materials add roughly $100 to $200 over a standard ground-level layout.
14. Small Greenhouse or Cold Frame Extension
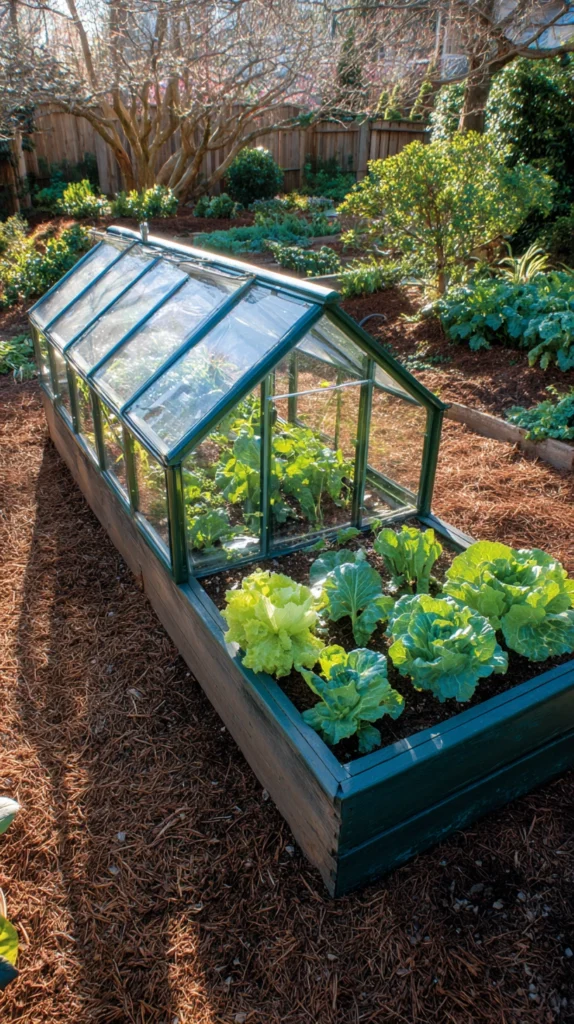
Extending a beginner layout’s growing season without a full greenhouse investment.
Build it:
- A simple cold frame built from an old window sash and scrap lumber, sized to fit over one bed section
- Positioned to capture maximum southern sun exposure
- Used to start seedlings early in spring or extend cool-season crops later into fall
Why a small cold frame is a smarter first step than a full greenhouse:
- It requires a fraction of the investment while still meaningfully extending the growing calendar
- It gives beginners a low-stakes way to start seeds indoors-adjacent, without the cost of grow lights and shelving
- It can be moved to cover whichever bed section needs it most as the season changes
Cost breakdown: A simple DIY cold frame runs $20 to $50 using a reclaimed window and scrap lumber.
15. Layout With a Dedicated Composting Corner
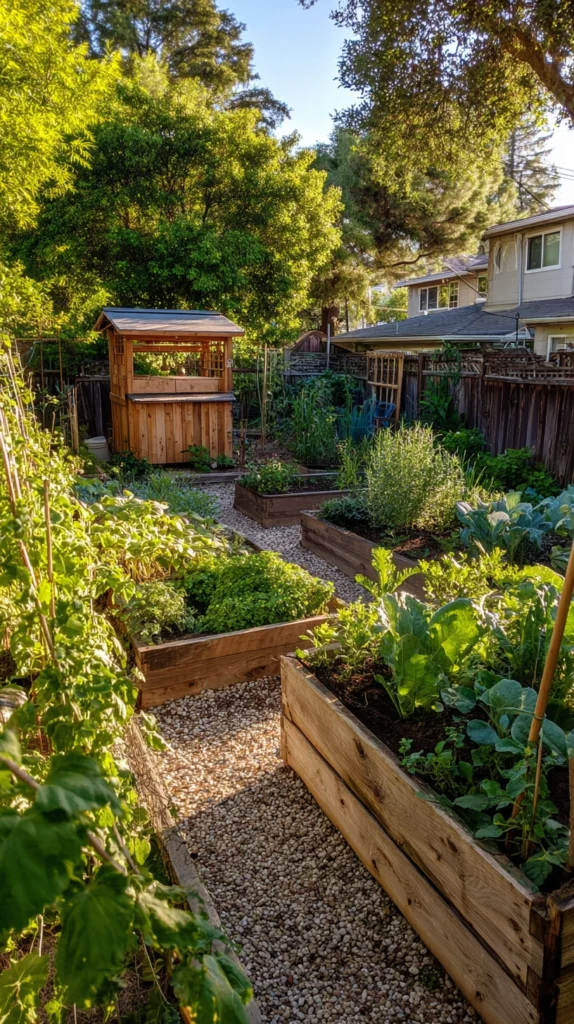
Placing the compost system directly within the garden’s overall plan, not as an afterthought.
Build it:
- A simple three-bin or tumbler composting system positioned at one corner of the garden
- Kitchen scraps and yard waste added consistently, turned every one to two weeks
- Finished compost used directly on adjacent beds, minimizing the distance it needs to be carried
Why planning for compost from the start matters:
- Beginners who add composting later often place it inconveniently far from where it’s actually needed
- A corner placement within the garden’s footprint means finished compost travels only a few feet to use
- It closes the loop on the garden’s own waste, reducing the need for store-bought fertilizer over time
Cost breakdown: A basic three-bin compost system runs $40 to $80 in lumber, or a tumbler-style bin runs $60 to $120.
Getting started this weekend
You don’t need to build all fifteen layouts before the first seed goes in the ground.
- Start with one small raised bed or a single square foot garden section
- Add succession planting and companion flowers once the first bed is established and producing
- Save larger structural additions like a cold frame or compost system for the following season
My own garden went from one overcrowded row to a fully planned layout over three separate growing seasons, adjusting each year based on what actually worked.
Budget reality
A beginner vegetable garden can start small and grow with your confidence.
- Under $50: Simple row garden, herb spiral, companion flower additions
- $50-100: Square foot garden bed, small kitchen garden, cold frame
- $100-200: Standard raised bed grid, vertical trellis system, accessible wide-path layout
- $200+: Keyhole garden, full compost system, multiple raised beds combined
Most beginner success comes from starting smaller than feels necessary, not from the size of the initial investment.
What actually makes a beginner layout succeed
It was never really about picking the perfect vegetables to plant first.
It’s the spacing that lets air move between plants, the path wide enough to actually use, the bed placed close enough to the door that it gets checked every single day.
Start with one manageable layout, let it teach you what your yard actually needs, and expand from there next season.