
15 Outdoor Mud Kitchen Ideas for Kids
The mud kitchen changed how my kids spent their afternoons more than any indoor toy purchase ever has. Not the new tablet. Not another board game. Not a bigger toy box or a better-organized playroom or a subscription box of monthly crafts.
A few boards, some old pots, and a patch of dirt.
Because giving children a genuine outdoor space built specifically for messy, imaginative play did something screens and indoor toys never quite managed. Before it: kids drifting toward a device the moment boredom set in, outdoor time treated as a brief interruption between indoor activities. After it: hours spent stirring mud “soup,” serving imaginary meals, and inventing games no adult ever suggested, the backyard becoming the actual destination rather than an afterthought.
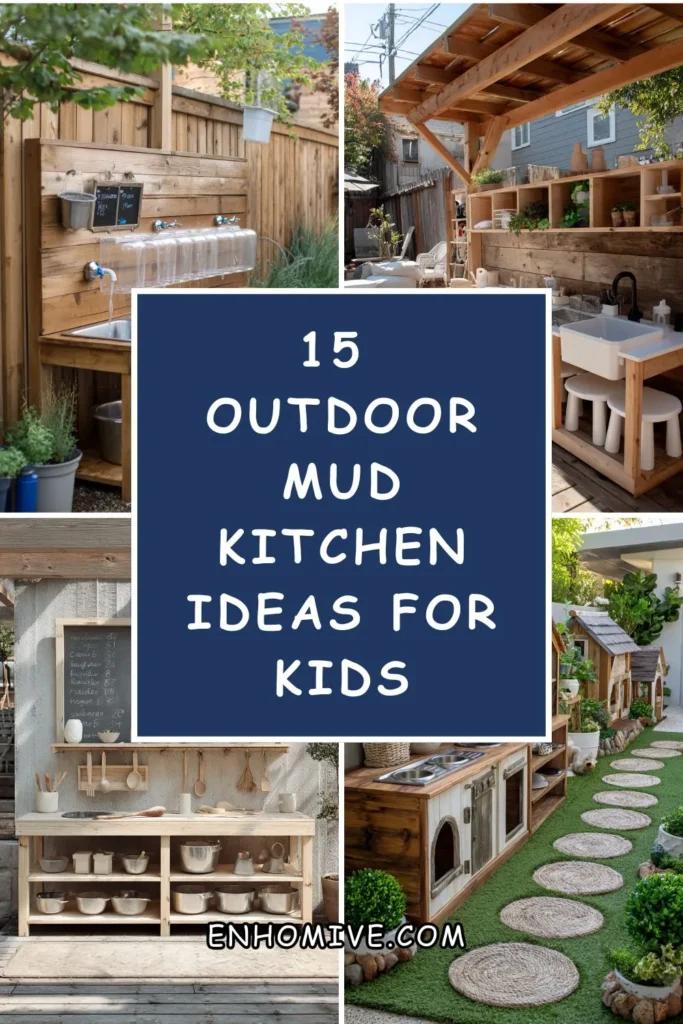
A mud kitchen is not a miniature version of an indoor play kitchen moved outside. It is a genuinely different kind of play space, built around real dirt, real water, and real (if repurposed) kitchen tools, giving children permission to get messy in a way most of the rest of the house understandably does not allow. The backyard: no longer just a lawn to maintain, but a genuine second play space children actually choose.
Here are 15 outdoor mud kitchen ideas for kids — from the simplest repurposed pallet setup to the most fully equipped outdoor play station — built on that understanding.
Why Mud Kitchens Offer Something Indoor Play Cannot Replicate
The sensory play case
Mud, water, and natural materials provide a genuinely different sensory experience than most indoor toys, engaging touch, smell, and a kind of open-ended creativity that structured indoor play often does not.
The unstructured play principle
Without a dedicated mud kitchen:
Outdoor play often defaulting to whatever equipment already exists — a swing set, a trampoline — offering a specific, limited range of activities.
The backyard: used, but in a narrower, more repetitive way than its actual potential allows.
With a dedicated mud kitchen:
Open-ended materials — dirt, water, pinecones, old pots — inviting genuinely inventive, self-directed play that changes daily depending on the child’s own imagination.
The backyard: becoming a space for a much wider range of activity, the mud kitchen’s very simplicity making it more flexible than a single-purpose piece of equipment.
The low-cost, repurposed-material advantage
Nearly every element of a genuine mud kitchen can be built from repurposed materials — old kitchen items, a discarded pallet, a salvaged sink — making this one of the more affordable outdoor play investments available, particularly compared with a swing set or a playhouse.
The durability consideration
Mud kitchens are, by design, meant to get dirty, wet, and heavily used, so materials and construction should be chosen specifically for that reality rather than for the polish a typical indoor furniture piece might prioritize.
The Five Core Elements of a Mud Kitchen
Before building any specific setup:
The work surface
A counter, table, or repurposed furniture piece, providing the main area for mixing, pouring, and “cooking.”
The foundational structure everything else is built around.
Scaled appropriately to the children’s actual height.
A water source
A rain barrel, a hose connection, or simply filled containers, providing the water essential to genuine mud play.
Arguably the single most important functional element.
Ranges from the simplest bucket to a full plumbed sink.
Storage for tools and materials
Shelving, hooks, or bins holding pots, utensils, and natural play materials.
Keeps the space organized between play sessions.
Extends the equipment’s lifespan through proper storage.
A dirt or “ingredient” source
A designated digging area or a filled sandbox-style bin, providing the actual mud-making material.
The core resource the entire kitchen is built to use.
Worth planning for easy replenishment over time.
Weather and durability considerations
Materials and construction suited to genuine, repeated outdoor exposure and heavy use.
Ensures the kitchen remains functional and safe over multiple seasons.
Worth prioritizing over purely aesthetic material choices.
1. The Repurposed Pallet Mud Kitchen
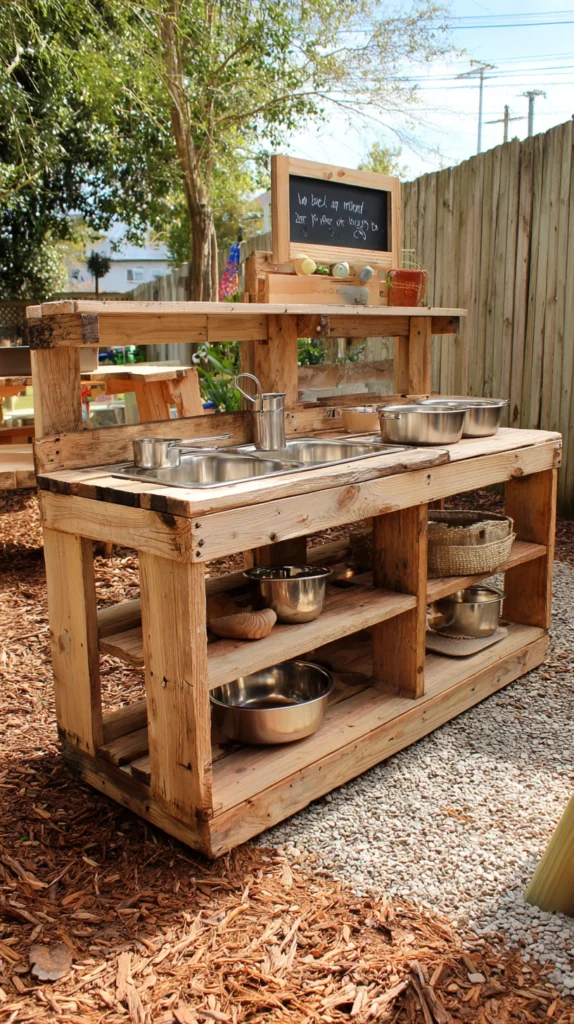
A simple mud kitchen built primarily from one or two wood pallets, disassembled and reconstructed into a basic counter and shelving structure.
Why pallets remain the most common and most accessible starting material
Pallets are frequently available free from local businesses and provide pre-cut, sturdy lumber in consistent dimensions, making them one of the most cost-effective materials for a first mud kitchen build.
The sourcing
Free pallets from local retailers, garden centers, or warehouses, checked to confirm they have not been chemically treated in a way unsuitable for a children’s play structure.
The basic construction
The pallet’s existing slatted structure used as the counter surface, with a second pallet or salvaged boards forming simple legs or a lower shelf.
The child-height scaling
Cut and assembled to a height appropriate for the specific children who will use it, generally lower than an adult kitchen counter, ensuring genuine comfortable access rather than a structure sized for adult convenience.
The finish
Lightly sanded to remove any splinters, left unpainted or given a simple weatherproof sealant, since the structure is expected to get wet and dirty regularly.
The overall value
A genuinely low-cost, accessible starting point for a first mud kitchen, using widely available free material and basic construction skills.
Cost breakdown: Pallets (free to $10 each): $0–20 Sealant: $15–30 Total: $15–50
2. The Salvaged Kitchen Sink Centerpiece
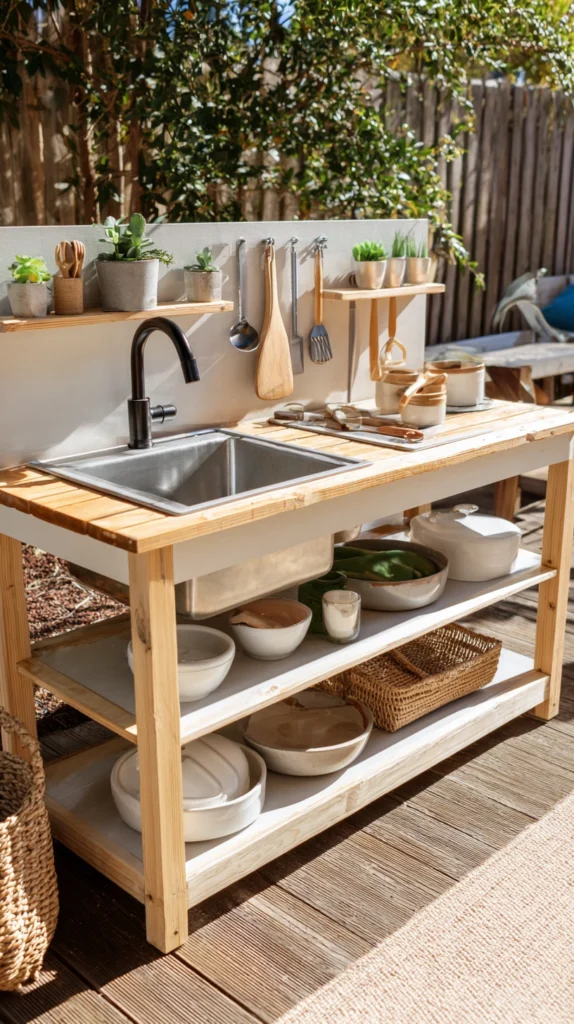
An old, discarded kitchen sink, either plumbed to a real water source or simply filled manually, serving as the mud kitchen’s central water feature.
Why a genuine sink adds significant play value over a simple bucket
A real sink, complete with a faucet even if not connected to running water, provides a far more authentic and engaging “kitchen” experience than a bucket alone, closely mimicking the actual cooking and cleaning activities children are imitating.
The sink sourcing
A salvaged sink from a renovation project, a salvage yard, or a secondhand marketplace, often available inexpensively or free from someone replacing their own kitchen.
The plumbing option
Connected to an outdoor hose bib for genuine running water, providing the most realistic and engaging play experience, though requiring more setup than a simple filled basin.
The non-plumbed option
The sink simply filled manually with a watering can or hose before each play session, still providing the authentic sink form and drainage even without active plumbing.
The drainage consideration
A drainage path directed away from the structure’s base, whether through actual plumbing or simply positioning the sink at a slight angle over gravel or a permeable surface, preventing water pooling and structural damage over time.
The overall value
A centerpiece that significantly elevates the mud kitchen’s realism and play value, the genuine sink form doing considerable work toward the imaginative cooking and cleaning play children naturally gravitate toward.
Cost breakdown: Salvaged sink: $0–40 Hose connection (if plumbing): $30–70 Total: $0–110
3. The Tiered Shelf and Pot Storage Wall
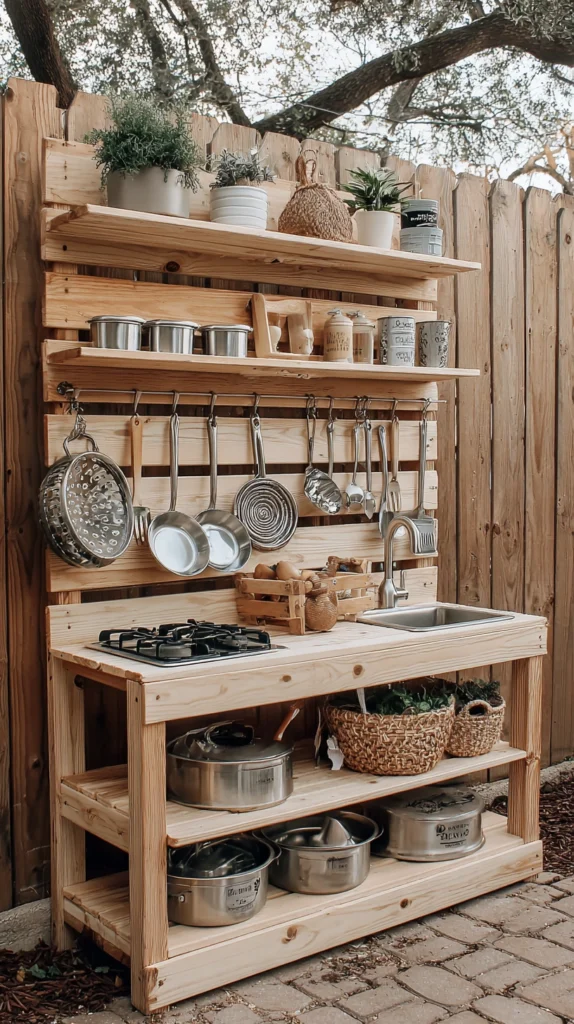
A simple shelving structure mounted to a fence or a standalone frame, holding old pots, pans, and utensils for genuine cooking-style play.
Why dedicated storage extends the equipment’s lifespan and the kitchen’s daily usability
Tools and pots left scattered on the ground quickly become lost, damaged, or simply forgotten. A dedicated shelf or hook system keeps everything organized, visible, and ready for the next play session.
The shelving structure
Simple wood shelves, mounted to an existing fence or built as part of the mud kitchen’s own frame, sized to hold a genuine collection of old pots, pans, and utensils.
The hook system
Hooks beneath the shelves holding smaller utensils — spoons, spatulas, a small colander — keeping them organized and easily grabbed during play.
The sourcing
Old, retired kitchen items no longer used indoors — a dented pot, a scratched pan, mismatched utensils — repurposed specifically for outdoor mud play rather than purchased new.
The weatherproofing
Metal items generally holding up well to outdoor exposure, though worth periodically checking for rust or sharp edges developing over time with repeated wet exposure.
The overall value
A genuine cooking-play experience using real, if retired, kitchen tools, organized in a way that keeps the mud kitchen functional and inviting between play sessions.
Cost breakdown: Shelving materials: $15–35 Hooks: $5–15 Retired pots and utensils: $0 (repurposed from home) Total: $20–50
4. The Chalkboard Menu Board
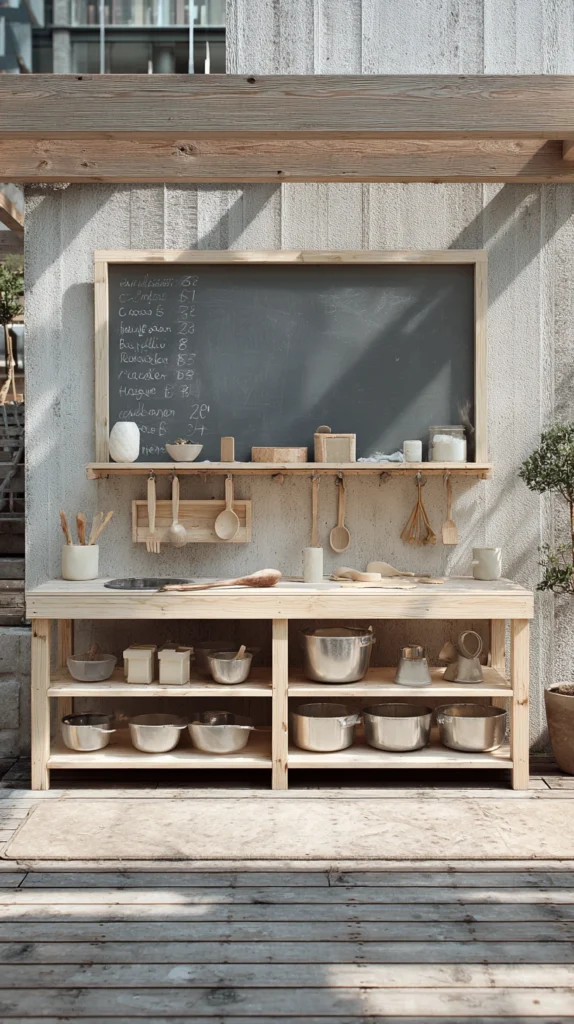
A small chalkboard mounted to the mud kitchen’s structure, allowing children to “write” daily specials or take orders as part of imaginative restaurant play.
Why a menu board extends play beyond pure sensory mud mixing
Children playing “restaurant” or “café” benefit from a specific prop that supports that particular imaginative narrative, extending the mud kitchen’s play value beyond simple mixing and pouring into more structured, role-play-based games.
The chalkboard
A simple chalkboard panel, either purchased or made from chalkboard paint applied to a section of the kitchen’s structure.
The height and accessibility
Mounted at a height children can genuinely reach and write on themselves, rather than positioned for adult convenience or purely decorative display.
The chalk storage
A small cup or holder for chalk, kept within reach and easily restocked as pieces are lost or used up during outdoor play.
The imaginative use
Children encouraged to write their own “menu” items or take imaginary orders, extending the mud kitchen into a broader restaurant or café role-play scenario beyond pure sensory mixing.
The overall value
A detail that broadens the range of imaginative play the mud kitchen supports, adding a literacy and narrative-building element alongside the purely sensory mud and water play.
Cost breakdown: Chalkboard panel or chalkboard paint: $10–25 Chalk: $3–8 Total: $13–33
5. The Herb and Edible Plant Garnish Station
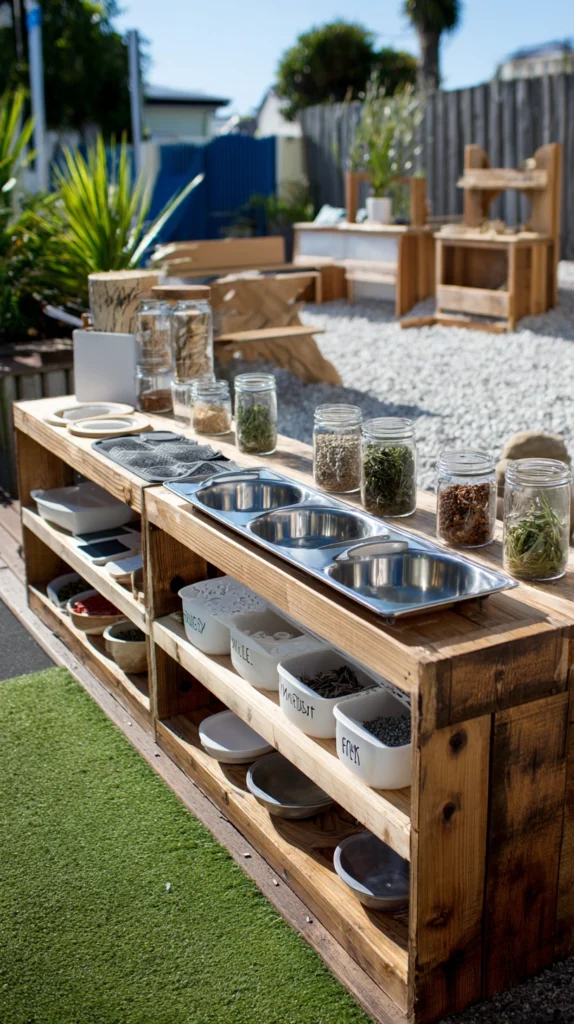
A small planted area or a row of pots holding hardy herbs and edible flowers positioned beside the mud kitchen, providing genuine “ingredients” children can pick and add to their mud creations.
Why real, pickable plants add a meaningful layer to mud kitchen play
Allowing children to actually pick real herbs or edible flowers to add to their mud “recipes” connects the imaginative cooking play to genuine plant knowledge and sensory experience, beyond mud and water alone.
The plant selection
Hardy, easily replaced herbs — mint, rosemary, or chives — and a few edible flowers such as nasturtium or calendula, chosen for their ability to withstand regular picking by enthusiastic young “chefs.”
The planting location
Positioned directly beside or within easy reach of the mud kitchen’s main work surface, so picking an ingredient becomes a natural, integrated part of the play rather than a separate activity.
The regrowth consideration
Fast-growing, resilient varieties chosen specifically because they will be picked frequently and need to recover and regrow between play sessions.
The safety check
Confirming every plant included is genuinely non-toxic, given that young children may realistically put picked material in their mouths during imaginative “tasting” play.
The overall value
A detail connecting the mud kitchen’s imaginative cooking play to real sensory and plant-based learning, adding genuine educational value alongside pure entertainment.
Cost breakdown: Herb and edible flower plants (4–6): $20–40 Total: $20–40
6. The Sensory Bin Ingredient Station
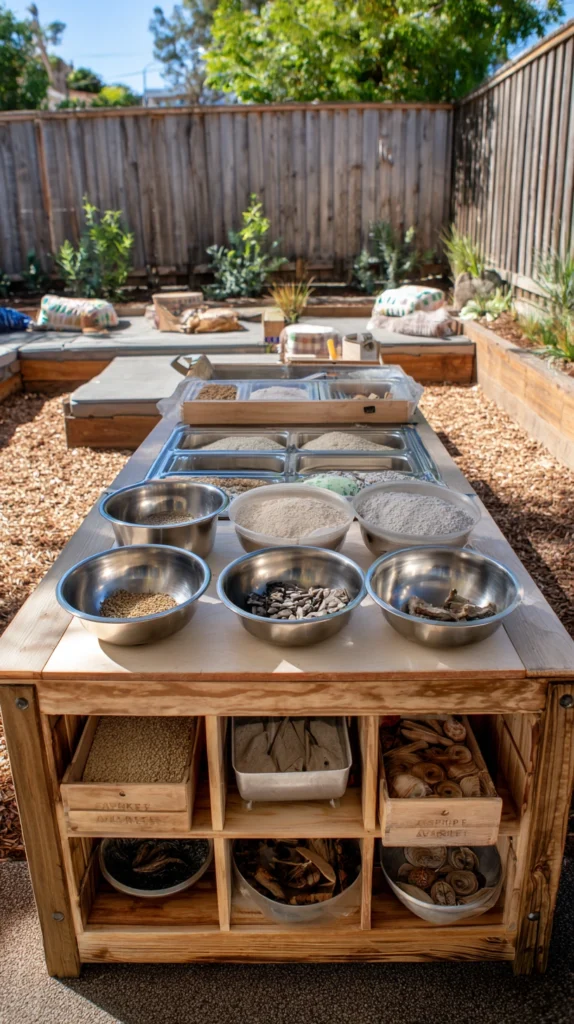
Several bins filled with different natural “ingredients” — pinecones, dried leaves, small stones, sand — positioned near the mud kitchen for children to mix into their creations.
Why varied sensory ingredients extend play beyond mud and water alone
A mud kitchen limited purely to dirt and water offers real but somewhat repetitive sensory play. Adding several bins of varied natural materials significantly expands the range of textures, colors, and “recipes” children can create.
The bin contents
Pinecones, dried leaves, small smooth stones, sand, and dried flower petals, each in its own separate, clearly organized bin or container.
The organization
Bins arranged on the mud kitchen’s shelving or on a nearby low table, each distinct enough that children can genuinely differentiate and choose specific “ingredients” for their play.
The replenishment routine
Bins refreshed periodically, particularly the more fragile materials like dried leaves and petals, which will naturally deplete or degrade with regular handling and weather exposure.
The seasonal variation
Contents naturally shifting with the seasons — fresh flower petals in spring and summer, colorful leaves in fall, pinecones and evergreen sprigs in winter — keeping the available materials feeling fresh and connected to the actual outdoor environment.
The overall value
A significant expansion of the mud kitchen’s sensory and imaginative range, the varied materials supporting much more elaborate and varied “recipes” than mud and water alone would allow.
Cost breakdown: Bins: $15–30 Natural materials (largely gathered free): $0–15 Total: $15–45
7. The Repurposed Dresser or Cabinet Base
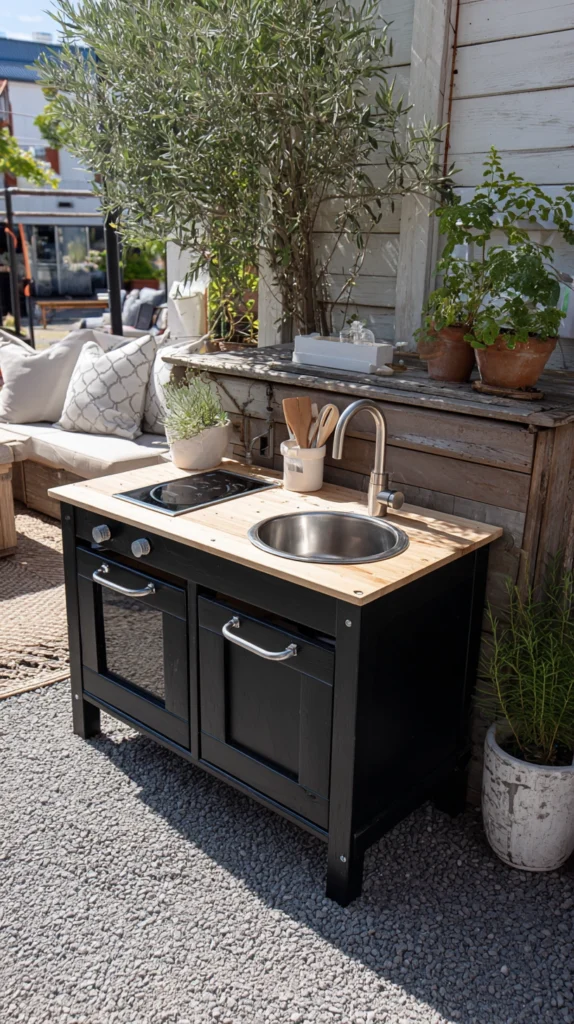
An old dresser or cabinet, no longer needed indoors, repurposed as the mud kitchen’s main structure, its drawers providing genuine storage for tools and supplies.
Why furniture with drawers offers storage advantages over open shelving alone
A dresser or cabinet’s drawers provide enclosed storage, protecting tools and smaller materials from rain and wind in a way open shelving cannot, while still offering the same basic counter-height work surface.
The furniture sourcing
An old dresser, cabinet, or even a retired television stand, sourced secondhand or from a household’s own furniture no longer needed indoors.
The weatherproofing
A weatherproof sealant applied to all exposed wood surfaces, since furniture originally built for indoor use requires additional protection before genuine outdoor exposure.
The drawer use
Drawers used for smaller utensils, chalk, or other items needing protection from rain, while the top surface and any open shelving serves the same function as a standard mud kitchen counter.
The drainage modification
Small drainage holes drilled into the piece’s base or lower sections, preventing water from pooling inside and accelerating rot or mold growth over time.
The overall value
A structure offering more enclosed, weather-protected storage than open shelving alone, using furniture that would otherwise be discarded.
Cost breakdown: Secondhand dresser or cabinet: $0–40 Weatherproof sealant: $15–30 Total: $15–70
8. The Water Wall Pouring Station
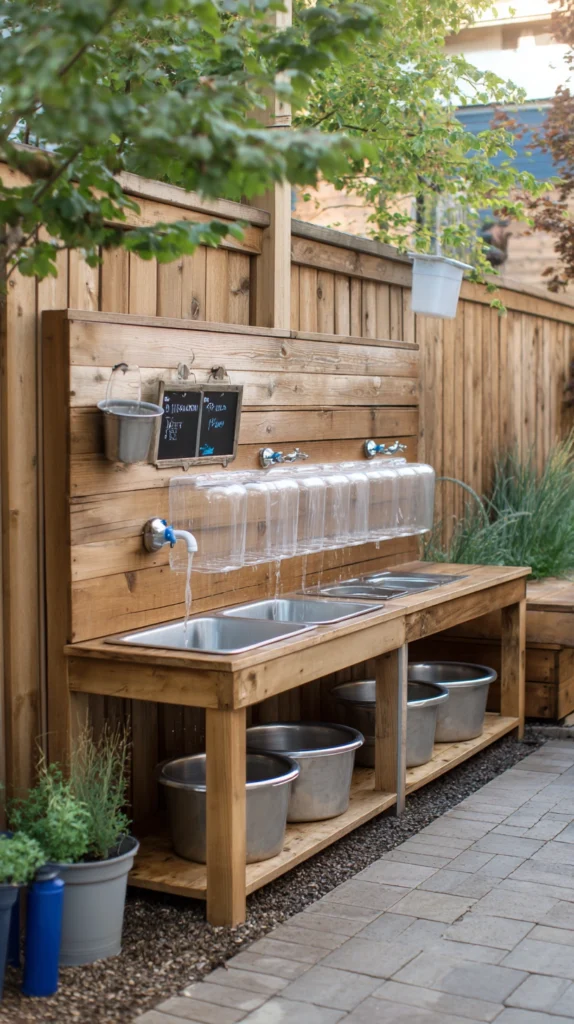
A vertical panel fitted with funnels, tubes, and small containers, allowing children to pour water and watch it travel through a winding, visible path.
Why a water wall adds an engineering and cause-and-effect play dimension
Beyond the sensory pleasure of mud and water mixing, a water wall introduces a cause-and-effect, almost engineering-style play element, as children observe how water moves through different funnels, tubes, and containers.
The panel construction
A vertical board or an existing fence section, fitted with mounted funnels, clear tubing, and small catch containers arranged in a winding, cascading path.
The material sourcing
Plastic funnels, clear tubing, and small containers, often sourced inexpensively from a hardware or craft store, or repurposed from household items no longer in use.
The mounting
Securely fastened to the panel with brackets or zip ties, positioned at a height allowing children to pour water in at the top and observe its path down to a collection point at the bottom.
The collection point
A basin or bucket at the water wall’s base, catching the water for reuse or simply allowing it to drain into the ground depending on the specific setup.
The overall value
An engaging, cause-and-effect play element extending the mud kitchen’s water play beyond simple pouring and mixing into a more structured, observational activity.
Cost breakdown: Funnels, tubing, and containers: $20–45 Mounting panel (if not using existing fence): $20–40 Total: $20–85
9. The All-Weather Roof Cover Addition
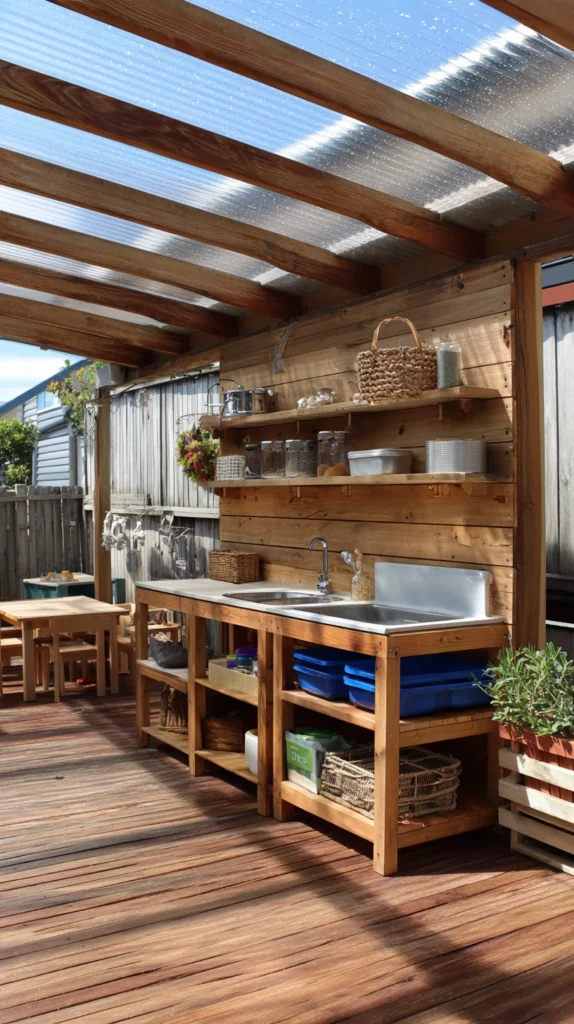
A simple roof or overhang added above the mud kitchen structure, protecting the equipment from rain when not in use and extending the play space’s usable season.
Why a cover addresses both equipment longevity and extended seasonal use
Constant, uncovered rain exposure accelerates wear on wood structures and can leave tools and bins constantly full of standing water. A simple roof addresses both concerns while also allowing genuine play during light rain.
The roof construction
A simple sloped panel — corrugated plastic, a small shed-style roof, or even a large market umbrella — positioned above the mud kitchen’s main structure.
The material choice
Corrugated polycarbonate panels, offering genuine light transmission while still providing real weather protection, or a simple shingled roof section for a more finished, permanent look.
The height clearance
Positioned with adequate headroom for children to comfortably stand and play beneath, rather than a low roof that would restrict movement or require constant ducking.
The seasonal extension benefit
Genuinely extending the mud kitchen’s usable season, allowing play during light rain or in the dappled shade the cover provides during intense summer sun.
The overall value
A meaningful upgrade extending both the equipment’s lifespan and the number of days per year the mud kitchen can actually be used comfortably.
Cost breakdown: Roof panel and support structure: $60–150** Total: $60–150
10. The Sand and Mud Mixing Table
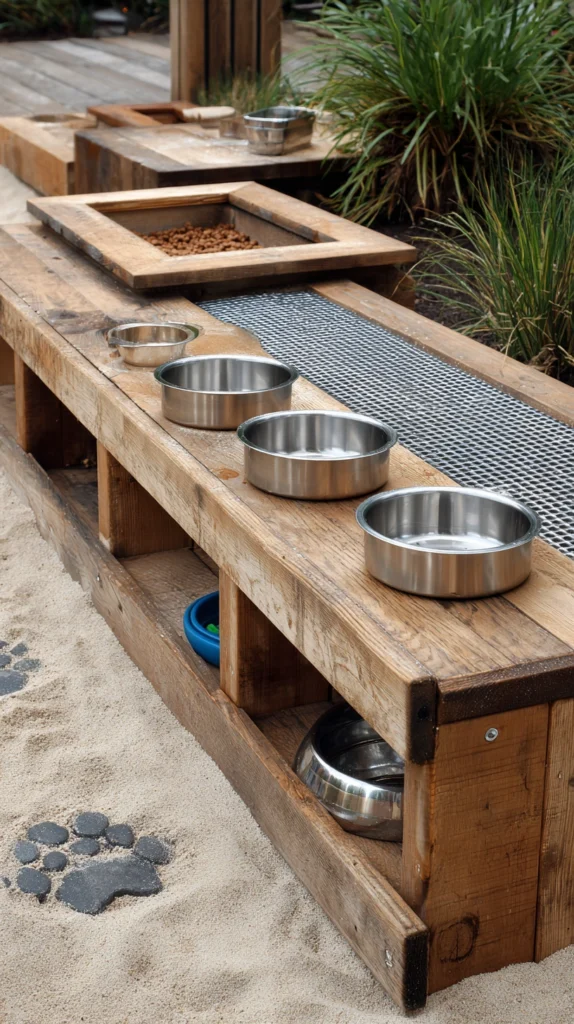
A dedicated low table with a built-in basin or divided sections, specifically designed for mixing sand, dirt, and water into various mud consistencies.
Why a dedicated mixing surface improves the actual mud-making experience
Mixing mud directly on the ground can be effective but limits the play to a single spot and consistency. A dedicated table with a proper basin allows more controlled, varied mud-making, and keeps the activity at a comfortable working height.
The table construction
A simple low table with a built-in basin or a large plastic tub set into a cut opening, providing a contained space specifically for mixing.
The divided sections option
Multiple smaller basins or divided sections within the table, allowing several different mud consistencies or “recipes” to be worked on simultaneously without mixing together.
The height
Scaled to the specific children using the kitchen, low enough for comfortable reach and mixing without requiring an awkward stretch or stoop.
The cleanup consideration
A basin that can be tipped or drained easily, simplifying the end-of-play cleanup process and preventing standing water and mud from accumulating indefinitely.
The overall value
A dedicated, properly scaled surface specifically improving the core mud-mixing activity at the heart of the entire mud kitchen concept.
Cost breakdown: Table construction and basin: $40–100 Total: $40–100
11. The Fairy Garden Adjacent Display
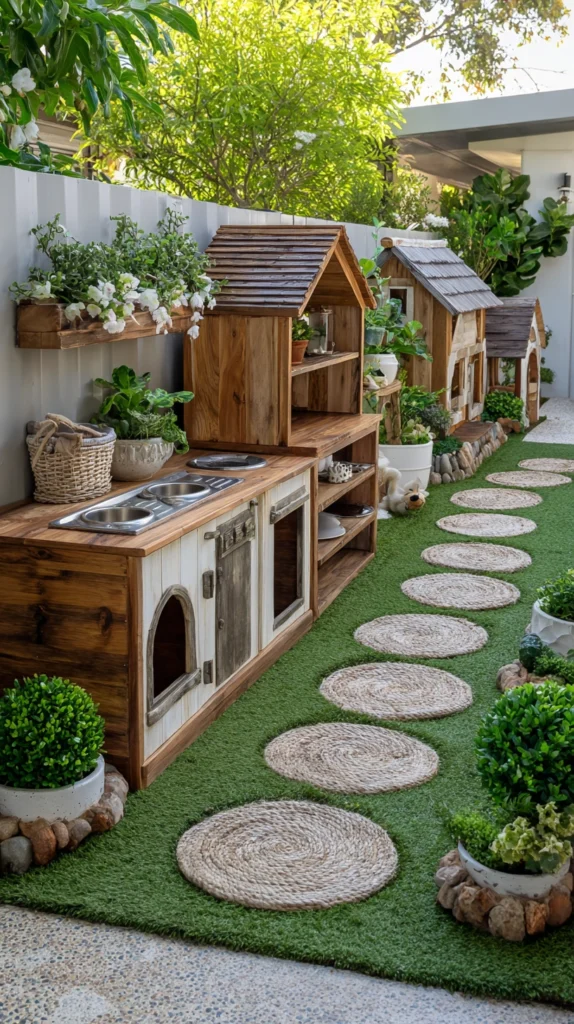
A small fairy garden or miniature landscape positioned beside the mud kitchen, adding a whimsical, storytelling element to the broader outdoor play space.
Why an adjacent whimsical display extends play beyond the kitchen itself
A small fairy garden or miniature scene positioned nearby gives children a second, related but distinct play opportunity, extending storytelling and imaginative play beyond the specific cooking and mixing activities the mud kitchen itself supports.
The miniature landscape
A small planted area or a container garden, featuring tiny paths, small figures, and miniature structures, creating a whimsical scene children can incorporate into their broader imaginative play.
The connection to the mud kitchen
Positioned close enough that children can move fluidly between “cooking” at the mud kitchen and “serving” or “visiting” the fairy garden scene, extending one cohesive imaginative narrative across both spaces.
The material sourcing
Small stones, twigs, and moss gathered from the yard itself, alongside a few purchased miniature figures or structures, keeping the display largely low-cost and easily refreshed.
The child involvement
Children encouraged to help build and rearrange the fairy garden themselves, rather than a fixed, adult-only-maintained display, extending their creative ownership over the whole outdoor play area.
The overall value
An adjacent whimsical element that broadens the outdoor play space’s overall storytelling potential, complementing rather than competing with the mud kitchen’s more sensory, cooking-focused play.
Cost breakdown: Miniature figures and structures: $15–35 Total: $15–35
12. The Reclaimed Tire and Log Seating Circle
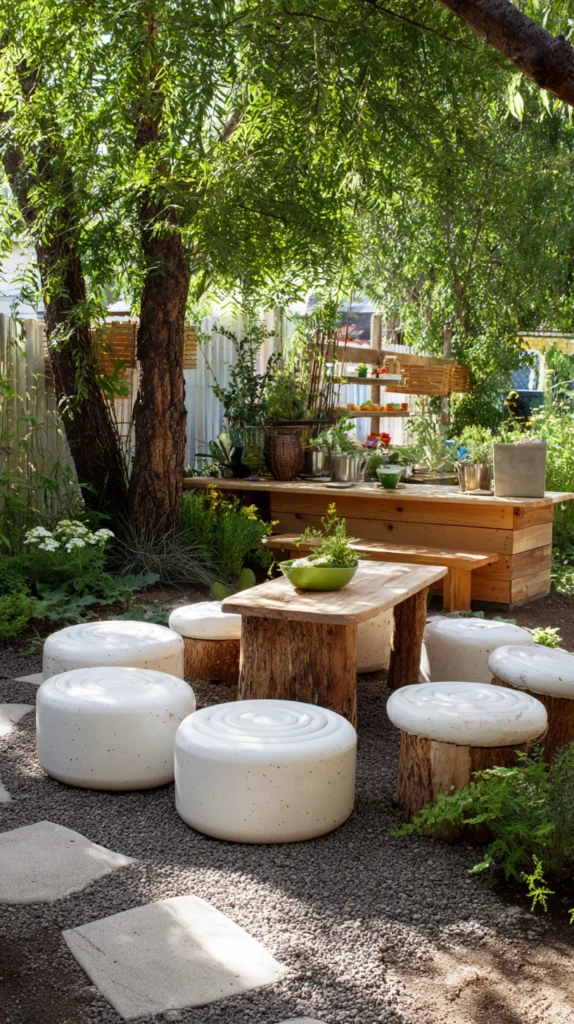
A small seating area near the mud kitchen, made from painted tires or cut log sections, providing a place for children to sit and “eat” their mud creations or simply take a break.
Why dedicated seating extends the mud kitchen’s social and imaginative function
A mud kitchen used purely for standing and cooking misses an opportunity for the social, sit-down “eating” phase of imaginative restaurant or picnic play, which a nearby seating area directly supports.
The seating material
Painted old tires, laid flat, or cut log rounds, both low-cost, durable, weather-resistant seating options well suited to a genuinely messy outdoor play area.
The arrangement
Positioned in a small circle or cluster near the mud kitchen, close enough for easy movement between cooking and “eating,” reinforcing the broader imaginative restaurant or café narrative.
The painting option
Tires painted in bright, cheerful colors, adding a decorative element beyond pure function, and helping the seating area read as a distinct, intentional zone within the broader outdoor space.
The scale
Sized appropriately for children to sit comfortably, rather than adult-scaled seating that would feel oversized or awkward for the intended young users.
The overall value
A social seating element extending the mud kitchen’s play beyond pure cooking and mixing into the sit-down, communal “eating” phase of imaginative restaurant or picnic play.
Cost breakdown: Reclaimed tires or log rounds (3–4): $0–30 Paint: $15–30 Total: $15–60
13. The Multi-Station Assembly Line Layout
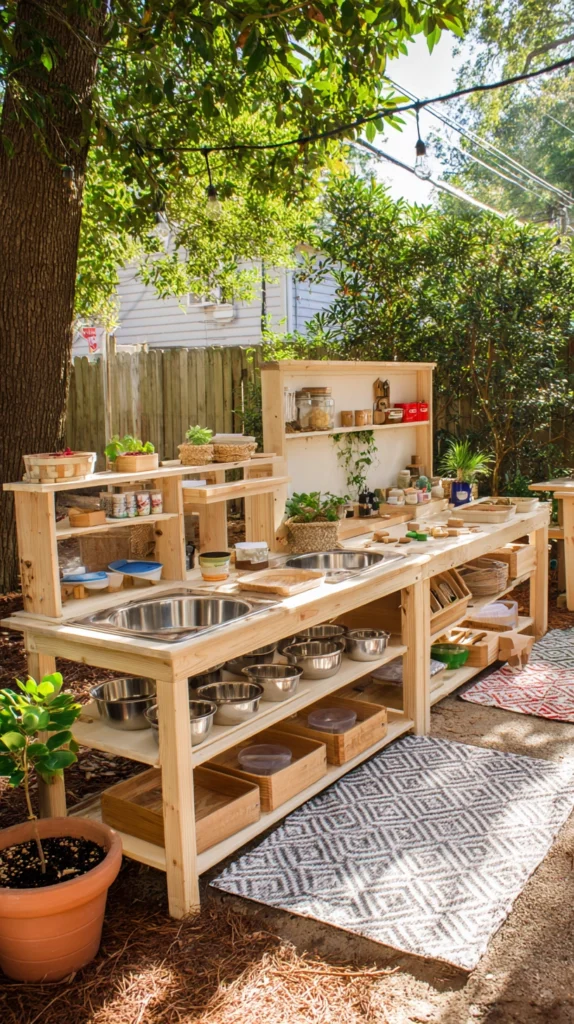
The mud kitchen expanded into several distinct stations — a mixing station, a “baking” station with an old muffin tin and oven prop, a serving station — laid out in a genuine assembly-line sequence.
Why multiple distinct stations suit a larger group of children or a more elaborate play scenario
A single mixing surface works well for one or two children, but a household or group with several children benefits from multiple distinct stations, allowing more elaborate, sequential play — mixing, then “baking,” then “serving” — rather than everyone competing for the same single work surface.
The mixing station
The primary basin or table for combining mud, water, and sensory ingredients, functioning as the sequence’s starting point.
The baking station
An old muffin tin, cake pans, and a repurposed appliance shell (an old microwave or oven with the internals removed) functioning as a play “oven”, where mixed mud “batter” gets “baked.”
The serving station
A small table or the seating circle described earlier, where finished “dishes” get plated and served to imaginary or real guests.
The layout flow
Stations arranged in a logical sequence a child would naturally move through, mixing to baking to serving, reinforcing the cooking process’s actual real-world sequence through the physical layout itself.
The overall value
A more elaborate, multi-step play experience particularly well suited to a group of children playing together, each station supporting a distinct phase of the broader cooking and serving narrative.
Cost breakdown: Muffin tins and bakeware (secondhand): $10–25 Repurposed appliance shell (free, from household discard): $0 Additional station surfaces: $30–70 Total: $40–95
14. The Vertical Growing Wall Backdrop
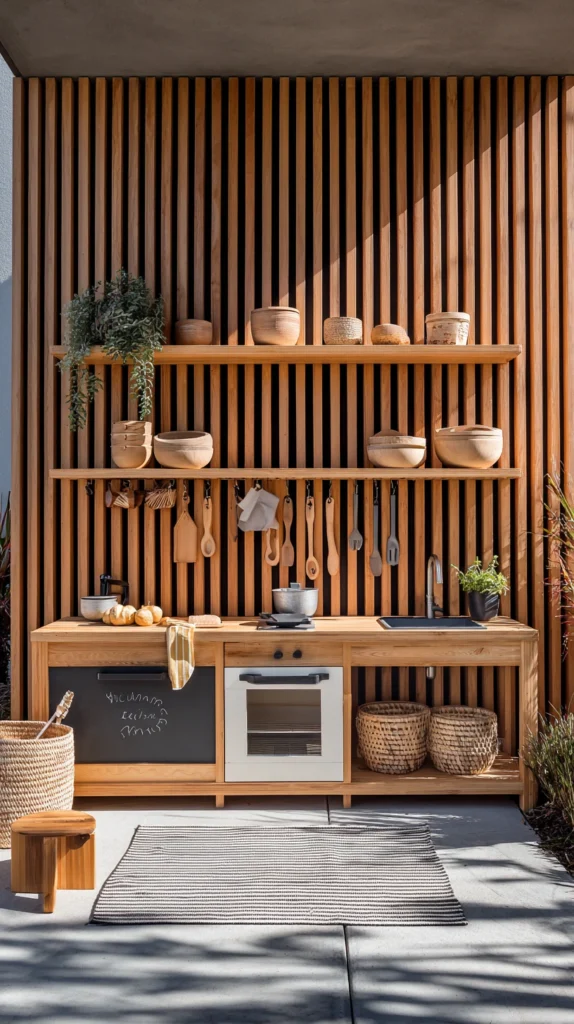
A vertical planted wall or trellis positioned behind the mud kitchen, growing vining plants and providing both a decorative backdrop and additional pickable “ingredients.”
Why a vertical growing element adds interest without consuming additional ground space
A mud kitchen area is often already fairly compact, and a vertical growing wall adds greenery, a decorative backdrop, and even additional pickable material without requiring any further ground-level footprint.
The trellis or wall structure
A simple trellis or a wall-mounted planter system, positioned directly behind the mud kitchen’s main structure, providing a green, textured backdrop.
The plant selection
Fast-growing, hardy vining plants — beans, nasturtium, or a flowering vine — chosen for both visual appeal and, in some cases, additional pickable material for the mud kitchen’s imaginative cooking play.
The child involvement
Children encouraged to help water and check on the growing plants as part of the broader outdoor play routine, connecting the mud kitchen experience to basic gardening responsibility.
The seasonal consideration
Plants chosen and replaced seasonally, keeping the vertical backdrop fresh and providing an additional point of ongoing outdoor engagement beyond the mud kitchen itself.
The overall value
A decorative and functional backdrop adding genuine visual interest and additional play material without consuming any further ground space in an already compact outdoor play area.
Cost breakdown: Trellis or wall planter: $30–70 Vining plants: $10–25 Total: $40–95
15. The Complete Outdoor Mud Kitchen (The Fully Equipped Play Station)
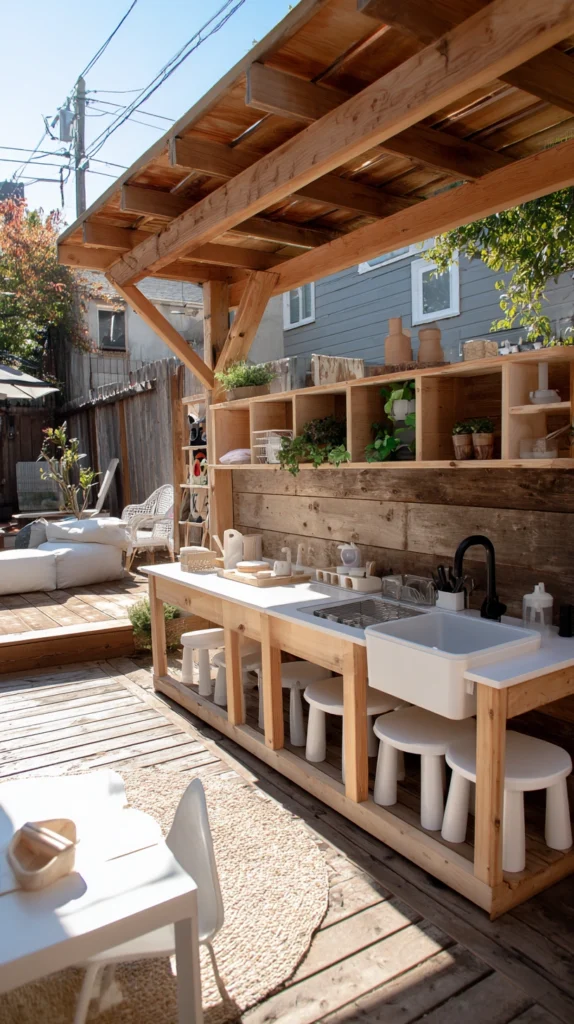
A complete mud kitchen combining several of the approaches above — a sturdy repurposed structure, a genuine water source, organized tool storage, sensory ingredient bins, and adjacent seating — treating the space as a fully realized outdoor play destination rather than a single improvised mixing spot.
What separates the complete mud kitchen from a single old pot and a patch of dirt
A single pot left near a dirt patch: a start, and still genuinely valuable play. A complete mud kitchen: every element — structure, water, storage, ingredients, and seating — working together, creating a destination children return to repeatedly rather than a single, quickly exhausted novelty.
The elements of the complete outdoor mud kitchen
The structure
A repurposed pallet, dresser, or built frame, scaled to the children’s actual height and sturdy enough for genuine daily use.
The water source
A salvaged sink or a simple filled basin, providing the water essential to genuine mud play.
The storage
Shelving and hooks holding retired pots, pans, and utensils, kept organized between play sessions.
The ingredients
Sensory bins of natural materials, alongside a small herb and edible flower garden for genuine pickable additions.
The seating
A small nearby seating area, extending the play into a social, sit-down “serving” phase.
The weather protection
A simple roof or cover, extending the structure’s lifespan and the number of usable play days throughout the year.
The complete design in action
A Saturday afternoon:
Arriving at the kitchen: Children immediately gathering pots and utensils from the organized shelving, filling the sink with water from the hose.
Mixing and creating: Mud “soup” stirred in one basin, dried leaves and pinecones added from the sensory bins, a sprig of mint picked from the adjacent herb garden as a final “garnish.”
Serving: The finished creation carried to the small seating circle, served to a sibling or a patient adult willing to “taste” the imaginative dish.
Hours later: The children still engaged, having moved through several rounds of mixing, baking, and serving, the whole afternoon spent outdoors rather than drifting back toward a screen.
The complete outdoor mud kitchen: not a single dirt patch with a leftover pot, but a genuine outdoor play destination, built to be returned to again and again.
Cost breakdown for the complete mud kitchen: Assuming a starting point of an empty yard corner: Structure (pallet or repurposed furniture): $15–70 Water source (salvaged sink or basin): $0–110 Storage shelving and retired kitchen tools: $20–50 Sensory bins and herb garden: $35–85 Seating area: $15–60 Roof cover: $60–150 Total: $145–525
Phased over a season or two:
Phase one: The basic structure and a simple water source, the foundational play space
Phase two: Storage shelving, retired kitchen tools, and sensory ingredient bins
Phase three: Seating, a roof cover, and additional decorative elements like a fairy garden or vertical growing wall
The complete outdoor mud kitchen: not a large investment, but a genuinely engaging outdoor destination built largely from repurposed materials, extending children’s outdoor play time well beyond what existing yard equipment alone typically achieves.
The Question Before Any Mud Kitchen Design
Before building any specific setup:
What is the primary goal for this outdoor play space?
If the answer is: the simplest, lowest-cost starting point — the repurposed pallet structure with a basic water bucket.
If the answer is: maximizing genuine cooking-style realism — the salvaged sink centerpiece and the tiered pot storage wall.
If the answer is: supporting several children playing together — the multi-station assembly-line layout.
If the answer is: extending play through varied sensory experience — the sensory bin ingredient station and the herb garden garnish addition.
The design follows the specific children’s ages, the household’s available materials, and the particular kind of play being encouraged, more than any single universal mud kitchen template. Every idea on this list contributes a different piece of a genuinely engaging outdoor play destination. The question is which specific elements matter most for these particular children and this particular yard.
The single old pot and a patch of dirt: still provides genuine, valuable sensory play. The complete mud kitchen, built with real structure, water, storage, and varied materials: an outdoor destination children return to repeatedly, extending their outdoor time and imaginative play far beyond what a single piece of playground equipment typically achieves.
That repeated, genuine engagement: the whole point of building a mud kitchen in the first place.
Getting Started This Weekend
The immediate mud kitchen solution:
Gather a few retired pots, pans, and utensils no longer used indoors.
The lowest-cost, most immediate start, requiring nothing beyond items already in the household.
Find or clear a small patch of dirt, and fill a bucket or basin with water nearby.
The two essential ingredients — dirt and water — before any structure is built at all.
Watch how the children actually play with this simple setup before building anything more elaborate.
Real observed play, rather than an assumed plan, should guide which of the fourteen additional elements gets added next.
Add one piece of dedicated storage, even something as simple as a milk crate, to keep the tools organized between sessions.
The rest of the design: the elaboration of this moment.
The dirt and water: the beginning. The mud kitchen: what gets built, played in, and returned to around it.